Pages
Monday, February 28, 2011
Bead Color Triads: Spring Pastels
Any softened shade could be considered a spring or Easter color. Like baby pink and baby blue, pastels give a sense of newness. Freshly sprouted grass, flower buds, and baby chicks may not be powdery in real life, but they usually are in art.
Even browns and grays can be spring-like, if they are soft or sweet enough. Once you’ve turned down the volume on a color, it seems to belong somewhere between March and June.
To keep things simple and to the point, I chose some classic Easter colors for my bead palettes: pink, yellow and green. We could compare them to all sorts of natural things, like flowers, bees and grass, but the truth is that they are the most common colors of fake plastic Easter grass, which might be why they are so obvious a choice. Not that I would ever buy fake plastic anything, or course. Luckily, I can get my pastel fix with beads instead.
This Easter Egg may not be filled with chocolate, but the colors are yummy! The first palette features plenty of shine and shimmer with lustered dandelion seed beads, pink cat’s eye rounds, and sea foam green hex cuts.
First Flower started with some transparent green wavy leaves. To keep a theme going with similar finishes, I added transparent lemon seed beads and pink lined crystal AB peanuts. The lemon yellow might actually be a bit too bold here if it were a dominant component in a design. It would look very nice if it were hidden in the background, perhaps in a spiral rope core.
And finally, we have Spring Rainbow. Sometimes simplicity is best, especially when working with bright contrasting colors. Here I matched up pink coral and sour apple 11/o seed beads, with opaque yellow 8/o’s. This palette is my favorite, and not just because it’s all seed beads. The sour apple color adds a zesty quality that really makes the other colors come to life.
What colors make you think of spring?
Copyright 2011 Inspirational Beading and COLOURlovers.com
Subscribe to Inspirational Beading
Saturday, February 26, 2011
A Bracelet a Week: Orange Creamsicle
Because Russian spiral netting works up really fast, I wasn’t ready to stop once the necklace was complete. So I decided to use the technique for this week’s bracelet. And since it’s a simple technique, I also used it as an opportunity to get into some more of my bright neon beads.
This time I picked shocking orange 8/o’s. And what goes better with orange than white? Creamsicle is such a fun color combo, and it has me thinking of summer already.
If you’re ever looking for a great instant gratification project, I highly recommend making a little Russian spiral. It makes great bracelets, and because it’s a tube, it can also be strung with other beads to make a necklace.
Copyright 2011 Inspirational Beading
Subscribe to Inspirational Beading
Friday, February 25, 2011
Wear It Twice: Wild Accessories
For this month’s fashion collage, I wanted to see how many bold and vibrant accessories I could layer onto each outfit. I started with a multstrand tube statement necklace in a crazy palette of black, white, orange, purple, pink and blue.
I made things easy on myself, and started with an all black clothing palette. First I picked out a cute tube dress with a feathered skirt. The extra texture makes a great background for lots of flashy add-ons. Since it’s winter and anything sleeveless looks impossibly chilly, I added some boots and a simple shrug.
The accessories for this outfit feature plenty of jewels and rhinestones. There’s a gorgeous pair of Splendori embroidered earrings, a jewel encrusted peacock bracelet, and an adorable flower beaded clutch.
For the casual side, I wanted to create a bit of a contrast with the basics, so I started with military cut jeans and army boots. I topped these off with a simple black top - the three-quarter length sleeves leave lots of room for statement bracelets.
Instead of earrings, I started with a splash of color on top, care of a gorgeous Hermes scarf. A boho mosaic bangle adds some more vibrant tones, along with a batik style shoulder bag. I couldn’t resist throwing in a lovably ridiculous octopus cocktail ring to put things over the top.
As always, handmade and vintage shops are up to the challenge. Here are just a few fun ways to build looks like these:
And a few of my favorite Polyvore sets featuring pieces from today’s collage:
Coco Chanel said it’s best to take off one piece of jewelry before leaving the house. So the more you put on to begin with, the more choices you’ll have!
Copyright 2011 Inspirational Beading
ArtFire.com and Polyvore.com
Subscribe to Inspirational Beading
Wednesday, February 23, 2011
Beading Tutorials: Leaf Fringe
Making a simple beaded leaf requires only two quick stitches, and can be done with nearly any type of bead that can be used for weaving. Round seed beads provide the best leaves, and you can create different sizes simply by increasing the number of beads used.
To make a basic fringe leaf:
String 5 seed beads, and slide them down to your beadwork. Skipping the last bead added, stitch down through the next bead in the stack, and pull snug. The final bead should now be locked in place at the top of the stack.
If you notice some slack thread in the stitch, try pushing the top bead down while you gently tug the needle end to snug up the loose thread.
Pick up 2 seed beads, and stitch through the first seed bead added to the stack, and continue back into your beadwork. When you pull the thread snug, a little leaf will form.
You can create any size leaf using a basic formula. The number of beads picked up in the second stitch is equal to the original stack, minus three. So if you start with seven beads, you will pick up four beads in the second stitch. If you start with six, you will add three beads.
Smaller leaves look the most realistic. As you increase the number of beads, the leaves become loopier, with a wider gap in the center. You can also increase the number of beads passed through in the first stitch for a different shaped leaf, or increase the number of beads at the base for a longer stem.
Leaf fringe can fit in just about anywhere. You can add it to rows of backstitch to add texture to bead embroidery, or combine it with branched fringe or corralling for a leafy vine fringe. You can even use beaded leaves to finish the edges of flat beadwork like peyote or herringbone weave.
More fringed project ideas:
Fringe Bracelet by Whimbeads.com
Beadwork.About.com Leaf Fringe Tutorial
Christmas Lights Bracelet
Seascape Necklace Project
Want to try out some new techniques, or add some new must-haves to your bead stash? Until the end of February, you can use this exclusive coupon code for 15% off any sized order from Artbeads.com: ZZ-DESIGNER-0211
Just copy and paste the coupon code and apply it during checkout for your discount. Happy beading!
Copyright 2011 Inspirational Beading
Subscribe to Inspirational Beading
Monday, February 21, 2011
Bead Wish List: Antique and Vintage
The certainty that our favorite vintage beads will never be available again makes it hard to justify using them up. Often, it’s their rareness that makes us second guess any ideas we have for creating a piece of jewelry with them.
But, precious as they may be, beads were meant to be used - unless you can get away with putting them on display to be enjoyed on their own. Sometimes you’ve just got to hold your breath and go for it. Today, I went on the hunt for some fabulous antique and vintage beads that might inspire a little hoarding, or perhaps some daring beadwork.
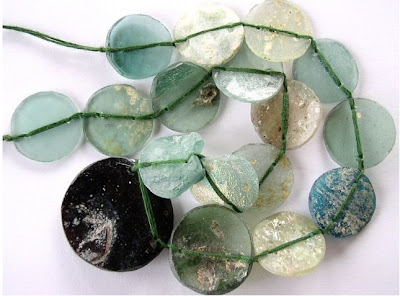
Ancient Roman Glass Beads
from Happy Mango Beads
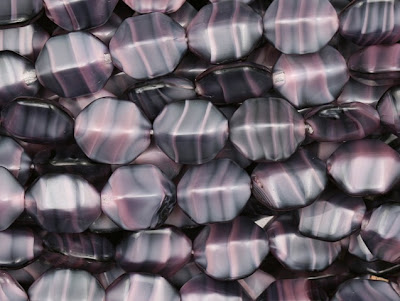
Czech Vintage Hexagon Marbled Beads
from Artbeads.com
Sapphire Vintage Swarovski Flying Saucer Crystals
from Rings & Things
Scarlet Floral Filigree Vintage Lucite Pendant
from Fusion Beads
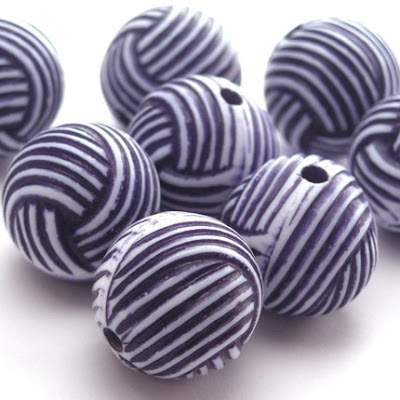
Vintage Plastic White and Navy Yarn Ball Beads
from MK Supplies
Vintage Lucite Pink Daisy Cabochon
from The Beadin’ Path
Vintage Czech Red Nail Head Beads
from The Hole Bead Shoppe
Vintage Green Yellow and White Swirled Beads
from Yummy Treasures
Copyright 2011 Inspirational Beading and Friends
Subscribe to Inspirational Beading
Saturday, February 19, 2011
A Bracelet a Week: Winter Frost
I wanted to capture that look in this week’s bracelet, so I started with white pearl Ceylon finish seed beads in 11/o and 6/o sizes. I think that this shimmery finish makes for really gorgeous snow-inspired designs. Better than stark opaque white, they seem to capture that sparkle of tiny frost crystals.
To add a bit of ice, I used crystal luster druks. The shiny finish on the transparent glass looks exactly like water that has just frozen. It has that perfect glossiness to it that makes them perfect for a winter inspired piece.
This design really brought out one of the issues that often kept me from making a lot of bracelets in the past. Because they need to fit just so, it’s often difficult to decide on the proper dimensions to use. Some designs, like this one, will change in length as you work, so there’s no sure fire way to tell how long a bracelet will be until it is finished.
I over estimated the amount of shrink the leaf fringe would cause, so this one ended up being in the plus size range. But now I know for next time! Every beading mistake is another valuable learning experience.
I would like to thank Artbeads.com for providing the seed beads and druks used in this piece. Inspirational Beading has not received paid compensation for including Artbeads.com products or reviews in this blog post. I have shared my honest opinions about the products used in this design.
Copyright 2011 Inspirational Beading
Subscribe to Inspirational Beading
Friday, February 18, 2011
Collections: Black and Red
Perhaps our giveaway winner, Alison B, will be able to tell once she has the whole set of mystery beads in hand. Congratulations to Alison for winning the draw, and thank you to everyone who stopped by to take an educated guess!
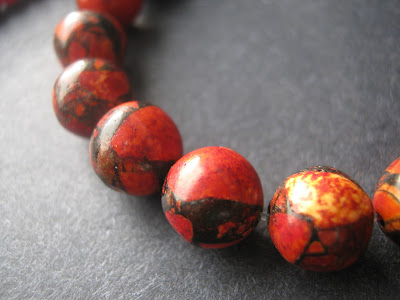
With all the fancy names for dyed and man made beads on the market, it’s hard to tell the true nature of a stone unless you’re willing to melt, cut or smash it. But the main thing is that beads should be beautiful, and the red and black mosaics fit the bill.
Here are my favorite handmade picks of the month, in gorgeous, sassy and trendy red and black:
I also had a look around one of my very favorite image communities, deviantART.com, and found these amazing works:
Red, Black, and White Doodle by ~Ithelda on deviantART
red and black by ~deardark on deviantART
Black and Red by ~Metalluz on deviantART
The simple and classic combination of colors is very inspiring - you can do whatever you want with beads in a small set of bold hues. Happy beading!
Copyright 2011 Inspirational Beading
Subscribe to Inspirational Beading
Wednesday, February 16, 2011
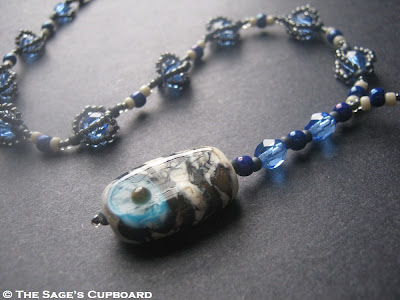
Blue Ivory Lampwork Pendant
In January, I purchased three gorgeous pieces from Silver River Glass Works. I immediately fell in love with this gorgeous focal bead. The layers of ivory, and black, accented with cool blue are so pretty. I wanted to pair them up with some cute blue and green spacers, but when I saw the focal up close, plans changed.
I wanted to really highlight the simple palette of the pendant, and I thought that adding green into the mix would make things a little too busy. So I’m saving them for later - perhaps they’ll make a great bracelet. To go with the focal bead, I chose a palette of seed beads and fire polish in blue, black and light beige. The jet lined crystal seed beads fit it perfectly!
The dilemma with such a great focal piece, is deciding between an elaborate design that will do it justice, and a simple design that will let it stand out without becoming unaffordable. I eventually decided that simple was best, and added a twist to my new favorite pendant design.
Instead of adding just a single ring of seed beads around the fire polish accents, I went back for a second round, and caged the fire polish within four rows of beads. The results are so much different than the typical “reverse daisy chain”. I love the way the beads seem to orbit together.
Now to find just the right method for the blue and green spacers!
Copyright 2011 Inspirational Beading
and Silver River Glass Works
Subscribe to Inspirational Beading
Monday, February 14, 2011
A Flicker of Inspiration: Crystals
Today I thought it would be fun to look at the unique shapes and colors of natural crystal formations. These amazing structures are formed by natural elements under just the right conditions, and have long captured human imagination.
1. Cristalli di Ametista 1, 2. Pyromorphite cavern, 3. Caverns of Sonora,
4. Crystal King, Ohio Caverns, West Liberty, Ohio, 5. Blue Crystals,
6. Ice Crystals #3, 7. Crystal World 2, 8. Amerthyst geode, 9. formation...,
10. Crystal Formation - Smithsonian, 11. formations of organic materials,
12. Quartz Crystal Focus Stack 2, 13. Blue Crystal Formation
Copyright 2011 Inspirational Beading and Big Huge Labs
Subscribe to Inspirational Beading
Saturday, February 12, 2011
A Bracelet a Week: Hot Chocolate with Tilas
One of the best ways to chase away winter blues is with comfort foods. Not only are they usually a good way to warm up from within, but filling foods appease those hibernation instincts that make you want to pull a blanket over your head at the first sign of snow.
For this week’s bracelet, I wanted to capture the comfort of a big mug of hot chocolate, complete with swirls of cream and mini marshmallows. I think a hot drink with a big heart in it is an instant mood booster.
I was very excited to get a chance to try out some Tila seed beads from Artbeads.com, but I didn’t want to get too carried away at first. I convinced myself to keep it simple and try using them with techniques I like. So, I added some of these beauties to rows of herringbone weave in warm chocolately shades of brown and beige.
I used three shades of brown seed beads for the base - dark beige, terracotta, and red brown. Instead of using just white Tilas for the marshmallows, I also added some in dark beige, to match some of the creamy beadwork rows, and help all of the elements blend together.
The way the herringbone curves around the increases really captures the fancy cappuccino cream look I was going for. And I’m happy to report that Tilas are just as fun to work with as they look!
I would like to thank Artbeads.com for providing the beads used in this piece. Inspirational Beading has not received paid compensation for including Artbeads.com products or reviews in this blog post. I have shared my honest opinions about the products used in this design.
Copyright 2011 Inspirational Beading
Subscribe to Inspirational Beading
Friday, February 11, 2011
Bead Giveaway: Mystery Gems
Now that I’m all grown up, I still get to experience that excitement once in awhile, with bead grab bags. I try to time my bead shopping so that I can take advantage of the grab bag sales at Auntie's Beads. There’s nothing like a combination of new beads and mystery beads to make getting the mail an uplifting event.
Because I’m so particular about the types of materials I use, it’s only inevitable that some of the goody bag beads will be out of my range. So what can I do with them but pass them on to some worthy beaders? My most recent grab bag was filled to the brim with all kinds of goodies in black and red, and they are so pretty. They deserve to be enjoyed!
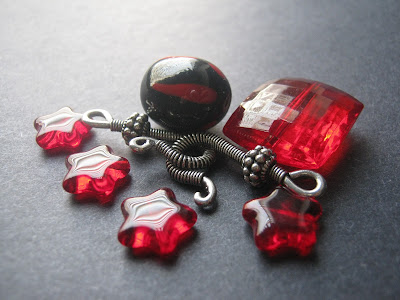
There’s a lovely set of black and red acrylic beads,
and wire wrapped clasp hooks. These pieces were easy to identify,
but the rest are a bit of a mystery.
These two drilled stone focals are pretty,
but I can’t tell them from rocks.
A strand of black 6mm rounds could be onyx or black jade. I’m 99 per cent sure that the smaller rounds are coral. The third strand has me totally stumped. I couldn’t find any other stones like it. They could be a composite, or even polymer clay!
Win These Beads
Leave a comment with your best guess at the true identity of any of these mystery beads. I'm especially curious about the black and red strand, but take your best shot at any of these beads for a chance to win them all!
If you don’t have a Blogger profile with email enabled, be sure to leave a contact link in your comment - like a shop or website.
For an extra entry, leave another comment with a link to a blog post or Tweet you've made about this giveaway.
One lucky winner will be drawn at random on Friday February 18th.
Good luck!
Copyright 2011 Inspirational Beading
Subscribe to Inspirational Beading
Wednesday, February 9, 2011
Bead Spotlight: Teardrops
One of my absolute favorite bead shapes is the top-drilled teardrop, particularly smooth, round glass drops. Something about the way these beads dangle and sway really brings out one’s inner magpie.
Green Turquoise & Topaz Swirl Czech Teardrop Beads, Bamboo Coral Freeform Flat Teardrop Beads,
Rose Quartz Side Drilled Teardrop Beads
Red Jade Gemstone Teardrop Beads, Tigers Eye Teardrop Brio Beads,
Silver Rose Czech Glass Teardrops
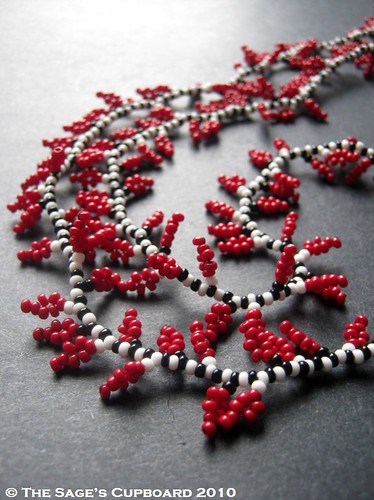
Drop beads - or any top drilled bead shapes - are great for fringe and edging, and finishing off strands. They make great ends for long drop earrings, and can add delightful texture to all kinds of beadwork ropes. My favorite way to use them is in spiral rope necklaces. They become like little caterpillar feet and are so pretty when evenly spaced all in a row.
Here are just a few examples of the fun and unique ways you can use drops to create beautiful jewelry.
Pink Sunset Jewelry Designs, Entwined Vines Jewelry,
Linda Landig Jewelry
The Wild Tangent, The Sage's Cupboard,
Phoenix Rising Glass Art
What’s your favorite treatment for teardrop beads?
Copyright 2011 Inspirational Beading and BigHugeLabs
Subscribe to Inspirational Beading
Monday, February 7, 2011
Favorite Techniques: Wrapped Loops
Inspirational Beading: What is your all time favorite beading or jewelry technique?
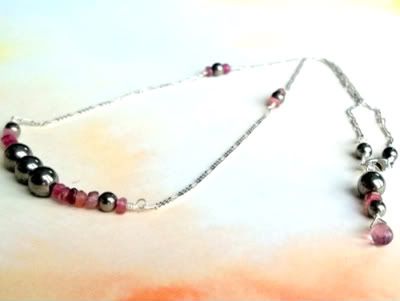
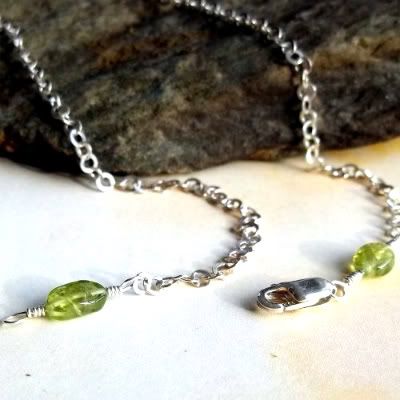
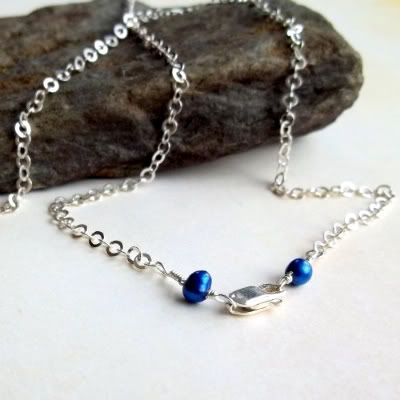
Chrisy: Of all the things I love to do, wire wrapping small gems and rondelles into the clasp of a necklace chain would have to be my favorite. There’s no reason the back of a necklace shouldn’t be as beautiful as the front. It’s like having a romantic secret…it may be hidden under your hair, or behind your collar, but you know it’s there, making the nape of your neck just a bit more beautiful.
Inspirational Beading: How do you first learn to use this technique?
Chrisy: I’d actually never thought of doing it until I bought a sterling chain for myself from another artist’s store for myself for Christmas. When it arrived there were crystals wrapped into the clasp, and it was a completely unexpected pleasure.
Inspirational Beading: Of all the creations you’ve made with this technique, which one is your favorite?
Chrisy: My favorites vary by day, but this is current one, inspired by Valentine’s Day and spring love: Pink Tourmaline and Pyrite Choker.
Inspirational Beading: Can you share any tips for getting started with this method?
Chrisy: All it takes is learning to wire wrap loops and making sure the gems you incorporate are small enough to fit through a pendant loop. I definitely recommend starting with a high gauge wire in a base metal before moving onto sterling so you can perfect your technique. Once you move on to sterling, it’s less difficult, because sterling is easier to work with. I also use dead soft sterling wire—it bends into beautiful shapes and hardens as you work with it.
Inspirational Beading: Do you have a favorite material to use it with?
Chrisy: I prefer faceted gemstones in a rondelle shape because they catch the light and sparkle, but I don’t discriminate. I’ve used jade, pearls, pyrite…whatever colors and shapes fit into the overall design.
Inspirational Beading: If someone had to choose to learn only one technique, would you recommend this one?
Chrisy: I would definitely recommend learning how to make wire wrapped loops. Wire wrapping allows for a stronger piece and it’s a versatile technique that can be used in a lot of ways in a design. I also think it’s 100 times more attractive than a simple jump ring, which can easily be torn apart.
Inspirational Beading: In your opinion, what is the best place for beginners to learn this technique?
Chrisy: The wrapped loop tutorial on the Artbeads website was the easiest place for me…after that, it’s trial and error and a lot of practice to keep your wire wrapping uniform and straight.
You can see more unique designs like these at earthegy on ArtFire and Facebook.
Copyright 2011 Inspirational Beading and earthegy
Subscribe to Inspirational Beading
Saturday, February 5, 2011
A Bracelet a Week: Spring Spiral
I had to study my bead stash for awhile, before choosing just the right color combination. A spiral bangle requires as much as 11 inches of beadwork, which means lots and lots of 8/o and 6/o seed beads. I had to decide which colors I wanted to use up completely.
I started with canary yellow 8/o Miyukis. I had basically been saving up two 10 gram packs for just such a project. After I added some pink lined transparent blue 6/o beads, I could see a fun springtime palette emerging. So, I selected some aqua sea foam green 11/o’s. I keep these beads in my Blue and Purple bead tray, but against the other two bead colors, they are definitely an Easter green.
This bracelet finished up just in the nick of time. I had only one - one! - 6/o bead left when I joined the ends of the beadwork to form the bangle. I guess that means it was meant to be.
Copyright 2011 Inspirational Beading
Subscribe to Inspirational Beading
Friday, February 4, 2011
Favorite Beads: Japanese Delicas
Inspirational Beading: What is your all-time favorite bead?
Wooley: Although I use a lot of Czech beads, I think my favorite beads are Delicas. I like them for the ability to create intricate designs.
Inspirational Beading: What is your favorite technique or method to use them?
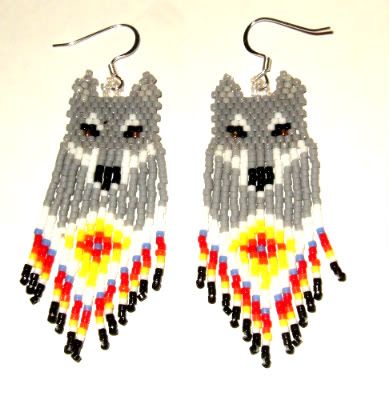
Wooley: My favorite technique is the brick stitch. Once you have mastered the technique you can create sculptured shapes.
Inspirational Beading: Of all the creations you’ve made with these beads, which one is your favorite?
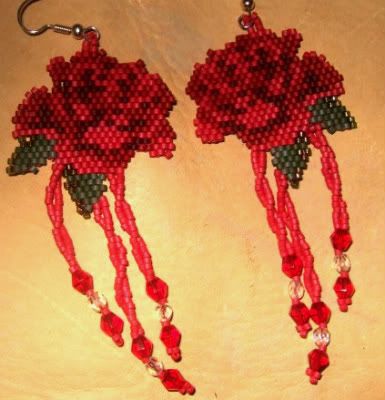
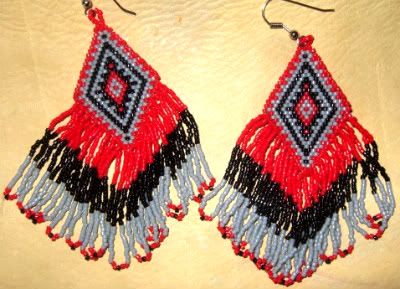
Wooley: You know, it's hard to pick a favorite for me. For the sculptured look, I would choose the Rose. For the intricate look, I would choose the Navajo Rug.
Inspirational Beading: Do you have any tips for making the most of these beads?
Wooley: Well, I love blending color, so the more colors you have to work with, the more variations in design you get!
Inspirational Beading: What is your favorite bead or material to pair these with?
Wooley: Delica beads work really well when mounted to leather. You can create a very intricate picture with these beads then attach them to a wonderful bag or even moccasins.
Inspirational Beading: If you were stranded on the moon, and you could have only one kind of bead with you, would you choose these?
Wooley: If I were stranded on the moon and had to choose ..I would probably choose the Czech beads over the Delicas, simply because there are more possibilities with what you can create. I call the Delica beads "Picture Beads". If I want to "paint" a picture in beads, I use Delicas. For everything else, I would use the Czech, because they are more versatile.
Inspirational Beading: In your opinion, what is the best source for these beads?
Wooley: Delicas are a little harder to find than Czech beads. I order most of my Delicas online.
Check out Artbeads.com and FusionBeads.com for a great selection of Delica seed beads. You can see more designs like these at Wooley Creek Tribal and Ethnic Jewelry.
Copyright 2011 Inspirational Beading
and Wooley Creek
Subscribe to Inspirational Beading