
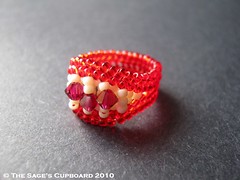
Ring # 16 - Rubies and Cream
Not coincidentally, the same answer can be given if someone asks “Why you would buy a PDF tutorial or project magazine, if you can’t sell the designs you make from them?”. When an artist shares their expertise, it is meant to offer new ways to perfect our knowledge of techniques and materials.
One of the easiest ways to explore the possibilities of bead weaving techniques is to add simple embellishments. A little fringe here, a change of bead style there, and suddenly you know a little bit more about what your beads and hands can do.
Adding bridges to flat Ndebele weave is one of my favorite basic embellishments. It’s easy to do, and incredibly versatile, because you can use it with all kinds of beads. Even beads that aren’t always suitable for bead weaving, like bugles and crystals, are perfect for adding to a herringbone bridge.

First begin by making a base with simple herringbone weave. I prefer to start with a double bead ladder. This creates a much neater first row by reducing the number of thread passes at the bottom of the beadwork.
On a comfortable length of beading thread, pick up 4 seed beads. Slide them down the thread, leaving at least a 6 inch tail. Stitch up through the first 2 beads again, and pull tight to create a pair of 2 bead stacks, side by side. Stitch down through the 3rd and 4th beads again, so that both threads are exiting from the bottom of the beads.
To help snug up the beads and create even tension for the rest of the ladder, try this trick: Hold both the tail and working thread securely with your thumb and forefinger. Place your thumbnail up against the bottom of the bead stacks. With your other hand, hold the working thread, and pull down as you press the bead stacks against your opposite thumb. Tug the thread gently until the beads are straight, and there is no slack thread within the beadwork.

Continue adding pairs of beads to the ladder until it is the desired width for your design. You will need an even number of bead stacks to begin the herringbone weave.
To start the first row, you will need to Step Up. Stitch up through the lower bead on the previous stack, and up through the top bead on the last stack, so that your thread is exiting from the end bead at the top of the ladder.


Pick up 2 seed beads, and repeat the process along the entire length of the bead ladder. After adding the final 2 beads, Step Up to begin the next row.

When you reach the increase again, pick up 2 seed beads, placing them between the rows as before. Add 3 beads at the increase in the next row. Continue adding 1 bead at a time to the bridge until it reaches the desired width.
To decrease and return to regular herringbone, reduce the bridge by 1 bead in each new row. After adding the final, single bead, you can continue with flat herringbone and finish the piece as desired.

Copyright 2010 Inspirational Beading and The Sage's Cupboard


Yet another sweet, little ring, and a tutorial! I haven't used seed beads in years, but I still have a lot left over. My Mother used to run a small jewelry business, and about 90 percent of it was the fine beadwork, similar to what you do. You're tutorial has inspired me to try my hand at it again, so Thank-you...
ReplyDeleteI love your rings! Keep them coming!
ReplyDeleteThank you! Andrea, I should warn you, once you get started with beadweaving, there might be no turning back!
ReplyDeleteYour site is fabulous!! Thanks so much for the inspiraton!!!
ReplyDeleteHi! Nice idea!
ReplyDelete...only... I'm lost. =(
Could you please tell me how to start the 4th row? I mean how to get to the start of the 4th row, because that part is left out(between picture 5 and 6)!
You wrote down how to add the first two and the next two beads, then you say flip! But I'm still stuck in the middle of the row, not the end... am I supposed to pull my needle through 3 other beads to turn around and get to the other side?
Hi, D!
ReplyDeleteTo move from the end of one row, to the start of a new one, you have to perform a step-up: stitch up through the previous bead in the same row as your thread, then up through the last bead added in the current row.
You can get a closer look at the basic herringbone technique here:
http://www.squidoo.com/beading-herringbone
Thank you!! Now I understand it! :)
ReplyDelete