Showing posts with label beading theory. Show all posts

Tuesday, May 10, 2016

5 Ways to Spark Bead Creativity

Ways to Spark Bead Creativity

I think many beaders want to believe that if we owned bead stores, we would have never-ending inspiration every day. And most bead store owners would tell you that when you run your own brick and mortar business, you don’t have time to bead. The truth is, no matter how well stocked we are, gaps in inspiration can happen at any time. Sometimes we just run out of ideas, or out of creative energy. I often get stuck in a rut when I try to make something that I don’t find enjoyable, and before I know it I’m in full procrastination mode. It can take days or even weeks until I’m ready to do anything creative again.

Since this is something that has happened to me often over the years, I’ve discovered a lot of little tricks for getting the beads rolling again. Sometimes all it takes is a little nudge; other times you need a complete creative detox and reset. These methods have worked for me time and again.

5. Browse Your Favorite Sites

The easiest and cheapest way to spark a little creativity is to do some artistic window shopping. Check out what other artists are making, look at the designs in museums and catalogues, browse interesting color palettes and patterns, or just ogle beads until something fires you up.

Your favorite bead shops, Pinterest, fashion mag sites, and museum catalogues are a great place to start. A lot of sites offer a little more in the form of interaction, where you can play with the inspirations and see what happens. I like ColourLovers.com and Pantone.com when I want to experiment.

COLOURLovers.com Color Palette Browser
Browse and Create Color Palettes on COLOURLovers.com


4. Flip Through Some Pages

Books and magazines always offer a wealth of inspiration, whether you buy or borrow. Your public library likely has a great selection of jewelry, beading, and craft books, as well as back issues of craft and fashion magazines. If you subscribe – or have ever subscribed – to magazines or catalogues, all you have to do is haul out your back issues and start flipping. You’re bound to find something that calls out to be beaded.

If, like me, you have a lot of beading magazines from years ago, you can go back and try out projects and techniques that you once overlooked. I tried this earlier this year, and it worked so well I haven't had to go back to it since! If you're not ready to commit your bead stash to old projects, you could always peruse the ads for new material and color ideas.

Favorite Bead & Button Projects


3. Make Collages

Making digital collages like those you can tinker with on Pantone and ColourLovers is a great way to spark creativity, but nothing beats the good old fashioned scissors and glue stick collage. Almost any type of magazine or catalogue will do to make an inspiration collage. Cut out any pictures that speak to you and arrange them together to get a palette of ideas to help you on your way to new designs. And don’t overlook the potential of ads for color and pattern ideas!

Once you’ve made a few collages, you can hole-punch them and store them in a binder for future use, or wallpaper your creative space for inspiration at any time of the day or night. If you want to skip the arranging step, you can also paste whole pictures and snippets in a scrapbook or sketchbook. As an added bonus, collage-making can often lead to sketching, which is a great way to experiment and plan new design ideas.

Lime Lizard


2. Try Something New

When all else fails, grabbing some new beads is a great way to get your designs flowing again. Even if the project doesn’t work out, you’re bound to come up with other ideas while you’re working. Beads are just too exciting to ignore! You don’t have to go outside of your normal comfort zone when trying out new beads. A new color, shape, or finish in a style you’re already familiar with is often enough to rev things up.

There are also zillions of tutorials out there to try when you need a little boost. Whether you choose a free project or purchase one from an instructor, working from someone else's pattern gives your creative side a chance to relax and reset. By the time you’ve finished the project, you’ll likely have a whole to-do list to look forward to.

The Necklace a Day Challenge


1. Challenge Yourself

By far my favorite way to start new inspirations and keep them going is with a challenge. Big or small, they never fail to give me a reason to bead (and learn new things along the way). It’s important to set a challenge that you want to do, and that you have the time and resources to stick with. While there’s plenty to be learned from failure, a successful challenge is much more exciting.

There’s no exact way to go about creating a challenge, but the easiest way to start is to pick something you want to repeat on some scale and set a time limit to do it in. It could be variations in a single design, or a variety of designs based on a theme. It could be a once-a-day challenge, or creating X number of projects by a certain date. Pretty much anything goes! Chronicling your challenge, whether in a journal or online, is a great way to stay motivated, too.

What’s your favorite way to deal with a creative slump?

Mortira

Subscribe * Facebook * Google+
Send your beading questions to InspirationalBeading@gmail.com
Support Inspirational Beading for bonus tutorials and more! Powered by Patreon

Copyright 2016 Inspirational Beading


Sunday, April 24, 2016

5 Ways to Use Leftover Beads

Ways to Use Leftover Beads

It’s rather unfortunate that we can’t devise a way to have all of our favorite beads on tap, with a never-ending supply of them ready to use at the touch of a button. Because even bulk beads come in a finite quantity, only to be replenished on our next trip to the bead store, leftovers are a common occurrence. If, like many beaders, you also tend to purchase new types of beads on a whim, they are even more common. The last few grams of seed beads, or the last bead or two on a strand have a tendency to hang around, too low in quantity to make their way into a design. Even if you purchase beads specifically for each project, leftovers can happen.

There are two major downsides to having leftover beads: they take up room in one’s stash, and they have a tendency to drag down our reserves of creative inspiration. Leftover beads can seem to call out “why haven’t you thought of a way to use me, yet?” Short of sweeping all leftovers into a broom bead box and shutting them away in a dark cupboard, the only solution is to just go ahead and use them up. Here are 5 fun ways to put those pesky hangers-on to good use.

1. Make a Charm Bracelet

All you need is a bit of chain and a pile of headpins, and you can eliminate almost any assortment of random accent beads from your stash. They don’t even have to match! In fact, the more eclectic, the better. Of course, if you do want to turn a motley crew of beads into a polished looking ensemble, you can always sort them by color, shape, or size and attach them in a pleasing pattern.


Sea Glass Charm Bracelet Tutorial by KeepsakeCrafts.Net
and
Paisley Daydream Leather Charm Bracelet by Artbeads.com


The sorting method would also work for a quick pair of asymmetrical earrings. By creating a visual relationship between two piles of beads, you can make a pair of earrings that looks like a match with a twist.

2. Do Some Bead Embroidery

Whether it’s traditional bead embroidery, soutache, or shibori, random beads are perfect for these kinds of projects. If you have multiples of some beads, you can make matching earrings. Otherwise a pendant or cuff is the perfect place to showcase not only your leftover accent beads, but those random few grams of seed beads as well. In any embroidery method, one or two accent beads is plenty, so this is a great way to use up just a handful of leftovers.


Shibori Ribbon Embroidery Tutorial by Cyndi Lavin at Beading-Arts.com
and
Augustine Soutache Earring Tutorial by Beadaholique


3. Colorblocking and Patchwork Patterns

Seed bead addiction is no laughing matter, especially when it means that we end up with so many packets and tubes of colors that lost their appeal after the first project. When these seed bead leftovers start to pile up, it’s time to make use of stripes and geometric patterns. Luckily, abstract designs and multicolor palettes have become super trendy for jewelry lately, and of course the possibilities are endless.


Blocked Up Bracelet by FusionBeads.com
and
Our own Patchwork Cuff Tutorial


When mixing and matching multiple bead colors without even glancing at your color wheel, a strong neutral can really help to bring everything together. Try incorporating opaque black or white for at least a quarter of the beads in your project to get a nice, cohesive look.

4. Make Bead Soup

Few things are more satisfying than tossing a bunch of beads together to make a lovely mélange of color and sparkle. If you happen to have lots of leftovers in monochrome or analogous colors, all you need is a package to mix them in and you’re halfway to a gorgeous project. Bead soups are great for adding interest to plain stitches, or for making…

5. Freeform Projects

Many beaders feel a bit intimidated by freeform beadwork. It’s hard to work without a net, but the results can be amazing. The nice thing about leftover beads is that we’ve already lost some of our attachment to them – otherwise we’d be restocking and they wouldn’t be leftovers at all. Use your random beads – alone or in a soup – to create a freeform project. Peyote stitch cuffs are a great place to start, and there are tutorials for them everywhere. Netting and right angle weave can be easy to work in freeform if you don’t mind breaking the rules. Flat and circular brick stitch also allow for lots of tweaks that make freeform beadwork possible.


Freeform Peyote Cuff Tutorial Video by PotomacBeads.com
and
Our own Striped Brick Stitch Tutorial


Do you have a favorite treatment for leftover beads?

Mortira

Subscribe * Facebook * Google+
Send your beading questions to InspirationalBeading@gmail.com
Support Inspirational Beading for bonus tutorials and more!

Copyright 2016 Inspirational Beading and Friends


Tuesday, April 5, 2016

The Pros and Cons of Bead Mats

For years I have been saying that I would never use a bead mat, nor would I permanently line my beading tray with any kind of fabric or fiber. To me, the idea of handling an unwashable piece of fabric or foam for several hours a day is kind of gross. Although we beaders don’t necessarily rub our fingers all over our workspace during a course of a project, the idea that I can take everything off of my bead tray at any time and give it a good wash is very reassuring. It doesn’t exactly get grimy, but dust is definitely a concern. When I’m beading, I like to know that my space and tools are neat as they can be.

My Favorite Beading Tray


A few months ago I got a simple bead mat as a freebie with a bead order, and it sat in my beading cupboard for ages, still in the package. Until a few weeks ago, I didn’t really have any reason to use it. But now that I’m juggling at least two projects at a time while making tutorials and designs for my shop, I need another mini workspace that I can easily put away. Since I still haven’t found a replacement for my dilapidated bead tray, I’m already behind. So, one night while moving from one project to the next, I decided to get out the bead mat.

Using a Bead Mat


Since the project that I was working on – the patchwork cuff tutorial – required a lot of bead colors, the bead mat did come in handy for keeping little piles of seed beads steady. It didn’t take long for me to figure out that I couldn’t simply place the mat on my table and start pouring beads onto it. I needed a portable backing for it, so I grabbed a cookie tray out of the cupboard. It looked a little awkward, but worked just fine for middle-of-the-night beading. Since then I’ve been swapping back and forth between my old bead tray and the new one when necessary, though I’m still on the hunt for something bigger and washable. To me, the cons still outweigh the pros with bead mats.

Pros:

1. The matte surface prevents beads and tools from moving around much.
2. It’s lightweight, and stores easily when not in use.


Cons:

1. I’ve only used it for 3 projects and it’s already starting to collect…stuff. I don’t know where those red and blue threads came from. All of my nymo is black and green.
2. It’s pretty small, and if I don’t use cups and saucers, the beads get all mixed together. It takes forever to clean up.
3. It’s square when everything else I have in my space is round. (That’s not really a con, but I ran out of complaints.)

Edit:
4. I'm afraid of what will happen if I wash it. Will it fray, or get filmy from the soap? And if I were to glue it down, I’d never be able to wash it, beyond shaking it out.

The Brittle Bead Tray


Over the summer I’ll be keeping an eye out for two suitable beading surfaces that will fit in my workspace and hold all of my beading implements at once. I considered momentarily using the cookie tray by itself, but it has a giant poinsettia in the middle and I’d really prefer a neutral surface. Until I find the perfect pair of bead trays, I’m stuck with one that’s falling apart and one that looks like I slapped a door mat on a cookie tray.

What kind of beading surface do you like to use? What features work best for you?

Mortira

Subscribe * Facebook * Google+
Send your beading questions to InspirationalBeading@gmail.com
Support Inspirational Beading for bonus tutorials and more!

Copyright 2016 Inspirational Beading


Sunday, April 3, 2016

Top 5 Beading Pet Peeves

Everyone has at least a few pet peeves. Even the usually-relaxing world of beading is not immune to the effects of irritation. A pet peeve is a thing that annoys you every time, which you inevitably love to complain about. It’s as human as our fascination with tiny bits of colored glass. Although each of us has our own unique list of favorite annoyances, many of them are common; most likely because it doesn’t matter how calm or reasonable you are – some things are just really annoying. These are my personal beading pet peeves, which I’m sure I share with many other beaders, too!

Top 5 Beading Pet Peeves


1. Broken Beads

There are so many reasons that a broken bead is beyond infuriating. First of all, it usually happens while weaving in thread, which means that the break is miles away from where you’ve added the most recent stitches, and it would take ages to undo all of your work to remove the offending bead and replace it. With some techniques it’s okay to lose a bead here and there, but for most it’s super obvious that there’s a gap in the pattern. A broken bead can ruin hours and hours of work.

Seed Bead Breakage
There's no "good" way to fix a broken bead like this.


The worst thing about broken beads is that they’re usually 100% our fault. We know that the bead holes are getting full because we can feel it as we try to pull the needle through to weave in a tail thread. And yet, we ignore that little voice telling us to put on a size 13 needle just to be safe, and instead try to force the needle until we hear the telltale crunch of exploding glass.

2. Kinky Peyote Thread

If you’ve worked with peyote stitch much, you may have noticed that it plays havoc with beading threads. Fireline is particularly susceptible to the twisting, kinky mess that results after so many rows of peyote. The thread closest to the beadwork gets twisted tighter and tighter with each new row, causing it to coil in on itself and making every stitch take longer than usual. The tighter your tension, the kinkier the thread gets.

Kinky Fireline
At this point it's like trying to bead with straw.


I generally work with a wingspan of thread for every technique and project, but many years ago I started using no more than one arm’s length for nearly anything involving peyote stitch. Shorter lengths of thread don’t get as kinky to begin with, and it means less time until a fresh, untwisted thread is needed.

Twisted Fireline


3. Surprise Bead Coatings

Has this ever happened to you? You’re browsing a bead shop online and spot a new bead color that you simply must have. You read the description carefully and everything seems great. You order the beads and wait for them to arrive, imagining all of the designs that you’ll make with them. The box arrives and you rip it open, only to discover that the color you liked so much is just a coating that is already starting to flake around the bead holes.

Coated Glass Beads
Do you really want to hurt me, coated beads?


Material quality is extremely important to me, and I always try to use the best beads in my designs. I intentionally avoid beads that aren’t going to stand up to the normal wear-and-tear of jewelry, and I rely a lot on product descriptions to know what I’m buying. It’s super annoying when essential details like color coatings are left out, especially because the colors are usually so awesome.

4. Spills

I drop things. Sometimes my hands just go on vacation from my brain and the next thing I know, there are beads (or coffee, or spaghetti sauce) everywhere. Sometimes it’s a container of recently decanted beads that I drop. Sometimes I drop something else into my workspace after setting up a project and there’s a bead explosion. Fortunately this usually only happens to beads in the vicinity of my bead tray, so most of the spill is contained within my workspace anyway. I can clean up some of the mess as I stitch, and scoop up the rest when a project is complete.

Explosive Bead Spill
This is what happens when you drop your camera on a pile of beads.


The worst kinds of spills are those that turn a few lovely beads into a gigantic bead soup. Most beaders have experienced this at least once, and a lot of bead sellers have, too. We even have a name for the resulting mixture: broom beads. I had quite a few major bead spills before I started beadweaving full time, which is why I never, ever, ever, ever, store beads loose. Especially seed beads. They all stay in their little packets and tubes where they can’t cause any trouble.

Culled Bead Mix
This is what broom beads would look like - if I didn't keep my seed beads locked up tight.


5. Having to Start a New Thread With Only a Centimeter To Go

There’s no short quip that quite describes this pet peeve, yet it happens all the time. You’re weaving away, getting close the end of a piece of beadwork, and realize that your thread is going to be too short to finish. You’re going to have to cut a new thread, put on a stop bead, and weave it into place - all for just a centimeter or two of beadwork. And you can’t just cut a short piece of thread, oh no. You have to use a full length because if you try to gauge how much you need to finish, you’ll only come up short again and have to add ANOTHER thread.

Fireline Beading Thread
The Preciousssss...


Working exclusively with Fireline for so many years has made me very stingy with thread. Every time I have to toss a tail that’s not short enough to truly be garbage, but not long enough to be of any possible use, I cringe. Trying to make the most of expensive threads is a constant source of beading anxiety. But I love my Fireline, and in the end it’s worth it.

What are your biggest beading pet peeves?

Mortira

Subscribe * Facebook * Google+
Send your beading questions to InspirationalBeading@gmail.com
Support Inspirational Beading for bonus tutorials and more!

Copyright 2016 Inspirational Beading


Saturday, March 26, 2016

The Ultimate Beading Idea Organizer

Staying organized is often a big challenge for any artist, and beaders are no different. Chances are you’ve got at least one – if not twelve – idea notebooks scattered around your home and workspace, perhaps a bulletin board covered with sketches, packets of project materials lined up for future use and collecting dust, or any number of scrambled brainstorming techniques taking up space but not being much use. It’s just what we do.

This weekend I discovered a fabulous new way to organize my life and my ideas in one place, with everything from work, blogging, and beading laid out every week. I got the idea from one of my favorite vloggers, who demonstrates a quick way to make your own custom weekly planner in her Agenda Hacks and Tips video. The stationery geek in me went a little nuts when I watched it, and I started making my own variation right away.

My Ultimate Bead Idea Planner


In my agenda, I’ve created a weekly layout that leaves plenty of room for idea sketches and allows me to make to-do lists that I can carry on from day-to-day. I never know what I’ll have the time or creative energy to accomplish in a day, so a flexible beading schedule is very important. I’ve got a spot for my day-job and appointment schedule, and everything else is dedicated to creativity. I can list my goals for the week, plus must-do lists for 2-3 day stretches. There’s also space for random idea lists, notes, and brainstorming. I’ve only done a few weeks’ worth of layouts at a time, so if I ever want to cut out and paste images from magazines and such, there’ll be space to include them.

Scrap Paper Brainstorming
Goodbye Scrap Paper!


Until now I’ve been using an ordinary pocket agenda to keep track of my timetable, but I was always frustrated that I didn’t really have the space to plan blogs or sketch out jewelry ideas when they suddenly arise. My workspace has also been constantly covered with bits of scrap paper with ideas and half-scratched out to-do lists that eventually get tossed even if I don’t finish them. I’m super excited to start carrying this book around so that I can keep my ideas rolling anytime and anywhere. The best part is that it will take a long, long time to fill up this book; I’ll be able to go back and re-think any unfinished ideas instead of losing them to the scrap paper graveyard.

What's your favorite way to keep track of ideas and projects?

Mortira

Subscribe * Facebook * Google+
Send your beading questions to InspirationalBeading@gmail.com
Support Inspirational Beading for bonus tutorials and more!

Copyright 2016 Inspirational Beading


Sunday, March 20, 2016

Four Weird Things People Say to Beaders

If you use Facebook, Pinterest, or Tumblr, there’s a pretty good chance that at some point you’ve seen some variation on the meme “10 Things Not to Say to an Artist”. I’m sure I’ve even seen one specifically for beaders. Anyone who’s been beading or designing jewelry for a while has probably heard at least a few of the unfavorable comments on these lists, though many of them are the types of barbs that only come about when you’re face-to-face with potential clients. The conversation at craft fairs can often turn to debates about price, skill, and even materials.


Source Unknown


While reading one of these memes I started thinking about some of the other not-so-flattering comments that one can sometimes hear not from strangers, but from our family, friends, and acquaintances. Assuming that you’re not hiding your creations away under the floorboards, chances are someone that you know has asked a question or offered an opinion that made you feel less than inspired. Although they don’t always come from a bad place, they can still sting. Just for fun, I’ve listed four of my “favorites”, and some possible interpretations and responses.

1. “I usually hate ___, but I love this.”

There’s something about we humans - at least in Western culture - that makes it nearly impossible to give a true compliment. They’re often a little bit skewed, and it’s almost funny that no one feels weird about paying a compliment that includes the word hate. I think it’s possible that we’re afraid to sound insincere if we’re not a little bit negative, too.

Weird Things People Say to Beaders


This comment can often pop up when a friend is admiring your latest creation. Before telling you they like it, they first have to point out what they don’t like about it. On the other hand, a more favorable interpretation could be “I don’t usually like ___, but you’re so talented that you’ve changed my mind.” That certainly feels better! In fact, you should translate that back to them by saying “That’s because I’m so awesome I can make anything look good.”

2. “I could never make anything like that. I’m just not creative.”

This is probably the most common thing that people say when viewing someone’s handiwork. And it’s definitely the weirdest. Creativity is one of the things that make us human; it just doesn’t always manifest itself in color and crafts. Creativity can be found in almost any activity or skill – from cooking to organizing one’s closet.


Sometimes this comment comes across as “I’m too busy/sophisticated/cool to make art.” But it’s probably more like “I’m being self-deprecating because I’m really intimidated by your amazing talents.” To be honest, I haven’t come up with a great response to this comment yet, even though I’ve had so many chances to practice. If you know the person well, you can always point out something they do that is creative. Otherwise, you’ve just got to own your skills by saying something like “It takes a lot of practice, but I find it very rewarding.”

3. “I should totally buy something from you sometime.”

This one isn’t exactly rude, just kind of annoying - especially after you’ve heard it for the tenth time. The fact is that if someone really does want to pay you for your work, they’ll ask for a price and get their wallet ready. Or they’ll tell you what they want and work out how they’ll pay you for it. Giving you their custom is one of the best compliments that someone can give you, particularly if they don’t try to haggle!

Things Not to Say to Beaders


The most likely translation for this statement is “I don’t like your work that much, but I want to make you feel good about it anyway.” This isn’t really a bad thing – our friends aren’t required to like what we do. A more forgiving interpretation might be “I really want you to know how much I like your designs, but also I know I can’t afford them.” For a really good friend, you can always make a note of the elements they like and make them a variation for their next birthday. Otherwise just smile and say “I do custom work, too. Let me know if you’d like a quote sometime.”

4. “Why don’t you ever make ___?”

A question like this often pops up in the jewelry section of a clothing shop, when a friend or family member catches a glimpse of a colleague’s design in your Facebook feed, or perhaps if you've left a beading magazine lying around with one of those ads featuring award winning pieces on the back. The design is usually way outside of your skillset, or so completely different from what you like to make that it might as well be architecture or championship pumpkin growing.

Weird Things People Say to Jewelry Designers


This comment probably stings the most, because we’re most likely to interpret it as “I like that person’s work way more than yours.” Or perhaps “You’re not very good yet, are you?” Of course this isn’t usually the case. A fellow artist of any medium wouldn’t say this, so the commenter is just not familiar with the techniques and materials involved in either design. Deep down, what they’re really saying is “You’re going to win awards someday, too. Get on it, you awesome beader!”

What’s the best or worst thing anyone’s ever said about your beadwork? How did you respond?

Mortira

Subscribe * Facebook * Google+
Send your beading questions to InspirationalBeading@gmail.com
Support Inspirational Beading for bonus tutorials and more!

Copyright 2016 Inspirational Beading


Thursday, March 10, 2016

Dollar Deals and the Accidental Seed Bead Stash

Size 15 Seed Beads

My current embroidery experiment is just the latest attempt in a long line of destash missions for my large collection of 15/o seed beads. Over the past 7 years, I’ve tried many times to put a dent in the quantities of 15/o’s that are in my stash, but it never seems to get any smaller. They’re just so tiny that no matter how much I use them, their volume never seems to get any lower. I once tried making beadwork bookmarks, I’ve made what seems like millions of beaded flowers with them, and of course I went through a brief rivoli obsession before moving on to other things.

The stash just never seems to get any smaller. Of course I’ve also added a few colors here and there as well. Once I discovered 15/o seed beads, I found that they were really quite useful - at least once in a while. Part of the trouble is that I didn’t know what I was getting into, so there are lots of colors that hardly ever get used – and a few that I like too much to use all the time. Bead hoarding comes in all shapes and sizes.

There’s currently a Dollar Days sale running at Fire Mountain Gems, which got me to thinking about the story behind how I ended up with an entire tackle tray of 15/o’s - even though I only use them rarely, and in such tiny amounts. I suppose you could call it a cautionary tale about making assumptions, but I like to think of it as a happy accident.

Size 15 Beaded Rainbow Flowers


When I placed my very first online bead order back in 2009, I had never set eyes on Japanese seed beads before. I had been using Czech seed beads from my local bead store for years, happily stringing and stitching without much awareness of the other possibilities out there. In that first order, I only included one package of 11/o TOHO seed beads, along with a bunch of other beads that were totally new to me. So, when the store mixed up the seed beads in my order and sent me 8/o’s by mistake, I had nothing to compare them to. A tiny voice was telling me that I knew there was very little difference between Czech and Japanese beads, but I was essentially working without a net. I assumed that TOHO sized their beads a little bit differently, just like Miyuki does with their Delicas.

Size 15 Seed Bead Stash


A few weeks later there was a Dollar sale at my new favorite site, and I went a little nuts ordering packets of 15/o seed beads in my favorite colors – and a bunch of exciting new ones! – thinking that they would be about the same size as the Czech seed beads I was used to. Imagine my surprise when the package arrived and I discovered a gaggle of little baggies containing what looked like colored sand at first glance. For a few moments I was totally heartbroken; I had been so excited to try out all of my new seed bead colors – what was I ever going to do with beads so tiny a single bead is practically invisible? Eventually I got over my initial disappointment and started thinking about ways to use these beads. It didn’t take long before I was stitching up little beaded flowers and using 15/o’s for accent fringe. Then I learned how to bezel and never looked back.

Beaded Starfish Lariat


Although I may have eventually tried out 15/o’s on my own, I’m not sure if the design discoveries I’ve made would have been possible without a big stash of little seed beads to choose from. If it weren’t for that one little mix-up, I’d probably have two or three essential 15/o colors and not much else. There’d almost certainly be no beaded starfish rings, and that would be a shame. Most seasoned beaders will say that mistakes can be the start of a great new design or technique. It turns out this is just as true for bead shopping as it is for the actual beadwork.

Custom Size 15 Seed Bead Mix


Have you ever had a big surprise in a bead order? Were you able to turn it around and make it work for you?

Mortira

Subscribe * Facebook * Google+
Send your beading questions to InspirationalBeading@gmail.com
Support Inspirational Beading for bonus tutorials and more!

Copyright 2016 Inspirational Beading

Actions you take from this post can result in a commission for Inspirational Beading.


Sunday, January 31, 2016

How to Mix and Use Bead Soups

How to Mix Bead Soups

There’s something wonderfully enticing about a mixture of beads. The combination of colors and shapes all playing together before the beadwork has even begun can be so much more inspiring than a single seed bead color. Bead soups are an excellent source of creative juice, not to mention a great way to experiment with new colors, or use up leftover beads.

One of the best ways to create a gorgeous bead soup is to hand select colors and shapes that work well together, as well as with your favorite techniques. A lot of bead sellers create their own custom mixes and blends, so the work of building a palette is done for you. If you want to experiment with concocting your own bead soup recipes, leftover beads are a great way to play with colors.

Starting with a single color is a good way to play it safe and see what your beads can do. You can mix together similar hues and shades to get a wonderful monochrome palette of ready-to-use seed beads. It’s a good idea to keep track of how much you’re adding with each new color, especially if you already have a project in mind. This way you can get a good balance of shades and be sure you’ll have enough beads to complete your design. If you’re not sure how your mix will turn out, start with a few grams of each color and add a dash of this-and-that until you get the perfect blend.

Blue Seed Bead Soup
Mix together seed beads of different sizes for texture.


Blue is a great color for bead soups because you can combine almost any number of shades together and they’ll still look great. Turquoise, aqua, cobalt, indigo…they all play well together. When planning your soup, try placing the beads you want to use together before mixing, to see how different finishes will look. Sometimes transparent, lined, or matte looks great when mingled, but different finishes can dramatically affect how other colors look.

Green Seed Bead Soup
Shaped seed beads are great in soups.


This green mix is a great example of too many shades. The mint and lime beads would look wonderful paired with the emerald. When all three come together, they clash. One way to salvage this soup would be to add some yellow or blue. This would allow either the mint or lime to attach itself visually to the new color, leaving the other to pair off with emerald.

Red Bead Soup
Try adding accents of similar sizes and shapes to start.


You can add accent beads directly to your bead soups. This is a great way to build a palette for freeform peyote, multistrand pieces, or bead embroidery. Depending on your project, you may want to go for a small range of sizes (from 3 to 6 mm), or add a handful of chunkier pieces. This is another great way to use up odds and ends in your bead stash.

Sandy Bead Soup Bead Soup Herringbone Stitch
Bead soups look great with freeform stitches and motifs.


Blending similar hues together can work out really well. This mix combines neutrals and a variety of warm tones for a sandy look. Starting with a base of neutrals (white, black, grey or beige) and then adding a few highlights is a great way to experiment with mixing colors.

Ombre Bead Soup Palette Ombre Multistrand Design
Bead soups are great for multistrand and fringe projects.


You can also use multiple bead soups in a single design. To create an ombré effect, create two bead soups with colors that are close together on the color wheel, or use one all-neutral palette. Remove one third of each soup and mix those thirds together to create an additional blend. Alternate between the three soups to gradually change the look and color of your beadwork.

If you're not using a bead spinner or stringing multiple beads at once, it can be tricky to find a truly random groove. When working with mixes, I like to pour out a portion of soup onto my workspace, then pinch a few grams into a line that I can choose from. By moving steadily through this row of beads, I can be sure that I'm not favoring a color or creating a pattern instinctively.

Do you like to mix your beads together? What’s your favorite bead soup palette?

Mortira

Subscribe * Facebook * Google+
Send your beading questions to InspirationalBeading@gmail.com
Support Inspirational Beading for bonus tutorials and more!

Copyright 2016 Inspirational Beading


Saturday, January 16, 2016

Seed Bead Aught Size Comparisons

Seed Bead Aught Sizing

The aught sizing system is probably one of the things that frustrates new beaders the most, along with the first few rows of peyote stitch. Although it’s easy enough to remember that the larger the number, the smaller the bead, even seasoned beaders can get confused sometimes. After working with beads for a while, we start to associate their aught numbers to them and all is fine, until we come across a size that we don’t use very often. While I was putting this post together, I had a moment where I couldn’t remember if 7/o comes before or after 8/o.

The word aught – meaning null, or nothing – is sometimes used to size things that are smaller or larger than standard. A product might come in sizes with regular integers as well as aughts. Seed beads are always and – as far as we know – have always been sized entirely with aughts. Though it’s not completely confirmed, the general story is that each size refers to how many beads will fit into an inch when lined up side by side, with the holes facing up. If true, that rule was created many, many decades ago. Although the overall process for making seed beads hasn’t changed much, standards have, and there are a lot more seed bead makers in the world today.

I decided to test out the aught sizing theory, and compare how each bead size measures up to an inch, as well as each other. I gathered one color of each size in every brand I had available, and counted out the quantities to match each – fifteen 15/os, eight 8/os, etc.


TOHO 15/o


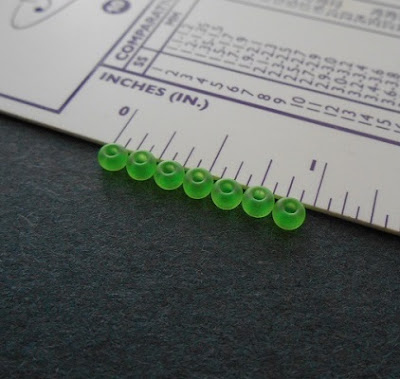
I wasn’t surprised that the 15/os didn’t quite measure up. To be honest, I wasn’t expecting any of the beads to match their size exactly. What’s interesting is just how close these beads came to making the full inch length. Spoiler alert: almost no other bead sizes came quite as close.


Preciosa 11/o and Toho 11/o


Another interesting development was that all of the 11/o seed beads came in at almost exactly the same length. The TOHOs are a little bit longer, which isn’t surprising since they tend to be a bit on the bulky side. Otherwise these seed beads were all pretty much the same when lined up this way, even though they can seem drastically different in actual beadwork.


Matsuno 11/o and Delica 11/o


I included 11/o Delicas in the test, even though they are sized by a completely different scale than round seed beads or rocailles. I thought it would be interesting to see the difference, and since I happen to have some, why not? It’s interesting to see just how diminutive they are next to round seed beads of the same size.


Vintage Czech 10/o and Matsuno Dyna-mites 8/o


I only had white-hearts in size 10/o, and I wish that I had a few more styles to test out. After only 3 sizes, a pattern seems to emerge. Except for the Delicas, each size seems to get progressively further away from the 1 inch length as we go up. What makes this very interesting is that these particular 10/o seed beads are vintage – which could mean that bead sizes haven’t changed much in the past 50 years or so. It makes one wonder just when the 1 inch standard fell by the wayside.


Preciosa 8/o and TOHO 8/o


The 8/o seed beads sort of smashed the reduction trend, as each brand came pretty close to the 1 inch mark. Unlike all of the other sizes so far, there was less than a full bead’s length left to fill. Once again, all 3 brands came in at almost exactly the same length.


Preciosa 7/o and TOHO 6/o


The 7/o beads so far have the record for being the closest match. It almost seems that the shrinking trend in the smaller beads has reversed for the larger ones. The inconsistency seems to make the entire theory of aught sizing origins rather unusual. Imagine what our seed beads would look like if they all followed the 1-inch standard!


Preciosa 6/o and Matsuno Dyna-mites 6/o


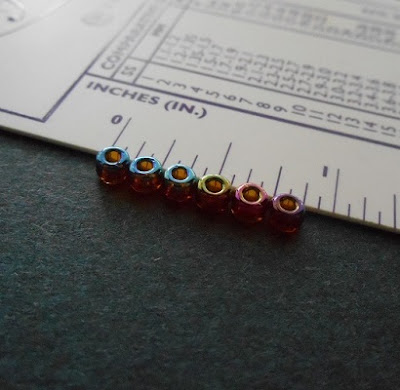
Finally we have the 6/o seed beads. This group was the only one with a noticeable size difference between brands. It could be argued that accuracy is more important with the smaller bead sizes, as they tend to be used in large quantities at close quarters. On the other hand, it’s really hard to make a nice Cellini spiral if your 6/o beads are way too big.

How did you feel about aught sizing when you started beadweaving? Which size is your favorite?

Mortira

Subscribe * Facebook * Google+
Send your beading questions to InspirationalBeading@gmail.com
Support Inspirational Beading for bonus tutorials and more!

Copyright 2016 Inspirational Beading


Blog Widget by LinkWithin
Fire Mountain Gems and Beads

Inspiration Topics

accessories amulet Ancient Worlds Modern Beads animals April's Army art ArtFire astrology astronomy autumn awards awareness bangle beach Bead Inspired Bead Shops bead soup bead spotlight bead stash Bead Trays beaded beads beading theory beads belt bezel birthstones black blog spotlight blue boho bone book spotlight bracelet Bracelet A Week branch fringe brick stitch brown bugles buttons cabochon ceramic chain maille challenge charity chevron chain christmas collar Collections color Color Ideas color triads conservation craft shows crafts crochet crystals cuff Culled Beads current events Current Faves daggers Daily Sets daisy chain Delicas Destash drops Dutch spiral earrings Egypt Egyptian Gods embellishing embroidery environment etsy exotic fair trade fantasy fashion Favorite Beads Favorite Techniques feminine fibers film findings fire polish fixtures Flashback Test flickr inspiration flowers food found object free form fringe Geek Jewels geekery gemstones geography giveaway glass gold gray Greece green herringbone hex cuts history holiday home decor insects inspiration tip inspired beader Inspired by... Inspiring Links ivory Jewelry Stash knitting ladder stitch lampwork lariat leaf fringe leather lights literature loomwork macrame magatamas Master Class Medallions metal free metalwork Mini Collar a Week mixed media mixture Mood Board MOP multi-color multi-strand music natural beads nature necklace Necklace a Day Nepal chain netting New Beads ocean ombre orange paint paper patterns pearls pendant peyote photography Picasso finish pink Pinspiration PMC polymer clay poster sketch purple quick inspiration rainbow RAW red resin ring Ring a Day rivoli Rome Russian spiral scarf science seed beads shell silver soutache spiral rope spring square stitch St. Petersburg steampunk stringing stripes summer tagua TBT The Elements thread Tilas Time Capsule tools trade beads triangle weave tribal tropical turquoise tutorial two-hole beads Ugly vintage Wear it Twice weather white winter WIP wire wishlist wood World Beaders yellow
Blog Home * About * Beading Tutorials * Advertise

Learn About Sponsoring Inspirational Beading with Project Wonderful
Affiliated With ShareASale.com and Amazon.com