Showing posts with label free form. Show all posts

Sunday, April 24, 2016

5 Ways to Use Leftover Beads

Ways to Use Leftover Beads

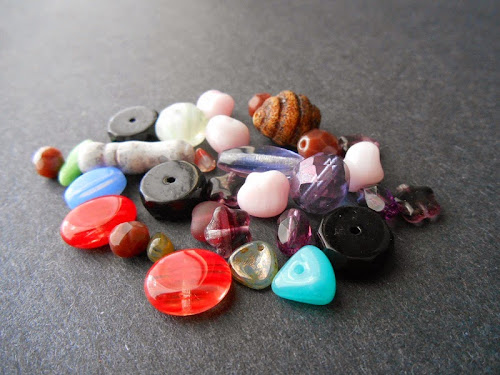
It’s rather unfortunate that we can’t devise a way to have all of our favorite beads on tap, with a never-ending supply of them ready to use at the touch of a button. Because even bulk beads come in a finite quantity, only to be replenished on our next trip to the bead store, leftovers are a common occurrence. If, like many beaders, you also tend to purchase new types of beads on a whim, they are even more common. The last few grams of seed beads, or the last bead or two on a strand have a tendency to hang around, too low in quantity to make their way into a design. Even if you purchase beads specifically for each project, leftovers can happen.

There are two major downsides to having leftover beads: they take up room in one’s stash, and they have a tendency to drag down our reserves of creative inspiration. Leftover beads can seem to call out “why haven’t you thought of a way to use me, yet?” Short of sweeping all leftovers into a broom bead box and shutting them away in a dark cupboard, the only solution is to just go ahead and use them up. Here are 5 fun ways to put those pesky hangers-on to good use.

1. Make a Charm Bracelet

All you need is a bit of chain and a pile of headpins, and you can eliminate almost any assortment of random accent beads from your stash. They don’t even have to match! In fact, the more eclectic, the better. Of course, if you do want to turn a motley crew of beads into a polished looking ensemble, you can always sort them by color, shape, or size and attach them in a pleasing pattern.


Sea Glass Charm Bracelet Tutorial by KeepsakeCrafts.Net
and
Paisley Daydream Leather Charm Bracelet by Artbeads.com


The sorting method would also work for a quick pair of asymmetrical earrings. By creating a visual relationship between two piles of beads, you can make a pair of earrings that looks like a match with a twist.

2. Do Some Bead Embroidery

Whether it’s traditional bead embroidery, soutache, or shibori, random beads are perfect for these kinds of projects. If you have multiples of some beads, you can make matching earrings. Otherwise a pendant or cuff is the perfect place to showcase not only your leftover accent beads, but those random few grams of seed beads as well. In any embroidery method, one or two accent beads is plenty, so this is a great way to use up just a handful of leftovers.


Shibori Ribbon Embroidery Tutorial by Cyndi Lavin at Beading-Arts.com
and
Augustine Soutache Earring Tutorial by Beadaholique


3. Colorblocking and Patchwork Patterns

Seed bead addiction is no laughing matter, especially when it means that we end up with so many packets and tubes of colors that lost their appeal after the first project. When these seed bead leftovers start to pile up, it’s time to make use of stripes and geometric patterns. Luckily, abstract designs and multicolor palettes have become super trendy for jewelry lately, and of course the possibilities are endless.


Blocked Up Bracelet by FusionBeads.com
and
Our own Patchwork Cuff Tutorial


When mixing and matching multiple bead colors without even glancing at your color wheel, a strong neutral can really help to bring everything together. Try incorporating opaque black or white for at least a quarter of the beads in your project to get a nice, cohesive look.

4. Make Bead Soup

Few things are more satisfying than tossing a bunch of beads together to make a lovely mélange of color and sparkle. If you happen to have lots of leftovers in monochrome or analogous colors, all you need is a package to mix them in and you’re halfway to a gorgeous project. Bead soups are great for adding interest to plain stitches, or for making…

5. Freeform Projects

Many beaders feel a bit intimidated by freeform beadwork. It’s hard to work without a net, but the results can be amazing. The nice thing about leftover beads is that we’ve already lost some of our attachment to them – otherwise we’d be restocking and they wouldn’t be leftovers at all. Use your random beads – alone or in a soup – to create a freeform project. Peyote stitch cuffs are a great place to start, and there are tutorials for them everywhere. Netting and right angle weave can be easy to work in freeform if you don’t mind breaking the rules. Flat and circular brick stitch also allow for lots of tweaks that make freeform beadwork possible.


Freeform Peyote Cuff Tutorial Video by PotomacBeads.com
and
Our own Striped Brick Stitch Tutorial


Do you have a favorite treatment for leftover beads?

Mortira

Subscribe * Facebook * Google+
Send your beading questions to InspirationalBeading@gmail.com
Support Inspirational Beading for bonus tutorials and more!

Copyright 2016 Inspirational Beading and Friends


Sunday, January 31, 2016

How to Mix and Use Bead Soups

How to Mix Bead Soups

There’s something wonderfully enticing about a mixture of beads. The combination of colors and shapes all playing together before the beadwork has even begun can be so much more inspiring than a single seed bead color. Bead soups are an excellent source of creative juice, not to mention a great way to experiment with new colors, or use up leftover beads.

One of the best ways to create a gorgeous bead soup is to hand select colors and shapes that work well together, as well as with your favorite techniques. A lot of bead sellers create their own custom mixes and blends, so the work of building a palette is done for you. If you want to experiment with concocting your own bead soup recipes, leftover beads are a great way to play with colors.

Starting with a single color is a good way to play it safe and see what your beads can do. You can mix together similar hues and shades to get a wonderful monochrome palette of ready-to-use seed beads. It’s a good idea to keep track of how much you’re adding with each new color, especially if you already have a project in mind. This way you can get a good balance of shades and be sure you’ll have enough beads to complete your design. If you’re not sure how your mix will turn out, start with a few grams of each color and add a dash of this-and-that until you get the perfect blend.

Blue Seed Bead Soup
Mix together seed beads of different sizes for texture.


Blue is a great color for bead soups because you can combine almost any number of shades together and they’ll still look great. Turquoise, aqua, cobalt, indigo…they all play well together. When planning your soup, try placing the beads you want to use together before mixing, to see how different finishes will look. Sometimes transparent, lined, or matte looks great when mingled, but different finishes can dramatically affect how other colors look.

Green Seed Bead Soup
Shaped seed beads are great in soups.


This green mix is a great example of too many shades. The mint and lime beads would look wonderful paired with the emerald. When all three come together, they clash. One way to salvage this soup would be to add some yellow or blue. This would allow either the mint or lime to attach itself visually to the new color, leaving the other to pair off with emerald.

Red Bead Soup
Try adding accents of similar sizes and shapes to start.


You can add accent beads directly to your bead soups. This is a great way to build a palette for freeform peyote, multistrand pieces, or bead embroidery. Depending on your project, you may want to go for a small range of sizes (from 3 to 6 mm), or add a handful of chunkier pieces. This is another great way to use up odds and ends in your bead stash.

Sandy Bead Soup Bead Soup Herringbone Stitch
Bead soups look great with freeform stitches and motifs.


Blending similar hues together can work out really well. This mix combines neutrals and a variety of warm tones for a sandy look. Starting with a base of neutrals (white, black, grey or beige) and then adding a few highlights is a great way to experiment with mixing colors.

Ombre Bead Soup Palette Ombre Multistrand Design
Bead soups are great for multistrand and fringe projects.


You can also use multiple bead soups in a single design. To create an ombré effect, create two bead soups with colors that are close together on the color wheel, or use one all-neutral palette. Remove one third of each soup and mix those thirds together to create an additional blend. Alternate between the three soups to gradually change the look and color of your beadwork.

If you're not using a bead spinner or stringing multiple beads at once, it can be tricky to find a truly random groove. When working with mixes, I like to pour out a portion of soup onto my workspace, then pinch a few grams into a line that I can choose from. By moving steadily through this row of beads, I can be sure that I'm not favoring a color or creating a pattern instinctively.

Do you like to mix your beads together? What’s your favorite bead soup palette?

Mortira

Subscribe * Facebook * Google+
Send your beading questions to InspirationalBeading@gmail.com
Support Inspirational Beading for bonus tutorials and more!

Copyright 2016 Inspirational Beading


Wednesday, December 16, 2015

Bead Embroidered Ocean Scene

I have a whole list of new inspirations, projects, and tutorials to work on, but for the moment they’re all on hold while I complete a bead embroidered Christmas present. I’m having a really great time working on this project, which is going to be a pouch for art supplies when it’s complete.

Bead Embroidered Ocean Scene


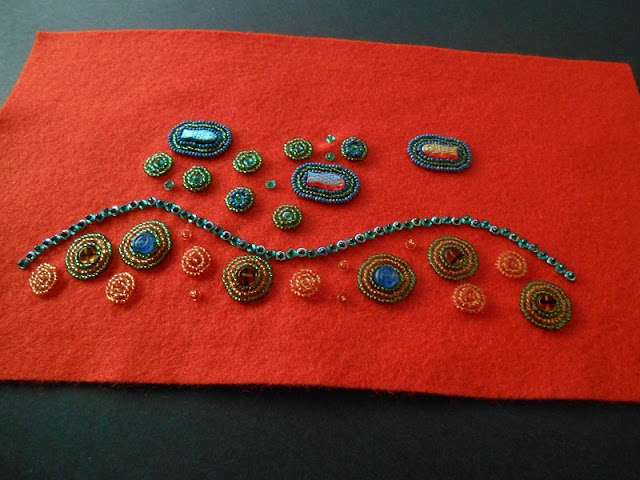
When I sat down to work on this piece, I had absolutely no idea what it was going to look like, or what kind of design I was going to stitch. Then I spotted some Czech glass fish that I happened to have in my workspace, and an idea started to take shape. I stitched on the fish and added a border of blue and green seed beads. From there, I picked out a few additional accents and then just let my beads decide where to go.

Free Form Bead Embroidered Ocean Scene


So far I’ve added a wave of O-beads and an assortment of accents like glass nautilus shells. I’ve been working in little patches, going back and forth to different areas and adding whatever looks best. The finished design should be covered with evenly spaced yet totally random embellishments and look like a sparkling underwater scene. I can’t wait to see how it turns out!

Do you use your beading skills for gift giving? What’s your favorite thing to make for others?

Mortira

Subscribe * Facebook * Google+
Send your beading questions to InspirationalBeading@gmail.com
Support Inspirational Beading for bonus tutorials and more!

Copyright 2015 Inspirational Beading


Wednesday, June 17, 2015

Operation Inspiration: Phase Three

I’m heading into the final stage of my plan for boosting creativity in my workspace. The new ugly necklace is complete, and it turned out pretty fabulous, with a fun combination of herringbone strips and circular brick stitch medallions. I used a coconut flower button for the clasp, which not only added the finishing touch, but also allowed me to finally get one into a project after having such high hopes for them.

Ugly Inspiration Necklace


Apart from refreshing my workspace and using up old leftovers, one of my favorite ways to find instant inspiration is to buy new beads. I haven’t placed a bead order since last year, so it was definitely time to get some fresh materials in my studio. I’ve got a good sized bead order on the way right now, and there are some pretty exciting things in it. I’m trying out a few new seed bead colors, some new accent beads, and of course I stocked up on Fireline so I’ll be ready to make whatever comes to mind.

Now that the ugly necklace is finished, I’m getting back to favorite projects. I’ll be finishing the fringe necklace with black and gold stripes that I started ages ago - and then, who knows?

Striped Necklace in Progress


Do you have a favorite bead or material to purchase when you need a pick-me-up?

Copyright 2015 Inspirational Beading
Subscribe to Inspirational Beading
Get inspired on Facebook and Google+


Saturday, June 6, 2015

Operation Inspiration: Phase Two

For the past week or so I’ve been picking away at getting back into beading with one of my favorite recharge methods, and I didn’t even have to clean up first!

Once it occurred to me that putting a stopper on the herringbone collar project I was (not) working on would help get me inspired again, I realized that it would be the perfect place to start a new ugly necklace. I took out my box of UfO’s and selected a few choice scraps of beadwork, then opened a few packets of beads that I had been planning to put away last week. I’m going to stitch all of these elements together any which way and use the free-for-all as a way to find my creative groove again.

I had been planning to make another Unfinished Object purge necklace at some point this year, and now is as good a time as any. Beading without any rules - not just freeform but totally without attention to style or form - is so liberating and has never failed to give me a cleansed feeling in the creative sense. It’s also giving me an opportunity to try out some unusual beads that have had me stumped for months.

Herringbone and Coconut Ugly Necklace in Progress


The center drilled coconut daggers have been on my mind a lot lately, but I just couldn’t come up with a good design to use them in. By adding them to this completely crazy necklace, I can use them in ways that I wouldn’t dare to otherwise, and get a feel for what they can and can’t do. I’m also incorporating some assorted leftovers and some really fun beadwork scraps from the past couple of years. I can’t wait to see how this piece turns out!

I’m hoping to have this ugly necklace complete in the next few days, so that I can be ready to work on normal projects again by the time Orange is the New Black hits Netflix. A great series always helps to keep me in my seat and beading away, since I can’t stand to watch movies or shows alone and not have something for my hands to do.

The final phase of Operation Inspiration all depends on my bead budget, but will probably be the most effective overall. Then things will really get rolling again!

How do you like to deal with stale or unfinished projects?

Copyright 2015 Inspirational Beading
Subscribe to Inspirational Beading
Get inspired on Facebook and Google+


Saturday, January 17, 2015

Learn Filigree Jewelry with a Twist

Floral Filigree Cabochon Pendant by Melody MacDuffee

There’s nothing quite like attending a class to learn a new skill or technique, where you can follow along with an instructor as you work. If there are no classes in your area, the next best thing is to get instruction from a video. You can see every step of the design process, and pause or rewind any time you need to refresh or start over.

Recently I had the opportunity to try out video tutorials on Craftsy, and it was a revelation. Unlike YouTube, which offers only basic interaction with instructors, Craftsy lessons are built for maximum learning. The video productions are excellent quality, with great lighting and sound, multiple angles from which to view a work in progress, and of course the ability to re-watch any section as needed. In fact, videos are already divided into sections for you, so it’s easy to review a particular portion of your favorite lessons. Once you’ve purchased a lesson, you can interact with the instructor and other students by posting questions, answering polls, or sharing images of the pieces you created.

Melody MacDufffee, founder of Soul of Somanya and author of Lacy Wire Jewelry, invited me to check out her latest class on creating gorgeous twisted wire filigree jewelry. The class includes 7 video lessons for 7 wirework jewelry projects, all featuring a pretty floral filigree technique. Each project builds on elements learned in the previous lesson, allowing students to continuously develop skill with the techniques. It all begins with adorable filigree earrings with a simple design using just wire, beads, and a flair for organic shapes. From there the filigree technique expands into a gorgeous statement necklace, framed hoop earrings, a stunning cuff bracelet, a freeform brooch, cocktail rings, and a cabochon pendant with a beautiful heirloom quality.

Filigree Jewelry with a Twist Virtual Beading Class with Melody MacDuffee


The fantasy geek in me – the part that loves fairies, dryads, and vine-covered castles – is head over heels for the look of Melody’s floral filigrees. The delicate wirework is deceptively simple, and works with a variety of beads and jewelry designs to create life-like flower and leaf motifs that look as if they took hours and hours to make. Because the wire can be twisted and shaped nearly any way you wish, and bead options aren’t limited, the design possibilities are endless. I was picturing the pretty flowers transformed by dark gem tones, black crystals, and patinas into elegant gothic jewelry.

Framed Filigree Earrings by Melody MacDuffee

Melody is a natural teacher and you really get the feeling of sitting down in a one-on-one class as she guides you through each step. The lessons are very thorough, with plenty of trouble-shooting tips and variation ideas included. The Crafty virtual classroom allows you to re-play the last 30 seconds with a single click, so you can easily get an in-depth look at any steps you need to, and you can add your own notes at any point for future reference.

If you’ve been looking for a new technique to try, or want to get a great introduction to wireworking techniques, Filigree Jewelry with a Twist is an excellent place to get started.

Want to give it a try? Leave a comment on this post letting us know how you would use floral filigrees in your designs, and you’ll be entered for a chance to win the complete class! Be sure to include a contact method with your comment if you do not have a profile with email enabled. One winner will be drawn on Saturday, January 24th.

For a limited time, you can also get the complete Filigree Jewelry with a Twist class for 33% off – visit MelodyMacDuffee.com for details.

I would like to thank Melody MacDuffee and Craftsy for allowing me to preview the Filigree Jewelry with a Twist class. Inspirational Beading has not received compensation for including products or content in this post.

Copyright 2015 Inspirational Beading
Melody MacDuffee and Craftsy
Subscribe to Inspirational Beading
Get inspired on Facebook and Google+


Saturday, October 4, 2014

The Ugly Stepsisters Necklace

Ugly Necklace Contest 2014 Entry

Sometimes bad news can also be good news, if you look at it the right way. It’s always a bit amusing to ponder whether or not making it into the finals for the Ugly Necklace Contest would truly be a good thing. Perhaps it’s great to be incapable of making something truly hideous.

This year’s finalists were recently chosen, though they won’t be unveiled until later this fall. I had really hoped that my concoction would make it into the voting round this year, so I'm a little disappointed. It was definitely a thrill to learn that I made it into the first draft - a little farther than last time. I’ll need to go back to the drawing board and think of ways to layer on even more ugly for the next contest.

For the 2014 Ugly Necklace Contest, artists were asked to include two strands in their piece, along with at least 75% beads overall. This worked out really well for the design that I had started planning long before the new rules were announced. Keeping with my favorite practice of pouring a lot of my unfinished projects and leftover scraps into my Ugly Necklace entry, I decided to use a pair of beaded doll dresses that I had experimented with. I had a brief phase where I really wanted to make non-wearable beadwork, and I thought tiny clothes would be a fun place to start. The beadwork turned out great, but the dress designs definitely did not.

Since the dresses were so ugly to start with, I thought they’d make a great contribution to my entry. I also wanted to find a way to include as many of my leftover bead baggies as I could. After so many years of beading, I had a huge collection of them. What better way to use them up?

I thought Ugly Stepsisters would make a great name for my necklace, so I reinforced and decorated the bead bags with magazine cut-outs of eyes, lips, and shoes to give it a Cinderella theme. Bringing that particular section together was a lot of work, especially stitching through it, but it was totally worth it. To complete the strands, I incorporated some herringbone rope, leftover bead mixes, recycled sari silk, cotton cord, and some of my least favorite beads.

Cinderalla Themed Bead Bag Concoction The Ugly Stepsisters Necklace


Voting for the world’s ugliest necklace begins in early November, through December 15th, 2014. Check out Land of Odds to see previous winners, or learn more about entering a piece in the next International Ugly Necklace Contest. I promise you'll have a blast!

Copyright 2014 Inspirational Beading
Subscribe to Inspirational Beading
Get inspired on Facebook and Google+


Wednesday, September 3, 2014

Work in Progress: Fall Fail Cuff

I’m way behind in my goals this week for beading and for blogging. It’s one part day job overload, one part back to school shopping, and one part beader’s block. (It’s a good thing the shopping part was really fun, because our teachers have been on strike since June and the actual going back to school is postponed until further notice).

Over the past week or so, I’ve been trying to recreate the semi-freeform mosaic cuff from a while back, using Java glass, vintage white hearts, and 8/o seed beads. I don’t know if it’s the materials or just bad luck, but I haven’t had any success. Last time, the beadwork just fell into place, but this time around I’ve had to take apart several attempts and start from scratch. I’ve still got two of my four failed starts to frog before moving on to something else.

Fall Color Cuff Frogging in Progress


This project has taken up so much time, and I don’t want to continue fighting with it when there are more exciting projects to make. I’m hoping that I’ll find my motivation again once I get some new beads on the tray. It’s too bad, because the colors are pretty awesome. I’ll have to keep them in mind for a fall themed project in the future - probably a necklace.

What are you working on this week?

Copyright 2014 Inspirational Beading
Subscribe to Inspirational Beading
Get inspired on Facebook and Google+


Tuesday, June 17, 2014

Broom Beads and Freeform Peyote

Congratulations to the winner of this month’s bead giveaway, Judy, and thank you so much to everyone who entered. For this draw, I asked about how you would use a random mix of assorted broom beads (a mix made from spills and/or leftovers). As always, your answers were varied and inspiring.

Broom Bead Mix


Judy and many other readers suggested freeform peyote stitch as a great way to use up an eclectic selection of beads. I couldn’t agree more! Working freeform can seem intimidating at first, but once you learn to let go, it becomes incredibly liberating and meditative. Plus it’s a great way to use up odds and ends. Although there aren't any specific steps for freeform, there are a lot of resources for anyone wanting to give it a try. I’ve collected a few excellent "tutorials" for freeform peyote projects with lots of valuable tips for beading outside the lines. If you haven’t tried it before (or you’ve tried and lost the knack) first check out some excellent advice from the Bead Mavens: All About Fredform Peyote

Freeform Peyote by Whimbeads


Freeform Peyote How-To by Whimbeads.com
Freeform Peyote Feels So Wrong But It’s So Right by Beading Daily
Freeform Peyote Necklace Tutorial and
Freeform Geode Bezel Necklace Tutorial by Beading Arts
and my personal favorite, Starting a Freeform Peyote Bracelet by Baubilicious

Do you like to use freeform peyote? What’s your favorite type of project?

Copyright 2014 Inspirational Beading and Friends
Subscribe to Inspirational Beading
Get inspired on Facebook and Google+


Monday, May 26, 2014

Inspired Beader: Cheri C. Meyer

Freeform Bracelet and Earrings by Cheri C. Meyer

Working with seed beads gives us unlimited possibilities for color and texture, and nobody combines them quite like beadwork artist Cheri C. Meyer. Her freeform bracelets, watches, and statement necklaces are something to behold.

Inspirational Beading: When did you first get started with beadwork?

Cheri: I was a creative kid with a big imagination growing up on a farm in northern Minnesota. My siblings were much older than me so I had a lot of time by myself to explore, play and use that imagination. The art of playing and creating was and is high on my “to do” list. I have been making jewelry for over 30 years and about nine years ago discovered bead weaving. I fell instantly in love with this ancient technique; the weave locking beads together, mixing colors, making up designs with color, the texture from the woven beads and making the art of this bead weaving technique my own.

Inspirational Beading: Do you remember your first piece? Where is it today?

Cheri: Yes I have the free form beaded bracelet and I wear it! I remember how difficult it was to make, manage the thread, when and where to place beads. I concentrated so hard on making it perfect and to look exactly like the example that I lost all the fun I wanted to experience. I learned something about myself from making that first bracelet; my brain does not work well following someone else’s pattern. But once I started to let go of all those expectation and discovering my own rhyme the joy and excitement started, thing fell into place.

Early Freeform Peyote Beadwork by Cheri C. Meyer


Inspirational Beading: What technique do you turn to the most?

Cheri: All my work is done with the peyote stitch and I free form all my designs. I usually have a special stone, piece or color I want to work with, so I gather my seed beads and other embellishments that I will use and start to bead. My design process is pretty intuitive, I have learned to let go of most expectations, focus on my inner voice and let it take over the design process, and it has never been disappointing. It’s also a process I have learned to love, its meditative, each new bracelet is fresh, exciting and one of a kind because there is no actual pattern to follow accept for the one that was inspired inside me, I take risks with my designs and that is also exciting.

Inspirational Beading: Where do you look for your favorite inspiration?

Cheri: Nature is my favorite inspiration, different landscapes when I travel; looking closely at how nature mixes its colors together and of course the stones nature produces. Also, going on nature walks, I come home with tons of ideas and sometimes I even find something I can use in my jewelry. I’m inspired by all beads, different cultures and their traditions, photos from the past, photos of nature, the southwest, vintage buttons and art of all forms. Pinterest, a photo sharing site, has also become one of my favorite places to go and it right from my computer. My boards reflect wonderful color mixing ideas, awesome nature photos, and art and just about anything imaginable for that inspirational dose.

Freeform Peyote Cuff by Cheri C. Meyer Turquoise Statement Necklace by Cheri C. Meyer


Inspirational Beading: What’s the most interesting or unique thing about your design process?

Cheri: They are all one of a kind because I make them up; all my jewelry is created from how I see the world, what inspires me and the result is a fun, enjoyable and satisfactory process. This intuitive process is letting my inner guide take me through the process when making a piece, no right or wrong, just having fun, trusting and expressing myself, there is no limit on what I can create or use in my jewelry. My hope, when others see my jewelry is to be inspired, to trust their own instincts and to think outside the box.

Inspirational Beading: Do you have a favorite color to work with?

Cheri: I love all earth tones, but have learned to use all colors and love them. My gift and favorite thing is mixing colors, I like taking chances when it comes to mixing those colors together!

Inspirational Beading: What are some of your favorite accent beads?

Cheri: I love Czech glass, they do a beautiful job with a large variety of colors, styles and their history of making glass beads is so interesting. Working with a variety of colors and objects is my favorite thing. I don’t limit myself; there are endless possibilities from meaningful stones, metal, fiber to found or handmade pieces or focals. I could walk a beach and find a stone I could use in a design or a really big find would be a piece of sea or tumbled glass. From a walk in the woods I have used birch bark I have found on the way. Also reusing old jewelry, vintage buttons or just someone else’s junk or throwaways, I have used colorful yarn, fossils and I have done metal work to incorporate into my bead weaving. Whatever comes along my path I will notice and process how I could use it in a design?

Freeform Peyote Cuff by Cheri C. Meyer

Inspirational Beading: What is the most exciting design in your shop right now? What makes it special?

Cheri: It’s hard for me to choose just one but, with this new listing I used the vintage button focal to inspire the beading design for the bracelet. I reused a piece from the past and gave it a new life with a bit of color. Something so simple but yet I found it fun and exciting to create.

Inspirational Beading: Who do you hope to inspire with your work?

Cheri: Anyone who wants a dose of inspiration around their wrist! I have worked with men, women, ages 10 to 90. Each piece is a part of me; I’m sending the beauty that I see and a little piece of art into the world. All my pieces have a name with a special message to inspire and empower.

You can see more of Cheri’s freeform designs in her Etsy shop, and website, CheriCMeyer.com. To see the latest inspirations from her workspace, following along with Cheri’s blog, and on Pinterest.

Copyright 2014 Inspirational Beading and Cheri C. Meyer
Subscribe to Inspirational Beading
Get inspired on Facebook and Google+


Tuesday, April 29, 2014

Wear It Twice: Totally Random

Themes and palettes are all well and good, but sometimes it’s fun to just throw out all the rules. As I’m preparing all of the details for my submission to this year’s Ugly Necklace Contest, I’ve been craving some more eclectic and freeform designs. And now that heavy coat weather is over, it’s also a good time to experiment with layered outfits and wild styles. With this idea in mind, I went in search for some interesting, exciting, and eye catching pieces to pair with a great statement necklace.

Mix Not Match


I started with a chunky multi-strand bead and chain necklace. With a great mix of neutrals, it would be that much more fun to play with patterns and textures. For each outfit I combined pieces that had prints or patterns, with a few complementary colors to bring out the personality in the necklace. I also added lots of chunky bracelets, a few with some great examples of trade beads at work.

If you’re in the mood to let your beads run wild, here are a few tutorials for similar designs in necklaces and bracelets:

Trail of Turquoise Necklace Project


This Trail of Turquoise necklace project from FusionBeads.com is the perfect combination of chain and chunky beads. The soft colors work harmoniously with the metals - for extra fun, try adding some striped beads!

For a more traditional approach, combine floating beads and chain in a cascade necklace from HowDidYouMakeThis.com

Daggers and spikes add even more texture in the Gulf Stream Necklace project from Artbeads.com

Like the idea, but want it a little more demure? Pair a handful of bold beads for a smaller statement with a Multistrand Statement Necklace tutorial from HappyHourProjects.com

If you're not comfortable with freeform but want the look, start with a simple technique and add lots of bead varieties. The Vegan Wrap Bracelet from Beadaholique.com provides a great place to start.

Layering bracelets is a great way to add personality to any outfit. The simple seed bead Stratum Bracelet tutorial from AuntiesBeads.com projects lots of color in a totally stackable size.

Natural elements in jewelry look great when they're big and bold. The combination of links, leather, and big beads in Live In Art's Chunky Bracelet Tutorial really delivers.

And here are my favorite Polyvore collages features some of this month’s picks:

Sin título #939


Untitled #1794


Casual Walk *No Backgrounds


What’s your favorite freeform technique?

Copyright 2014 Inspirational Beading
Subscribe to Inspirational Beading
Get inspired on Facebook and Google+


Tuesday, April 22, 2014

Mood Board: Fiesta

Although I love all four seasons just as much as anyone, as far as I’m concerned the months of the year are best divided into two categories: those when you can wear shorts, and the rest. So now that Easter is behind us, I’m ready to put away the pretty pastels and bring on the heat!

For this month’s mood board, I’ve refined the look a bit, and reserved the bead picks for their own mosaic. I started with a sort of Cinco de Mayo theme in mind, and searched for exciting statement pieces, hot colors, and a hint of natural goodness. With so many multicolor and mixed media jewelry pieces to showcase, I chose a simple but still interesting dress for a background. The huge daisy print is definitely a great show-stopping complement to the full-texture jewelry.

Fiesta


In a beaded design, this theme could be carried out not just with color, but with carefree abandon. Lots of unique elements, some freeform techniques, and a mix of materials would make the look. For this mood, I chose lots of multicolored beads and mixes, then added some bright pops of color and a few more of those natural elements. Honestly, it was a challenge not to just look for the most exciting bead mixes and those with a multicolored finish. This theme really calls for some big statement beads to bring everything together. These are my picks for perfect summer explosion designs:

Summer Fiesta Bead Inspirations

1. Red Jasper Seed Bead Mix by Spirit Bear Beads
2. Murano Diamond Pendant from Artbeads.com
3. Ashanti Glass Disc Beads from Happy Mango Beads

4. Saffron Recycled Glass Rounds from Auntie's Beads
5. Czech Glass Ladybugs from FusionBeads.com
6. Paper Flower Lampwork Beads by Mermaid Glass

7. Rainbow Mix Seed Beads from Beadaholique
8. Chili Pepper Glass Beads from Strum and Sparkle
9. Multicolor Sari Silk Ribbon from Lima Beads


What kinds of beads are you in the mood for this month?

Copyright 2014 Inspirational Beading and Friends
Collage Hosted by Polyvore.com
Subscribe to Inspirational Beading
Get inspired on Facebook and Google+


Friday, April 11, 2014

Medallion Pendant Collaboration

It’s time to reveal the secret behind my new line of bead embroidered pendants! So far this ongoing project has been one of my absolute favorites, and I hope to continue it for as long as I can. It all depends on my new beading partner.

Several weeks ago, I was reading an article about a mother-daughter art team that creates the most unusual and exciting sketches. First Mica Angela Hendricks takes some portrait inspiration from vintage photos. Then she lets her daughter fill in the rest of the picture with her limitless imagination. Mom adds a bit of color and an amazing work of art is born.

Spring Pharaoh Embroidered Pendant Mermaid Print by Mica Angela Hendricks and Daughter


I loved the prints, but it was the collaboration that really caught my attention. I immediately wanted a piece of that creativity for myself. I turned the idea over and over, hoping to come up with an teamwork method that I could use with my own designs. Then I had it! Embroidered medallions are quick to make, and offer a design process that would allow me to involve my favorite munchkin without expecting him to work a needle.

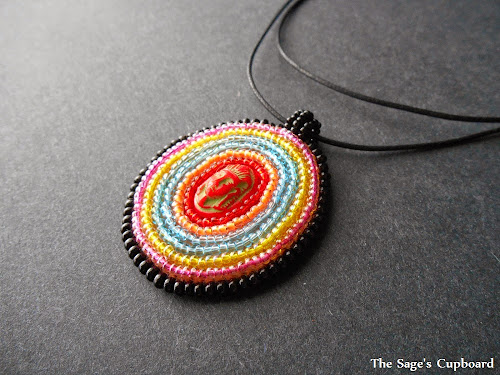
He was really excited at first, and it only took a few seconds for him to make his first selections. We start with the focal bead, which he chooses from 3 or 4 options that I provide, rotating through my collection of coins and cabochons. Then he picks a felt color and the first round of seed beads. One by one he selects all of the following rows, and I keep on adding color until he tells me it’s done.

Earthy Blue Medallion Pendant Snow White Embroidered Pendant


Not only has the project been a great way for us to do something together, but we’re both learning a lot. At his age, the names of colors are particularly interesting, and it’s fun to watch him catalogue them for future reference, then bring them out again when it’s time to choose the next round. Robin’s egg is a favorite right now.

For me, it’s been another experience in letting go, just like with the Ugly Necklace series. There have been a few times when I thought his color choices crazy, until they absolutely worked. I've learned to be a lot more trusting, and it’s awesome to be able to say to him “You made this, and it’s perfect!”.

Copyright 2014 Inspirational Beading
Subscribe to Inspirational Beading
Get inspired on Facebook and Google+


Tuesday, March 12, 2013

Branch Fringe and Coraling Tutorial

Chimera Fringe Necklace

Like peyote stitch bezels, fringes and embellishments are one of the fantastic ways that seed beads can cross over into other types of jewelry design. Even if you’re not a die hard bead weaver, these techniques can add something extra to your designs.
Branch and coral fringe are two versions of the same technique, and one of my personal favorites for creating unique pieces with lots of personality. By changing the colors, lengths, and patterns of your fringe, you can recreate the look of all manner of natural shapes - like feathers, pine boughs, and sea life.

We’re going to take a look at the very basics of branch fringe and coraling, worked in threes. You can always adapt these fringes for longer lengths at each step, but threes create lush, uniform embellishment with no guesswork. For clarity, each component of the fringe is also grouped into threes - the base beadwork or trunk, the basic fringe or limbs, and extra fringes that we’ll call branches.

Branch and Coral Fringe Components


How to Weave Basic Branch Fringe

Starting from an existing piece of beadwork, pick up any length of seed beads in multiples of three. This will make up the trunk portion of your fringe. Next, pick up seed beads in multiples of three, to make the first limb. Add one more bead at the end. This will be the tip of the fringe. If you’re working with a specific pattern or color palette, remember that this second bead addition will appear separate from the trunk section.

Starting Branch Fringe Embellishing Branch Fringe Beading Tutorial


Skipping the last bead added, pass through all of the beads just picked up, plus the following three beads in the trunk. Pull your thread snug, and you’ve got the first limb of your fringe.

Pick up another group of three or more seed beads +1 and slide them down to the beadwork. Skip the last bead added, and pass back through all of the beads in the new branch, plus the next three beads in the trunk.

How to Weave Branch Fringe Basic Branch Fringe Technique


The limbs and branches will rest every which way as you stitch. When a full fringe is complete, you can gently nudge them into the positions that you like - alternating from one side to the other, for example.

For variation, you can increase or decrease the number of beads in each limb, add accent beads, or include daisy chain stitches or leaf fringes to all or some of the limbs.

Pine Bough Necklace with Branch Fringe


How to Weave Basic Coral Fringe

Coral fringe is worked in the same way as branch fringe, but with extra additions of beads. Start by picking up seed beads in multiples of three to reach the desired fringe length. The finished strand will be a few millimeters shorter, especially if you are using a stiff thread like Fireline.

Pick up four more seed beads. Skip the last bead added , and pass through the other beads just added, and the next three beads in the trunk. Pull snug.

Coral Fringe Beading Tutorial Coral Fringe Beadwork Tutorial


With coraling, you can make limbs of varying lengths, with a different number of branches on each. To start, pick up seven seed beads for the limb, and four seed beads for the first branch. Skip the last bead added, and pass back through the remaining branch beads, and the next three beads in the limb.

To finish this section, pick up four branch beads, skip the last bead added, and pass back through the next six beads, and the following three beads in the trunk.

How to Weave Coral Fringe Coral Fringe Beading Technique


Notice how the original branch added at the end of the fringe is now higher than the new fringe, because the new limb is longer. You can work this into your pattern, or make the first few stitches short. Whenever longer limbs are added, they will hang past the previous ones, which can make for some wonderful organic looks.

Basic Coral Fringe Coral Fringe Variations


When you’ve added new limbs and branches along the trunk, you’ll have a lovely strand of fringe. To make it even more lush, increase the number of beads in the limbs - in a pattern or at random. You can also work in extra limbs. Instead of picking four branch beads, pick up seven or more beads for a new limb, and add branches as usual.

Cornucopia Coral Fringe Necklace with Accent Beads


Copyright 2013 Inspirational Beading
Subscribe to Inspirational Beading
Get inspired on Facebook and Google+


Blog Widget by LinkWithin
Fire Mountain Gems and Beads

Inspiration Topics

accessories amulet Ancient Worlds Modern Beads animals April's Army art ArtFire astrology astronomy autumn awards awareness bangle beach Bead Inspired Bead Shops bead soup bead spotlight bead stash Bead Trays beaded beads beading theory beads belt bezel birthstones black blog spotlight blue boho bone book spotlight bracelet Bracelet A Week branch fringe brick stitch brown bugles buttons cabochon ceramic chain maille challenge charity chevron chain christmas collar Collections color Color Ideas color triads conservation craft shows crafts crochet crystals cuff Culled Beads current events Current Faves daggers Daily Sets daisy chain Delicas Destash drops Dutch spiral earrings Egypt Egyptian Gods embellishing embroidery environment etsy exotic fair trade fantasy fashion Favorite Beads Favorite Techniques feminine fibers film findings fire polish fixtures Flashback Test flickr inspiration flowers food found object free form fringe Geek Jewels geekery gemstones geography giveaway glass gold gray Greece green herringbone hex cuts history holiday home decor insects inspiration tip inspired beader Inspired by... Inspiring Links ivory Jewelry Stash knitting ladder stitch lampwork lariat leaf fringe leather lights literature loomwork macrame magatamas Master Class Medallions metal free metalwork Mini Collar a Week mixed media mixture Mood Board MOP multi-color multi-strand music natural beads nature necklace Necklace a Day Nepal chain netting New Beads ocean ombre orange paint paper patterns pearls pendant peyote photography Picasso finish pink Pinspiration PMC polymer clay poster sketch purple quick inspiration rainbow RAW red resin ring Ring a Day rivoli Rome Russian spiral scarf science seed beads shell silver soutache spiral rope spring square stitch St. Petersburg steampunk stringing stripes summer tagua TBT The Elements thread Tilas Time Capsule tools trade beads triangle weave tribal tropical turquoise tutorial two-hole beads Ugly vintage Wear it Twice weather white winter WIP wire wishlist wood World Beaders yellow
Blog Home * About * Beading Tutorials * Advertise

Learn About Sponsoring Inspirational Beading with Project Wonderful
Affiliated With ShareASale.com and Amazon.com