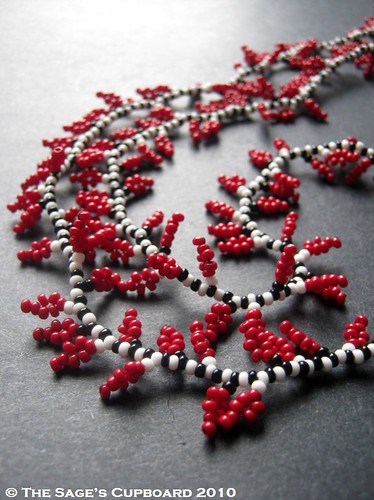
Fringe is a beader’s best friend. Whether you specialize in embroidery, loom work, or beadweaving, chances are, you’ll want to add a bit of trim to your designs from time to time. There are many different techniques and styles of fringe to choose from. One of the easiest and most interesting, is leafy fringe.
Making a simple beaded leaf requires only two quick stitches, and can be done with nearly any type of bead that can be used for weaving. Round seed beads provide the best leaves, and you can create different sizes simply by increasing the number of beads used.
To make a basic fringe leaf:
String 5 seed beads, and slide them down to your beadwork. Skipping the last bead added, stitch down through the next bead in the stack, and pull snug. The final bead should now be locked in place at the top of the stack.
 If you notice some slack thread in the stitch, try pushing the top bead down while you gently tug the needle end to snug up the loose thread.
 Pick up 2 seed beads, and stitch through the first seed bead added to the stack, and continue back into your beadwork. When you pull the thread snug, a little leaf will form.
 You can create any size leaf using a basic formula. The number of beads picked up in the second stitch is equal to the original stack, minus three. So if you start with seven beads, you will pick up four beads in the second stitch. If you start with six, you will add three beads.
 Smaller leaves look the most realistic. As you increase the number of beads, the leaves become loopier, with a wider gap in the center. You can also increase the number of beads passed through in the first stitch for a different shaped leaf, or increase the number of beads at the base for a longer stem.
Leaf fringe can fit in just about anywhere. You can add it to rows of backstitch to add texture to bead embroidery, or combine it with branched fringe or corralling for a leafy vine fringe. You can even use beaded leaves to finish the edges of flat beadwork like peyote or herringbone weave.
 More fringed project ideas:
Fringe Bracelet by Whimbeads.com
Beadwork.About.com Leaf Fringe Tutorial
Christmas Lights Bracelet
Seascape Necklace Project
Want to try out some new techniques, or add some new must-haves to your bead stash? Until the end of February, you can use this exclusive coupon code for 15% off any sized order from Artbeads.com: ZZ-DESIGNER-0211
Just copy and paste the coupon code and apply it during checkout for your discount. Happy beading!
Copyright 2011 Inspirational Beading
Subscribe to Inspirational Beading
Making a simple beaded leaf requires only two quick stitches, and can be done with nearly any type of bead that can be used for weaving. Round seed beads provide the best leaves, and you can create different sizes simply by increasing the number of beads used.
To make a basic fringe leaf:
String 5 seed beads, and slide them down to your beadwork. Skipping the last bead added, stitch down through the next bead in the stack, and pull snug. The final bead should now be locked in place at the top of the stack.


Leaf fringe can fit in just about anywhere. You can add it to rows of backstitch to add texture to bead embroidery, or combine it with branched fringe or corralling for a leafy vine fringe. You can even use beaded leaves to finish the edges of flat beadwork like peyote or herringbone weave.

Fringe Bracelet by Whimbeads.com
Beadwork.About.com Leaf Fringe Tutorial
Christmas Lights Bracelet
Seascape Necklace Project
Want to try out some new techniques, or add some new must-haves to your bead stash? Until the end of February, you can use this exclusive coupon code for 15% off any sized order from Artbeads.com: ZZ-DESIGNER-0211
Just copy and paste the coupon code and apply it during checkout for your discount. Happy beading!
Copyright 2011 Inspirational Beading
Subscribe to Inspirational Beading


What a great project! I will have to keep those in the to do stack!!!
ReplyDeleteGreat tutorial! Thanks!
ReplyDeleteI included this post in a tutorial link list on my blog today. Enjoy. :)
Saturday Link List: the January tutorial edition
Thanks, Rose!
ReplyDelete