I can barely believe it, but week 52 of the Bracelet a Week challenge has arrived, and everything is wrapped up in a neat little bow. Bracelet number fifty-two is complete, and there are only hours left until the end of the year. Thank you so much for joining me and encouraging me during this challenge!
For the final bracelet, I wanted to do something colorful and celebratory. I’ve made a habit during these challenges to use rainbow themes for final designs, and I didn’t see any reason not to do it again this time.
Because this challenge is ending at the start of the New Year, I was inspired to create something that might resemble stars and fireworks. I started with a selection of Swarovski bicones in bright birthstone hues. The variety of colors and their characteristic sparkle would easily provide that flashy effect that I wanted.
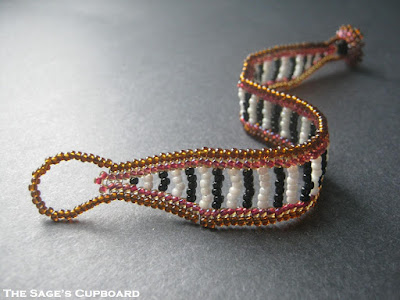
Although I had a little more time for beading this week compared to Christmas, I still had a pretty tight deadline. I know from the Necklace a Day challenge that one of the easiest ways to make a design go faster is to use larger beads. So, I paired my crystals with 6/o silver lined crystal seed beads, and whipped up a simple but sparkly herringbone cuff.
I added one crystal every two rows in random places, trying not to repeat the same pattern of colors as I went. Once the bracelet started coming together, I realized that it looks a little like white fruit cake – even more appropriate for this time of year, and certainly a fun treat for celebrations.
The overall concept for this cuff – using almost entirely 6/o silver lined crystal seed beads – came about when I was contemplating my design challenge for 2012. I’ll be ready to reveal it in January, as soon as the New Beads challenge is wrapped up. November’s necklace is a little delayed, but coming along nicely, and December’s beads are in the mail. Within a few weeks, I’ll have one more goal to check off the list.
Farewell to 2011! What are your crafty resolutions for the New Year?
Copyright 2011 Inspirational Beading
Subscribe to Inspirational Beading
Get inspired on Facebook
Showing posts with label Bracelet A Week. Show all posts
Saturday, December 31, 2011
Wednesday, December 28, 2011
A Bracelet a Week: Unexpected
Have you ever wished that you could make time stop, so that you could get a little more work done? That’s a little how I felt over the week of Christmas, as so many different deadlines and obligations closed in. Not only is it the busiest work week of the year, but I was spending most of my free time rushing to finish a handmade Christmas gift. So I needed a bracelet project that I could finish in one sitting, and check one more task off the list.
One of the quickest stitches to work is St. Petersburg chain, so I decided to take this opportunity to use a few more of my new 8/0 seed beads, and whip up a quick wrist wrap. Instead of making a complicated pattern or palette, I chose simple black and turquoise. Even though the design and colors look fairly ordinary, they seem to make a big impact together.
As I was stitching the first row, and looking forward to the end of the project, a little light bulb came on. What if the button were completely different from the rest of the bracelet? It would certainly be new and interesting, but I also hoped that it might lend a bit of mod-podge flair. Plus adding a contrasting button would give the bracelet an unexpected and welcome focal.
It was a little tough choosing colors for the button. I definitely wanted red or green - but not both. I finally decided on white lined peridot with a brown horn druk base, and I couldn’t be happier with the result. I look forward to testing out more combinations of contrasting button colors in the New Year!
Copyright 2011 Inspirational Beading
Subscribe to Inspirational Beading
Get inspired on Facebook
Tweet
Topics:
black,
bracelet,
Bracelet A Week,
buttons,
green,
St. Petersburg
Monday, December 19, 2011
A Bracelet a Week: Yellow
Last week I couldn’t resist giving in to the temptation to make another herringbone cuff. Apart from how easy it is to create simple repeating patterns with this stitch, I love how quick it is to finish the ends and cover up the bridge threads, since the beadwork moves vertically instead of horizontally like peyote stitch, and the bare edges are small.
Perhaps I’m getting a little weary of gray winter weather, but I’ve been craving some yellow seed beads, so I built my palette around two shades of bright and lemony hues. I added transparent cobalt for a bold contrast, but something else was needed to fill things out. I considered green for awhile, before finally deciding on a pale shade of transparent orange.
There are only two more bracelets left in this challenge, and I can’t decide what to make! Let’s hope that inspiration strikes soon. In the meantime, happy holidays!
Copyright 2011 Inspirational Beading
Subscribe to Inspirational Beading
Get inspired on Facebook
Tweet
Topics:
blue,
Bracelet A Week,
cuff,
herringbone,
yellow
Wednesday, December 14, 2011
A Bracelet a Week: Stripes and Wine
This week I was in the mood to work with primarily seed beads. I’m not sure why, but the accent bead sections of my bead stash just aren’t inspiring of late. I tried to steer clear of yet another herringbone cuff - though I’m starting to think of them as a signature design. Instead, I thought I’d use a different style of herringbone.
Graduated, or bridged herringbone bracelets were a favorite project when I first started beading. They’re simple to do, but look unique and complex. Plus it allows for the combination of many colors without creating an elaborate pattern for them.
I’ve been trying to stick to my Egyptian and tribal themes whenever I can, so I started with black and white, which would make up the striped center. I chose transparent rootbeer for the base, but the palette needed a little something extra.
I noticed that my stash of mauve lined topaz was getting low, but there would be more than enough to finish this bracelet. So I added it to the mix, and found that the brown and red look delicious together - like wine and chocolate. Or maybe I’m just looking forward to holiday treats?
Copyright 2011 Inspirational Beading
Subscribe to Inspirational Beading
Get inspired on Facebook
Tweet
Topics:
bracelet,
Bracelet A Week,
brown,
herringbone,
red
Friday, December 9, 2011
A Bracelet a Week: River Stripes
When I sat down to write about last week’s bracelet, it suddenly occurred to me that this challenge is nearly at an end. It seems that out of nowhere, the end of the year is approaching - there are only a few weeks left to go. It hardly feels like an entire year has gone by, let alone nearly fifty two bracelets.
I had no idea how difficult this challenge would be at the end, with so many changes to my schedule. I would love to make something big and elaborate for the last leg of this journey, but I don’t know if I can find the time. It would be nice to finish off with the best design yet, but I’ll be happy with whatever inspiration, and opportunity, allows.
In any case, I was a little worried that the designs over the past few weeks have been a little dry. While I’m certainly not wanting for ideas, I have a lot less time to execute them within the tight deadlines of a weekly challenge. For the most recent piece, I set out to do something that fits my current style, but wasn’t previously attempted. In the end, I turned to a stitch that I haven’t used in a really long time - since I first started beading, in fact.
Using plain, ordinary flat brick stitch, and a combination of fun bead colors and shapes, I worked up a simple cuff that looks so much like a rag rug that it makes me think of early 1980’s kitchens, flying carpets, and macramé wall hangings all at once. The combination of greens and blues, with a hint of black and white, has a sort of watery effect, like jewels at the bottom of a lagoon.
I’m very tempted to use this stitch one more time this year, because it was so much fun to play with a simple pattern and an even simpler stitch.
Copyright 2011 Inspirational Beading
Subscribe to Inspirational Beading
Get inspired on Facebook
Tweet
Topics:
black,
Bracelet A Week,
brick stitch,
cuff,
green,
turquoise
Sunday, November 27, 2011
A Bracelet a Week: Quick Jade
This week I needed a bracelet project that I could finish and photograph in the same day - something quick and simple. Ironically, the piece that I chose to make used a large assortment of beads, which made my work space look a lot more complicated than the actual bracelet-to-be.
I decided to go with an easy three strand bracelet, and what better place to start than with an Egyptian hieroglyph bead? I’ve already done one with orange, so I decided to create its mate in jade green. Although the opportunity to find another new palette for these hieroglyph beads was tempting, I couldn’t resist using some of the same beads from my jade necklace. I really loved the combination of olive greens with turquoise and topaz.
Unfortunately, I had used up all of my green Swarovski bicones for the necklace, so I had to make a few adjustments to the palette for the bracelet. Once I got going, I found all kinds of fun things to add, and ended up with a very different look. The bracelet has a much softer mood to it - a bit more playful.
Do you like to use the same palettes over many projects?
Copyright 2011 Inspirational Beading
Subscribe to Inspirational Beading
Get inspired on Facebook
Tweet
Topics:
bracelet,
Bracelet A Week,
Egypt,
green,
multi-strand
Wednesday, November 23, 2011
A Bracelet a Week: Time Piece
I find myself in a bit of a pickle this week - I’m four days behind with last week’s bracelet post, and the weekend is fast approaching. I’m going to count this as a slight hiccup in the challenge, only because I was able to finish the bracelet in the usual time. Photographs and posts are another matter.
I have discovered a new appreciation for beaders, bloggers and handmade sellers who carry on full time day jobs in addition to everything else! I used to think that there weren’t enough hours in the day to get everything done, and now I’m just happy to get the important things out of the way while everything else piles up.
I have been away from the bookstore business for a few years now, and I’m delighted to be back, despite the drastic changes in my daily schedule. I have a lot of reading to catch up on, and loving that as well. I forgot how much I missed having my nose in a book at every opportunity, and I finally have a reason to make use of Goodreads.
I have also discovered that the less time there is for beading, the more reluctant I am to do it. It seems that beading only feels worthwhile if I can devote myself to it totally. I’ve never enjoyed doing something in fits and starts. Things are going to be a little quieter here on Inspirational Beading as the holidays approach, but I’m still determined to keep this challenge going. There are only a handful of weeks left, after all. I hope to see you at the finish line!
I decided to let color be my guide instead, and turned to one of the western inspired palettes I had created earlier this month. I really loved the look of jonquil and aqua cube beads with transparent ruby, and created a palette very similar to the original. The cube beads inspired a new bracelet shape, with a square stitch base and bands of right angle weave. I love the watch-like shape of the beadwork, and the simplicity of the three bold colors. It was a risky project, but turned out great!
Copyright 2011 Inspirational Beading
Subscribe to Inspirational Beading
Get inspired on Facebook
Tweet
Saturday, November 12, 2011
A Bracelet a Week: Stone Spiral
This week I was in the mood to test out some of my newer 8/o seed bead colors. One of the prettiest stitches for larger seed beads is Russian spiral netting; the simplicity of the stitch allows the beads themselves to stand out, and makes it a great technique for mixing up colors and basic patterns.
I combined turquoise green and dark beige 8/o seed beads, and gave them a background of jet black. Alternating the bigger beads in each row gives a speckled, almost striped look to the bracelet. Although none of the beads have a Picasso finish, the texture of the beadwork and its colors almost has the same effect overall. Even with the flashes of bright green standing out starkly against the black, I find that it has an earthy quality - like a pebble on the beach.
Copyright 2011 Inspirational Beading
Subscribe to Inspirational Beading
Get inspired on Facebook
Tweet
Topics:
black,
bracelet,
Bracelet A Week,
green,
Russian spiral
Saturday, November 5, 2011
A Bracelet a Week: Winter Mint
I had so much fun weaving last week’s striped herringbone cuff, that I decided to keep going and make another with a new palette. I wanted to do something that was a little more Egyptian-looking, so I started my palette with navy blue, turquoise and white. It needed a little something extra, so I tossed in avocado green for a dash of personality.
Unlike the first bracelet, this palette didn’t have a smooth graduation, so I switched up the pattern and did double columns in staggered rows. Instead of a toggle clasp, this time I used a cobalt AB druk to make a button, which goes really well with the navy blue seed beads.
Though this cuff is a little bit wider than the first, I didn’t expect it to take much longer than the autumn colored version. The beadwork seemed to drag on for awhile, and I suppose I was more excited about the idea of another herringbone project than the actual making of it. Next week’s bracelet might have to be something light!
Copyright 2011 Inspirational Beading
Subscribe to Inspirational Beading
Get inspired on Facebook
Tweet
Topics:
blue,
Bracelet A Week,
cuff,
Egypt,
green,
herringbone,
white
Saturday, October 29, 2011
A Bracelet a Week: Blazing Colors
Inspiration can come from a lot of different places, and sometimes it sneaks up on us suddenly and inexplicably. I can’t quite explain why, but this week’s bracelet was inspired by coloring books.
At some point, I was musing about something or other, and had a flash of a coloring page done in gradually changing shades of green, yellow, orange and beige. It was a tree line of sorts, and reminded me of the AMAV art coloring books that I used to love during summer road trips. The images started out simple, and got more complex and interesting with each page. I’ve searched high and low for them in recent years, but it seems that they are either no longer in print, or not available as single books like in the good old days.
I had a hard time shaking the image of the billowing colors, so I decided to build the palette, even though the time for fall inspirations is quickly passing by. I wouldn’t be able to completely mimic the shapes that I had imagined, but I came up with a pattern that would work well with the blend as well as the structure of herringbone weave.
Using an all transparent palette of emerald, lime, lemon, tangerine, sherbet, light topaz and dark topaz, I was able to capture the look of an autumn tree in the sun.
Copyright 2011 Inspirational Beading
Subscribe to Inspirational Beading
Get inspired on Facebook
Tweet
Topics:
autumn,
Bracelet A Week,
cuff,
green,
herringbone,
orange
Sunday, October 23, 2011
A Bracelet a Week: Leopard Print
This week I was in the mood for some more medallions. After experimenting with brick stitch and stick pearls, I wanted to take things a step further and combine lots of medallions into a single piece. To create a theme that would go with lots of circles, I chose a palette of black and topaz, with tortoiseshell druks for the medallion base.
This bracelet was a lot of fun to make. I added a loop of seed beads to either side of each medallion while adding the picot finish, and connected them together as I stitched. The best part was being able to incorporate a button clasp seamlessly into the design - it exactly matches the smaller circles in the chain, and completes the pattern as well!
Copyright 2011 Inspirational Beading
Subscribe to Inspirational Beading
Get inspired on Facebook
Tweet
Topics:
animals,
black,
bracelet,
Bracelet A Week,
brick stitch,
brown
Sunday, October 16, 2011
A Bracelet a Week: Papyrus
This week I picked up on my mission to remake old designs in new colors. I was craving something ‘easy’ - a design that I could just make and meditate to without having to map out a complex plan or count stitches. I’ve been meaning to use up the last of my bugles, so I mixed together black and ivory in a striped cuff.
I love the look of bright colors against black and white patterns. For this bracelet, I went with peridot and apple green. The bugles had me thinking of papyrus reeds, and the color combination turned out just right. It’s sort of electric and fresh, and I much prefer the subtle shade of ivory to a stark white - it seems to complement the greens very well.
This cuff, and the original blue version both turned out so nicely that I’m really looking forward to making more. I suppose I’ll be keeping an eye out for more bugles in the future!
Copyright 2011 Inspirational Beading
Subscribe to Inspirational Beading
Get inspired on Facebook
Tweet
Topics:
black,
Bracelet A Week,
bugles,
cuff,
green,
square stitch,
white
Saturday, October 8, 2011
A Bracelet a Week: Forty
Today’s bracelet is the first design in the last quarter of this year long challenge. I can’t believe the end is nearly here! There are still twelve more weeks to go, and I think the challenge is going to be a success.
This week I got a head start on a design that I’ve been pondering for some time. I wanted to recreate some Egyptian jewelry that I have long admired in a vintage issue of National Geographic. The article from December 1982 reveals some of the treasures and artifacts uncovered at a lost Egyptian outpost in the Gaza Strip.
After following leads on some grave robbers, archaeologists discovered a burial ground near Deir el-Balah that was suspiciously Egyptian. Four years later, they were given permission to dig, and found previously unknown settlements spanning several centuries and cultures. The final reveal was a small fortress from the time of Akhenaten and Nefertiti, which explained why so many of their early discoveries included Egyptian style housewares, jewelry and personal effects.
Among some of the most intriguing original finds was a set of jewelry in the sarcophagus of a man and a woman - dubbed Romeo and Juliet by the team. In addition to several rings and pairs of gold earrings were a handful of simple single strand necklaces. One featured tiny carnelian beads and gold palmette spacers - beautiful tree or leaf shaped beads.
It was this necklace that I wanted to recreate. I had hoped to use Indian white heart beads for the job. Their color, size and irregular shape would be perfect. I’ve had my eye on some from a favorite shop for awhile, but I’m also eager to pick up a few other unique bead strands, and I’m waiting until my budget has room for a spree. I was starting to get a little impatient with myself, so I went ahead without the white hearts, with the notion that I can always do a later variation with different beads.
To replace the gold palmettes, I needed something that would give the same protruding, fringe-like shape to the necklace. I had planned to use a combination of daggers and drops, but when I found some coppery stick pearls in a bead grab bag, I knew it was meant to be. At first I considered using the pearls and daggers together, but the coppery brown was such a nice complement to the different shades of ruby red glass all by themselves.
I was so happy with the way this piece turned out, that I had to make a bracelet to match. I didn’t want to do the obvious thing and make a multistrand bracelet that copied the necklace exactly. Instead, I started with a brick stitch medallion. Adding some bead loops to either side made it easy to tie on strands of stick pearls and druks with just the right amount of beads for a lightweight bracelet.
Copyright 2011 Inspirational Beading
Subscribe to Inspirational Beading
Get inspired on Facebook
Tweet
Sunday, October 2, 2011
A Bracelet a Week: Nile Orange
This week I was in the mood for a little color challenge. I’ve been eager to try out new palettes for the orange hieroglyph beads I purchased in August. The color is so intense, it’s hard to find just the right complements and contrasts for it.
I recently picked up some new turquoise blue druks, and turquoise green seed beads, which I thought would provide a nice background for one of these curious orange beads. As I went through my bead stash, building the palette, I collected all kinds of blues and greens. The different shades together have a sort of aquatic, boggy feel to them - like papyrus reeds along a river bank.
With so many different colors and shapes, I decided to keep things simple and use them in a three strand bracelet, with the hieroglyph bead front and center. I love the way the orange works with the hints of turquoise, and the darker emerald and cobalt beads really highlight the metallic green hieroglyphs.
Copyright 2011 Inspirational Beading
Subscribe to Inspirational Beading
Get inspired on Facebook
Tweet
Topics:
blue,
bracelet,
Bracelet A Week,
Egypt,
green,
multi-strand,
orange,
turquoise
Saturday, September 24, 2011
A Bracelet a Week: Queen Weret
This week I had some fun with something I don’t often use - bold, opaque colors. I usually avoid pairing different colors of opaque beads in a single piece, because I want to avoid that crayon-y, gift shop beadwork look. But with so many new Egyptian and tribal inspirations, I’m challenged to find the right balance of colors, shapes and proportions to make it work.
Opaque royal blue isn’t a new color to me, but I’ve had no desire to use it for years, until I decided to recreate the anklets of Queen Weret. My bracelet is actually a recreation of a recreation. No one will ever know for certain what Queen Weret’s jewelry really looked like. The materials used to string and weave her lovely beads were long gone when her remains were discovered, but Adela Openheim of the Metropolitan Museum of Art was able to reconstruct them with some educated guesswork.
I particularly like the anklet design from the Queen Weret jewels, with the enameled claw charms in the center, so I used these as inspiration. The palette of the original is blue, red, turquoise and gold. Most of my gold substitute colors are too transparent or flashy to work well with the rest of the palette, so I went with dark beige instead. I like the way it cools off the palette, makes it earthier, and balances the slight luster of the turquoise.
I used the same technique behind my Wavy Wedges bracelet, but without the waves. To mimic the charms, I added some drops and daggers to the center panel. They certainly don’t resemble the glass inlay of the original, but they complete the look all the same.
Copyright 2011 Inspirational Beading
Subscribe to Inspirational Beading
Get inspired on Facebook
Tweet
Topics:
blue,
Bracelet A Week,
cuff,
Egypt,
red,
square stitch,
turquoise
Saturday, September 17, 2011
A Bracelet a Week: Egyptian Coils
This week I had a lot on my plate, so I needed a bracelet design that would be quick and free of surprises. I decided to make good on my pledge to remake designs using different color palettes. I chose the coil bracelet from week 26 of the challenge - simple and sweet.
If you’re following Inspirational Beading on Facebook, you may have caught my new Show and Tell video. I shared a quick look at some new bead colors that I picked up recently, including transparent dark topaz seed beads, and turquoise druks. I decided to give these new colors a try, and see if I could bring out some more of the Mediterranean qualities in the original design.
I added some lustered turquoise seed beads to the mix, and the combination of colors is really pretty. It’s tropical and rustic and ancient all at once. The addition of the black and brown bead loops really completes the look.
Copyright 2011 Inspirational Beading
Subscribe to Inspirational Beading
Get inspired on Facebook
Tweet
Topics:
bracelet,
Bracelet A Week,
brown,
Egypt,
herringbone,
turquoise
Saturday, September 10, 2011
A Bracelet a Week: Double Double
This week I have another pair of bracelets to share, because I just couldn’t stop at one. You may have already seen a sneak peek at the first bracelet in yesterday’s chevron chain tutorial. I decided to make a second bracelet for two reasons. First, I was way too excited about the new Tila technique to wait until next week to share it with you, so I had to make another as a surprise. And, while I was working on the tutorial, I noticed something interesting about the pattern in the beadwork.
Luckily, I had just the right color of Tilas to make my idea work. These beads have been so versatile, even though I only have the two shades to work with. If you’ve been thinking about trying out Tilas, but don’t care for the price tag, I can assure you that one packet can go a long, long way.
So, I was looking at the interesting honeycomb shape of the first Tila cuff, noticing something funny about the shapes within the beadwork, and pondering how I could best take advantage of those shapes with the right combination of colors. It took some planning, some frogging, and eventually a leap of faith, but I ended up with a wonderfully spooky seed bead spinal column.
I’m even happier with the second bracelet, and not just because of the fun theme. I love the different look that the netting takes on with the pattern and color change, and it leaves me wanting more. I have put at least one more Tila double chevron cuff on my to-do list.
Copyright 2011 Inspirational Beading
Subscribe to Inspirational Beading
Get inspired on Facebook
Tweet
Topics:
black,
Bracelet A Week,
chevron chain,
cuff,
Tilas,
two-hole beads,
white
Saturday, September 3, 2011
A Bracelet a Week: Egyptian Stripes
This week’s bracelet design was a little lesson in choosing beading instinct over patience. After dressing up a pair of new Czech glass hieroglyph pendants, I wanted to try capturing one in a peyote stitch bezel, and use it in a cuff bracelet. This turned out to be easier said than done.
There just aren’t enough curves on these lozenge shaped beads to hold a traditional tubular peyote bezel. I didn’t want to spend a lot of time experimenting with increases and different bead patterns until I found a bezel shape that would work. It's not much fun, and I don’t like using up thread if there’s an easier solution.
Instead, I started with the standard 3 rows of 11/o beads, and added a row of 15/o’s on each side. Then I took advantage of the bead holes, and stitched it to the bezel base to hold in in place. I added a few more rows of beadwork to one side of the bead, to prevent slipping and make sure that it didn’t pop out of the bezel.
I love the way it turned out. The face of the hieroglyph bead is totally free of the beadwork, and sits in it’s jacket snugly. After adding some peyote stitch off the sides, I ended up with a really nice cuff that has a shape reminiscent of the scarab god Khepri.
Now to come up with a palette for the orange hieroglyphs…
Copyright 2011 Inspirational Beading
Subscribe to Inspirational Beading
Get inspired on Facebook
Tweet
Saturday, August 27, 2011
A Bracelet a Week: Triple Berry
This week’s bracelet was a fun diversion, and an experiment in color. One of my favorite beaders requested a tutorial for my Rocky Path bracelet, and I was more than happy to oblige. This meant making a new version of the design, and choosing a new color palette.
Because I only have a handful of Delicas to choose from, creating a new set of colors for this bracelet meant working around what I had - burgundy, black, gray or silver-lined red. The burgundy are my favorite, and since I had yet to try them out, I chose them for the base of this new bracelet.
I wanted to make a palette that would work with both the Delicas, and the shape of the beadwork, so I combined red, blue and transparent blue lined with red for a berry colorway. This time around, I stuck with just two bead sizes.
I was really excited to try out this design with a new set of colors, and see how it would come out. I saved a little time by incorporating the edging right into the peyote stitch, and ended up with a pretty interesting bracelet! I really like the way the colors and texture work together.
I only finished the bracelet with enough time to share it with you today, and now it’s on to writing up the steps to create it., along with the brick and square stitch button closure. If all goes well, I’m also hoping to create a beaded clasps compilation PDF, with all of my favorite metal-free closure designs.
Copyright 2011 Inspirational Beading
Subscribe to Inspirational Beading
Get inspired on Facebook
Tweet
Saturday, August 20, 2011
A Bracelet a Week: Fake Wrap
To mimic the look of beads suspended between leather cords, I turned to what is almost certainly my favorite technique - herringbone weave. By using a very small herringbone base, and adding an increase for 6/o seed beads, the same overall shape of leather wraps appears. My version is a bit chunkier, and the dimensions are a little different, but I think the effect is very similar.
Since this was just a little experimental prototype, I only made a seven inch bracelet. I’m keeping this bracelet for myself, and it is really fun to wear! In the future, I’d like to make some adjustments to the stitch sequence and try to make a new bracelet with a more polished shape. Hopefully, I can do this without adding any additional bead sizes to the center row, but it’s tough to get all those 6/o beads to sit neatly when they are stitched perpendicular to 11/o’s. If I can make it work, I’ll try a double or triple wrap variation.
In the meantime, I’m working on a brand new PDF tutorial along with next week’s design. And the color palette is delicious. See you next Saturday!
Copyright 2011 Inspirational Beading
Subscribe to Inspirational Beading
Get inspired on Facebook
Tweet
Topics:
bracelet,
Bracelet A Week,
herringbone,
red
Subscribe to:
Posts (Atom)
Inspiration Topics
accessories
amulet
Ancient Worlds Modern Beads
animals
April's Army
art
ArtFire
astrology
astronomy
autumn
awards
awareness
bangle
beach
Bead Inspired
Bead Shops
bead soup
bead spotlight
bead stash
Bead Trays
beaded beads
beading theory
beads
belt
bezel
birthstones
black
blog spotlight
blue
boho
bone
book spotlight
bracelet
Bracelet A Week
branch fringe
brick stitch
brown
bugles
buttons
cabochon
ceramic
chain maille
challenge
charity
chevron chain
christmas
collar
Collections
color
Color Ideas
color triads
conservation
craft shows
crafts
crochet
crystals
cuff
Culled Beads
current events
Current Faves
daggers
Daily Sets
daisy chain
Delicas
Destash
drops
Dutch spiral
earrings
Egypt
Egyptian Gods
embellishing
embroidery
environment
etsy
exotic
fair trade
fantasy
fashion
Favorite Beads
Favorite Techniques
feminine
fibers
film
findings
fire polish
fixtures
Flashback Test
flickr inspiration
flowers
food
found object
free form
fringe
Geek Jewels
geekery
gemstones
geography
giveaway
glass
gold
gray
Greece
green
herringbone
hex cuts
history
holiday
home decor
insects
inspiration tip
inspired beader
Inspired by...
Inspiring Links
ivory
Jewelry Stash
knitting
ladder stitch
lampwork
lariat
leaf fringe
leather
lights
literature
loomwork
macrame
magatamas
Master Class
Medallions
metal free
metalwork
Mini Collar a Week
mixed media
mixture
Mood Board
MOP
multi-color
multi-strand
music
natural beads
nature
necklace
Necklace a Day
Nepal chain
netting
New Beads
ocean
ombre
orange
paint
paper
patterns
pearls
pendant
peyote
photography
Picasso finish
pink
Pinspiration
PMC
polymer clay
poster sketch
purple
quick inspiration
rainbow
RAW
red
resin
ring
Ring a Day
rivoli
Rome
Russian spiral
scarf
science
seed beads
shell
silver
soutache
spiral rope
spring
square stitch
St. Petersburg
steampunk
stringing
stripes
summer
tagua
TBT
The Elements
thread
Tilas
Time Capsule
tools
trade beads
triangle weave
tribal
tropical
turquoise
tutorial
two-hole beads
Ugly
vintage
Wear it Twice
weather
white
winter
WIP
wire
wishlist
wood
World Beaders
yellow
Blog Home * About * Beading Tutorials * Advertise
Learn About Sponsoring Inspirational Beading with Project Wonderful
Affiliated With ShareASale.com and Amazon.com
Learn About Sponsoring Inspirational Beading with Project Wonderful
Affiliated With ShareASale.com and Amazon.com