Showing posts with label photography. Show all posts

Thursday, April 14, 2016

Wardrobe Inspiration: Summer Berry

While putting together our Pantone inspired fashion picks last month, I came across this fabulous chunky bead necklace and bookmarked it for later. It has an amazing palette of deep raspberry, orange currant, cream, and black. The contrast between the neutrals and the incredibly juicy colors was very inspiring, and I couldn’t resist using it for this month’s fashion picks.

Summer Berry


I considered going with a colorblocking theme for this collage, and started with a colorful geometric frock with hints of orange. I loved the purple that it added to the mix, and things just started rolling along from there. I found lots of fun accessories to go with a palette of red, orange, purple, and cream. The damask bangle in bright purple is definitely a favorite.

I wasn’t able to find any tutorials for such a chunky beaded necklace, and that’s okay. Assuming you could locate (or make) the big beads, all you’d have to do is string them. Instead, I found some other chunky necklace projects that are great for summer outfits, and a lovely damask pendant project with an easy painted patina.


I love the ingenuity of DIY jewelry designers.
The magpie in me can’t stop looking at this wrapped stone necklace project by Trinkets in Bloom.


The custom clay beads in this chunky necklace project by Katie at Crafts Unleashed make it really adaptable.
I’d love to see it in lime and turquoise!


The floating glass pearls in Beadaholique’s Sea Treasures Earrings have
the same dew-drop effect as our red leaf ones. Very pretty!


These super-easy stamped polymer clay pendants from Doodle Craft are so pretty
they make me want to drop everything and get out my paints.

What’s your favorite berry-inspired palette?

Mortira

Subscribe * Facebook * Google+
Send your beading questions to InspirationalBeading@gmail.com
Support Inspirational Beading for bonus tutorials and more!

Copyright 2016 Inspirational Beading


Friday, February 14, 2014

Work in Progress: Beaded Beads

I’ve been a bit overwhelmed by my to do list of late, and I’m way overdue for a bead tray update. This week I’ve been working on wrapping up some projects, as well as experimenting with new stitches and a few little inspirations.

Right at this moment, I’ve got a handful of simple beaded beads that I’ve been playing with for an upcoming project. I just threw together a few favorite colors and got stitching. It’s been really fun! It’s interesting how different a technique can look just by changing up the placement of colors.

Beaded Beads in Progress


In other news, I’ve got a brand new camera and it’s my absolute favorite thing right now. The old one was dropped by a certain small person, right on the lens while it was open. After that, I couldn’t get it to take a clear photograph, and it was time to invest in something new. Even though I bought one of the least expensive models available, it’s still way better than what I was working with before.

The new camera is a Nikon COOLPIX,and my favorite feature - apart from the crystal clear photos it takes - is how lightweight it is. I’m looking forward to trying it out a lot more in the coming weeks. I’ve already finishing photographing the new rope necklace I was working on, which turned out pretty great. It was a lot more work than was worth it for the results, but it looks exactly the way I wanted it to.

Tawaret Sa Amulet Necklace


What are you working on this week?

Copyright 2014 Inspirational Beading
Subscribe to Inspirational Beading
Get inspired on Facebook and Google+

Actions you take from this page can result in a commission for Inspirational Beading.


Thursday, August 22, 2013

MyMemories Giveaway Winner

It’s time to reveal the winner of our latest giveaway! I’ve consulted with the Random.org crystal ball, and the MyMemories Digital Scrapbooking Suite goes to Tavia Ladd of Tavia’s Beadiful Life. Thank you so much to everyone who entered!

Last week I shared a few examples of the beautiful layouts and jewelry collages you can make with MyMemories. To show what else you can do with a few minutes and some of your best photos, I put together a brand new bead palettes video. This time around, I used collages just for the headings of each theme - the theme for this year’s palette roundup. It’s interesting to see how these bead picks can look new again when grouped together by themes like earth, air, water, and fire.


If you’d like to give MyMemories a try, you can download a trial version of the suite for free. Inspirational Beading readers can also receive a discount on the full digital scrapbooking package by using coupon code STMMMS31747.

Happy scrapping!

I would like to thank Story Rock Inc. for giving me the opportunity to try out MyMemories software. Inspirational Beading has not received compensation for featuring products in this review, however, using the coupon code STMMMS31747 to purchase MyMemories Suite v4 will earn a commission for Inspirational Beading.

Copyright 2013 Inspirational Beading
Subscribe to Inspirational Beading
Get inspired on Facebook and Google+


Wednesday, August 14, 2013

MyMemories Scrapbooking Software Giveaway

Bead Collage Made with MyMemories Software
Drag and drop photos into frames
for instant collages

Thanks to digital photography and all of its perks, sharing images of your beadwork is incredibly easy and fun. It’s almost too fun - there are so many exciting ways to showcase design photos that it can become a second hobby to compete with beading.

Awhile back, we looked at the wonderful creations that can be made with the MyMemories digital scrapbooking suite. It’s great for creating shop and blog banners, Twitter backgrounds, landing pages, videos and professional-looking business card graphics. With a great printer, you can even use your jewelry collages to create lookbooks of your work for craft fairs and consignment pitches. The easy to use program is also fantastic for planning designs, color palettes, and saving your ideas in a beautiful digital album.

For the traveling beader, finished scrapbook projects can be turned into physical items and printables like gift boxes, party favors and loot bags - great for home parties and craft shows. Scrapbook files created with MyMemories can be printed from home, or you can take your files with you to a print shop for a professional product. The possibilities are endless.

In addition to the basic suite, which includes tons of pre-made designer layouts, plus papers and embellishments for designing your own unique scrapbook pages, you can add to your scrapbooking repertoire with hundreds of downloadable kits and goodies. New background papers, stickers, and decorations are just a click away, and you can mix and match any elements you like to get the perfect collage. Many user created add-ons and scrapbooking kits are available for free, and download instantly, so you can make quick pages or add exciting details to your digital collages.

Here are two pages I made in just a few minutes with free scrapbooking kits:

Egyptian Jewelry Collage with Heritage Scrapbook Elements Egyptian Revival Collage with Blueberry Scrapbook Elements

Backgrounds and embellishments from Heritage Gift Pack by Cari Lopez,
and Blueberry Combo Pack by Gypsy’s Scrapbooking.


MyMemories recently released version 4 of the scrapbooking suite, with new and improved features that any crafter will love. And the best part is that all MyMemories software comes with a Limited Use License that allows you to promote your jewelry or craft business with your creations.

Using MyMemories Digital Scrapbooking Suite for Jewelry Collage
Browse for photos right inside the scrapbook suite
for quick and easy jewelry collages


How to Enter

For your chance to win a free digital copy of MyMemories Suite v4 Scrapbooking Software, visit the amazing selection of downloadable goodies at MyMemories. Then head back here and leave a comment letting us know which product or scrapbook theme is your favorite, and how you would use it. Anything goes!

Important: Entries must be made here on Inspirational Beading to qualify for the draw. Please make sure to include an email address or contact link in your comment, or through your profile, so that I can contact you if you win. Incomplete or anonymous entries will not be included in the draw.

One lucky winner will be drawn on Thursday August 22, 2013. This giveaway is open to international readers (prize is for the downloadable full version of MyMemories).

Update: The draw has closed. Inspirational Beading readers can use coupon code STMMMS31747 for a discount on their purchase of MyMemories software. For more information about digital scrapbooking, tutorials and extra goodies, you can also check out MyMemories on Facebook and Youtube.

Good luck!

I would like to thank Story Rock Inc. for giving me the opportunity to try out MyMemories software. Inspirational Beading has not received compensation for featuring products in this review, however, using the coupon code STMMMS31747 to purchase MyMemories Suite v4 will earn a commission for Inspirational Beading. I have shared my sincere opinions of this product - it is fantastic!

Copyright 2013 Inspirational Beading
Subscribe to Inspirational Beading
Get inspired on Facebook and Google+


Friday, April 26, 2013

Three Beading Quick Fixes

When you’re passionate about something, you tend to take it pretty seriously. If you eat, sleep, and breathe jewelry making, you probably want to make sure that you always have the best tools and materials, and that your techniques are the best they can be. But when it comes to the little things, sometimes you really just need to go MacGyver to get the job done. These are some of my favorite little tricks for making a day at the workbench go smoothly.


What would MacGyver do?


Broken Needle Disposal

No matter what kind of needle you like to use, chances are that it will eventually be too bendy to use. Sometimes needles snap - if you’re fond of Cellini spiral this might happen to you a lot - and sometimes the eye will give out. It doesn’t happen very often, so saving up needle scraps for salvage isn’t exactly an appealing idea. You can’t just toss them into the trash, either - who knows where they’ll end up?

How to Dispose of Broken Needles


To make a broken or otherwise useless needle safe for disposal, all you need is a few centimeters of clear tape. Use whatever you’ve got on hand to seal the sharp scraps in a little envelope of adhesive, and you won’t have to worry about it poking out of the trash or ending up in your vacuum cleaner.

Sharpening Scissors

Whether you use Fireline or Nymo, sharp scissors are essential to prevent frayed threads, and give clean cuts when you’re trimming tails. If you’re like me - without the time or patience to visit a scissor sharpening service - you can freshen up your blades right at home in minutes, practically for free.

How to Sharpen Scissors with Aluminum Foil


All you need is a foot or so of aluminum foil from your kitchen drawer. Fold the sheet in half three or four times to get a thick sheet. Then snip it several times with your scissors, using a single cut (don’t saw right across the foil). Give the blades a quick rinse and dry, and they’ll be ready to cut threads clean again. The results don’t last as long as a professional sharpening, but the convenience is worth regular re-dos.

Extending Battery Life

I always use rechargeable batteries in my digital camera. They’re incredibly expensive, although they stand up to the demands of a digital camera really well and pay for themselves after only a few uses. I’ve only got the four that came with the charger, and I’m not ready to invest in any more. So when the second pair runs out of juice, my choices used to be borrow the batteries from the TV remote, or wait a day for mine to recharge.

Digital Camera Tip


Fortunately, good batteries never really die! A few weeks ago I was right in the middle of a shoot when the batteries gave out. On a whim, I pulled out the cells and swapped them. Placing the batteries in opposite slots (in the appropriate +/- positions, of course) provided just enough power for 20 or 30 more photos, not to mention saving a lot of time.

Do you have any quick fixes that you like to use to make beading easier?

Copyright 2013 Inspirational Beading
Subscribe to Inspirational Beading
Get inspired on Facebook and Google+


Wednesday, August 1, 2012

Book Spotlight: 1000 Jewelry Inspirations

Sometimes the best resources aren’t those that teach you things, but those that show you what’s out there. After all, nothing is more inspiring than plenty of eye candy all in one place. When stuck for color ideas, some beaders like to open a page of The Beader’s Color Palette at random and try a new combination. But what about when you’re stuck for ideas on materials and techniques?

1,000 Jewelry Inspirationsis not like your average beading book. After a quick introduction by editor Sandra Salamony, this book is stuffed full of page after page of jewelry photos. Apart from each picture’s index code and photo credits, there is no text whatsoever. Just oodles of gorgeous jewelry designs by hundreds of artists.

The photographs are organized into five chapters: beads and baubles; paper and mixed media; polymer and precious metal clay; vintage and repurposed; fibers and fabric; wire and metal. Each chapter and its pages are color coded for easy reference. To coordinate with the handy artist index at the back of the book, the table of contents also lists the photo numbers so you can easily find pieces by your favorite designers.

Each pair of pages features jewelry grouped by theme, material, or style, which can help you to compare ideas and inspirations, and come up with your own unique variations. There are plenty of necklaces and bracelets, as well as rings, earrings, and brooches. The polymer clay chapter is particularly stunning, and features designs created with handmade beads of amazing shapes, colors, and patterns.

After perusing these 1000 Jewelry Inspirations, it’s hard to resist sitting down to create a new piece of jewelry. For beginners, the book finishes with an appendix of basic beading techniques like wrapped loops and jump rings, and a resource guide with plenty of bead shop listings to help you find some of the materials seen in the book.

If you happen to pick up a copy of 1000 Jewelry Inspirations, I highly recommend sitting down with a pen and stack of sticky notes the first time you look through it. You’ll want to bookmark your favorite designs, and make notes about how you can adapt the ideas to your own unique taste and style. This book is an excellent tool for anyone with beader’s block!

Copyright 2012 Inspirational Beading
Sandra Salamony and Quarry Books
Subscribe to Inspirational Beading
Get inspired on Facebook and Google+


Tuesday, March 27, 2012

The Papyrus Experiment

One of the toughest things about entering the handmade marketplace is creating attractive product photographs. It takes a lot of practice and experimentation to find one’s groove - the balance of good photography and personal style.

For years, I’ve been using simple dark gray cardstock for my photo backgrounds. I like it because it’s inexpensive, convenient, requires virtually zero storage space, and most importantly, provides the truest color. Once I found the right combination of light and camera angles, I was able to get photographs that required no editing to look ‘right’, and that looked similar every time, providing a cohesive appearance to my storefronts.

I have tried using different backgrounds from time to time. White cardstock creates too many shadows, and makes colors look dull. I once experimented with natural-looking shelf paper, but it proved to be too shiny under natural light. I went running back to my reliable gray card, with the hope that someday something better would come along.

Last week I decided that it was time to try again. I want to give my first photos and thumbnails a more Egyptian - and ultimately more treasury-worthy - look, by adding a lighter background. And what better backdrop could there be for Egyptian inspired jewelry than papyrus? Perhaps you’ve seen kids craft projects that create artificial papyrus scrolls using strips of brown paper lunch sack. I decided to use this simple technique to make my own papyrus backdrop, though hopefully with a more authentic look.

First, I picked up some newsprint style sketch paper - I hoped that the pulpy look would give a more natural appearance to the finished scroll. I soaked sheets of paper in coffee to give them a more organic color, and set them out to dry. The color wasn’t quite right, so when it came time to decoupage the strips together, I used a mixture of glue, water, and a hint of yellow acrylic paint. At first I wasn’t pleased with the results, but after letting the layers of paper dry overnight, I was happy to find that the color was very similar to the real thing. All that’s missing is the gauzy, grainy look of real papyrus strips.

The true test would be whether or not the fake papyrus would provide a good background for jewelry photos. Just in case it didn’t turn out, I also picked up some additional backdrops - a packet of desert-themed scrapbook papers. While I was at it, I also tried out some new lighting angles. Here are the results:


Handmade Papyrus


Old Manila


White Sand


Red Dunes


Paper Pulp


White


Traditional Gray


I like how most of the pictures turned out, but I can’t quite decide if I should make a switch. Which background do you like best?

Copyright 2012 Inspirational Beading
Subscribe to Inspirational Beading
Get inspired on Facebook and Google+


Thursday, September 29, 2011

MyMemories Software Giveaway Winner

The results are in, and Random.org has selected Mandy of Beads for Brains to receive a free copy of the MyMemories digital scrapbooking suite! Even though the software is intended for family photos, just like a traditional scrapbook, there are endless possibilities for creating beautiful jewelry and beading presentations. I can’t wait to see what Mandy can do with the fun layouts and decorations!

I’ve been having a great time playing with papers and embellishments, and finding new ways to present photos and make them look even better than before. The blank layouts provide a great jumping off point, and they can be edited and altered until everything looks right. I tried making a little presentation for A Bracelet a Week with a simple 16-image layout. With some tinkering, I got pages like this one:

A Bracelet a Week Photo Collage


Then I decided to really make use of having multiple images on a single page. Not only is this a great way to show off a design at multiple angles, but there’s room for inspiration photos, color swatches, materials, or even a little jewelry haiku. I started with one of my favorite beads to beadwork designs - the original strawberry blossom pendant. Once I had the right background paper, all I needed were a few extra polka dots in coordinating colors.

Strawberry Blossom Pendant Collage
Source: Strawberry Blossom Photo


I love how easy it is to transfer finished albums into JPEG folders. Once I got going, it was hard to quit! I gathered up some of my favorite bead palette pictures, and did a little seasonal remix with simple layouts and embellishments. Next, I uploaded them into my movie maker and created a brand new color ideas video!


Congratulations to Mandy, and thank you so much to everyone who entered the MyMemories giveaway! If you’d still like to give it a try, Inspirational Beading readers can use coupon code STMMMS31747 for $10 off the MyMemories Suite. It’s such a fun and easy creative tool!

Happy beading, and happy scrapping!

I would like to thank Story Rock Inc. for giving me the opportunity to try out My Memories software. Inspirational Beading has not received compensation for featuring products in this review, however, using the coupon code STMMMS31747 to purchase My Memories Suite v2.0 will earn a commission for Inspirational Beading. I have shared my sincere opinions of this product.

Copyright 2011 Inspirational Beading
Subscribe to Inspirational Beading
Get inspired on Facebook


Wednesday, September 21, 2011

Digital Scrapbooking for Jewelry Designers

Art Deco Jewelry Collage

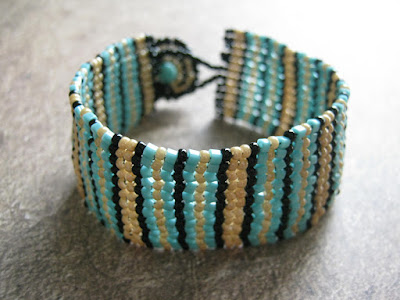
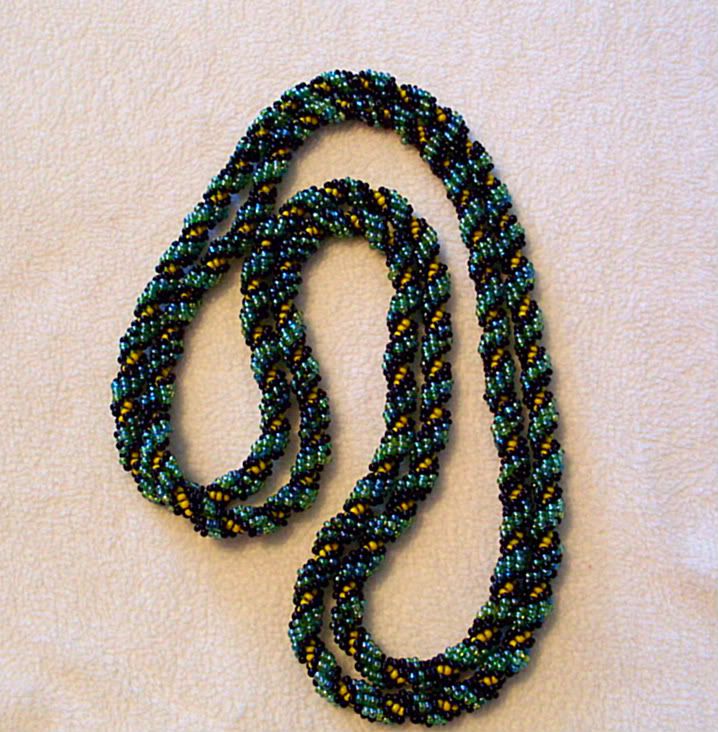
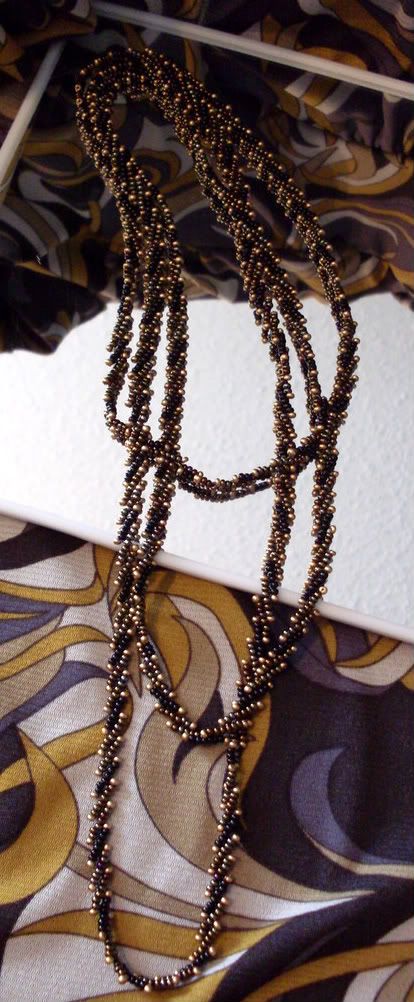
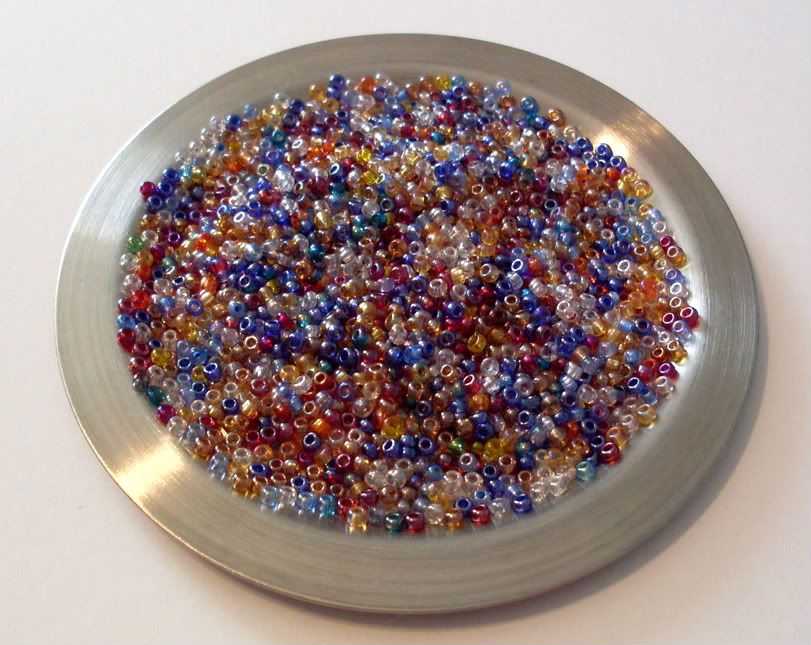
Whether your bead and jewelry creations are for business or pleasure, there comes a time when you want to share what you’ve made. Taking great photos is the first step, and once you’ve mastered that, the fun begins. There are so many ways to promote and show off your work both online and in person, from Flickr and Facebook, to graphic business cards.

With digital scrapbooking, you can turn your jewelry and beadwork photographs into beautiful presentations. And the best part is, you don’t need to take a class, or read tons of tutorials to learn how to do it. MyMemories digital scrapbooking software - developed by Polaroid - is incredibly user friendly. If you know how to use the programs that come with most home computers, you’ll be able to navigate MyMemories easily and create professional looking albums for your best work.

The MyMemories Suite comes with everything you might expect to find in a real scrapbooking studio. There are plenty of background “papers”, stickers, and embellishments. You can add ribbons, faux stitching and even graphic staples for an authentic scrapbook look. The studio comes with hundreds of options for decorating your albums, and you can also create your own elements.


Creating Albums with MyMemories Personalizing MyMemories Templates
Here's a basic designer template for traditional scrapbooking.
On the right, you can see some of the export, print and share options.
Just click to add photos, change the text and you're done!
You can also color, move, change or remove any element on your album pages,
to create presentations that are totally unique.


Beginners will love the pre-made designer templates for picture albums. You can choose your theme, and pick from a variety of page styles and layouts. Then all you have to do is click to add the photos that you want from your computer. Every element on an album page is dynamic - you can change sizes and shapes, move objects, switch colors, and add extra elements to every page. Once you get the hang of things, you can create your own album pages completely from scratch.

Nile Theme Custom Photo Collage
I created this custom layout using the built in papers and stickers.
The digital layouts are ideal for professional-looking craft presentations.


I was very excited to have the opportunity to try out MyMemories. As a professional beader, I’m always looking for new and unique ways to show off designs. Once you’ve created an album with MyMemories, you can transfer it to any material that is compatible with your printer. My favorite feature also allows you to create JPEG files of your individual album pages, and with these the possibilities are endless. You can use photos of your designs to make a Facebook landing page, a blog header, a video slideshow, or a professional-looking gallery.

Want to try it out? All Inspirational Beading readers are invited to try the MyMemories Suite at a discount of $10 using coupon code STMMMS31747. You can download the software instantly, and get started on your jewelry albums right away - you might even find some other fun ways to use it! To get an even better idea of how the MyMemories Suite works, and all the things it can do, check out this digital scrapbooking tutorial video by The Pink Toque, or browse through some user creations on the MyMemories Facebook page.

Art Deco Jewelry Cover Page
This layout was made with a designer template.
You can add your own text, or fill the area with
more pictures, embellishments, or color.

For one lucky reader, I also have one free copy of MyMemories to giveaway! I know sometimes beaders and scrapbookers are like oil and water, but I would love to see what a beader could do with all of these fun tools!

How to Enter

Take a look at some of the cool album extras and digital scrapbooking kits at MyMemories, then head back here and leave a comment with the name of your favorite scrapbooking theme, and how you would use it to showcase your designs.

If you do not have a Blogger profile with email contact enabled, please make sure to include a contact link - like your shop or website - with your comment, so I can let you know if you win!

One winner will be drawn at random on Thursday, September 29th. Good luck!

I would like to thank Story Rock Inc. for giving me the opportunity to try out MyMemories software. Inspirational Beading has not received compensation for featuring products in this review, however, using the coupon code STMMMS31747 to purchase MyMemories Suite v2.0 will earn a commission for Inspirational Beading. I have shared my sincere opinions of this product - it’s truly awesome!

Copyright 2011 Inspirational Beading
Story Rock and Polaroid
Subscribe to Inspirational Beading
Get inspired on Facebook


Wednesday, August 17, 2011

Time Capsule: August 2008

It was three years ago this month that Inspirational Beading began, and I started on a journey that seemed so small at first. Four hundred and fifty posts later, I can hardly believe how much this blog has grown. My original concept was simply to share what I was making, what inspired it, and the materials that I had used. But new ideas kept forming, and now Inspirational Beading has so many regular segments that I can barely fit them all in every month.

One of my favorite things about blogging, is creating a stamp in time - a reference to what was happening at that moment. It’s fun, and sometimes a little scary, to go back and review old posts. For me, it’s wonderful to see how much my designs and photography have improved, along with my skills as a blogger.

To celebrate how far Inspirational Beading has come, we’re going to go back and take a look at some posts from three years ago, and how different they are from what you’ll find here today. There were only three posts in August 2008, and all of them were part of the original concept: The Inspiration, The Beads and The Beadwork.

Frog Conservation Bead Palette Amphibian Necklace


The difference in photography style is very noticeable. Since then, I’ve made changes to everything from backgrounds and lighting, to angles and props. Although I still use metal coasters as bead cups when I’m working on a design, it’s been a long time since I used them for photographing bead palettes. After awhile, the glare off the metal started to get to me. I much prefer the small, clear cups that I use now, which make seed beads look more full, and displaying accent beads loose against the backdrop.

Print Dress Bead Palette Print Dress Necklace


I experimented with a lot of different background materials, including cloth, felt, paper and mirrors. None of them really produced nice photographs, especially with poor lighting. Today I’m really happy with the textured black posterboard and indirect sunlight approach. The third photograph below was taken in April of 2010, as part of the 6th Photo Game. I re-photographed the beads from one of my original posts to show the difference in style and quality. Today, I’m happy to report that I finally used up that bead mixture!

Iris Bead Mixture Iris Bead Mixture Necklace Iris Bead Mixture Redux


Do you ever look back on old blogs or journals and compare them to today?

Copyright 2011 Inspirational Beading
Subscribe to Inspirational Beading
Get inspired on Facebook


Tuesday, July 12, 2011

Inspired by Silhouettes

silhouette


Is there anything more lovely than a silhouette? They are the original airbrush - taking something beautiful and obscuring all but it’s shape in a single color creates a pure image that can't be ignored. The simplicity of a silhouette is what makes them so intense. The subject becomes concentrated in it’s outline, especially when the background provides a stark contrast.

fly free


Did you know that silhouettes are named after a person? The art of cutting out a person’s profile from black card to create a portrait was popular in the 1700’s, especially for those who could not afford more expensive art forms. In France, Etienne de Silhouette was attempting to restore the country’s finances, causing many people to pinch their pennies, or live in poverty. The phrase a la silhouette came to mean anything cheaply made, and was used to describe these cut-out portraits. The name stuck, and now applies in many ways to shapes, profiles and backlit objects.

Handmade Shadows and Silhouettes

Cameos, Cut-Outs, Sunsets and Silhouettes


Silhouettes were also used in cameos and memento mori, or mourning jewelry, which were popular in the Victorian era. Despite these sad origins, silhouettes continue to be popular in art, photography and even jewelry.

Silhouette Photo Collage

1. Silhouettes, 2. Magical Silhouette, 3. Silhouette, 4. Silhouettes, Thar desert,
5. CIMG2167 Diver Silhouette, 6. Silhouette, 7. Silhouette, 8. Silhouette,
9. Silhouette Portrait, 10. Silhouette, 11. Beach Shadow Silhouette, 12. Silhouette 1


Do you like to use cameos or silhouette shapes in your work?

Copyright 2011 Inspirational Beading
Subscribe to Inspirational Beading


Blog Widget by LinkWithin
Fire Mountain Gems and Beads

Inspiration Topics

accessories amulet Ancient Worlds Modern Beads animals April's Army art ArtFire astrology astronomy autumn awards awareness bangle beach Bead Inspired Bead Shops bead soup bead spotlight bead stash Bead Trays beaded beads beading theory beads belt bezel birthstones black blog spotlight blue boho bone book spotlight bracelet Bracelet A Week branch fringe brick stitch brown bugles buttons cabochon ceramic chain maille challenge charity chevron chain christmas collar Collections color Color Ideas color triads conservation craft shows crafts crochet crystals cuff Culled Beads current events Current Faves daggers Daily Sets daisy chain Delicas Destash drops Dutch spiral earrings Egypt Egyptian Gods embellishing embroidery environment etsy exotic fair trade fantasy fashion Favorite Beads Favorite Techniques feminine fibers film findings fire polish fixtures Flashback Test flickr inspiration flowers food found object free form fringe Geek Jewels geekery gemstones geography giveaway glass gold gray Greece green herringbone hex cuts history holiday home decor insects inspiration tip inspired beader Inspired by... Inspiring Links ivory Jewelry Stash knitting ladder stitch lampwork lariat leaf fringe leather lights literature loomwork macrame magatamas Master Class Medallions metal free metalwork Mini Collar a Week mixed media mixture Mood Board MOP multi-color multi-strand music natural beads nature necklace Necklace a Day Nepal chain netting New Beads ocean ombre orange paint paper patterns pearls pendant peyote photography Picasso finish pink Pinspiration PMC polymer clay poster sketch purple quick inspiration rainbow RAW red resin ring Ring a Day rivoli Rome Russian spiral scarf science seed beads shell silver soutache spiral rope spring square stitch St. Petersburg steampunk stringing stripes summer tagua TBT The Elements thread Tilas Time Capsule tools trade beads triangle weave tribal tropical turquoise tutorial two-hole beads Ugly vintage Wear it Twice weather white winter WIP wire wishlist wood World Beaders yellow
Blog Home * About * Beading Tutorials * Advertise

Learn About Sponsoring Inspirational Beading with Project Wonderful
Affiliated With ShareASale.com and Amazon.com