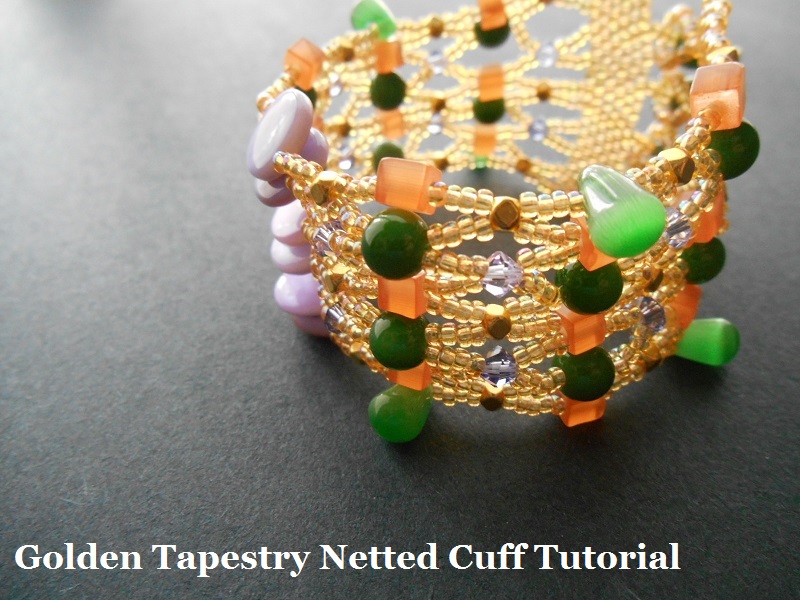
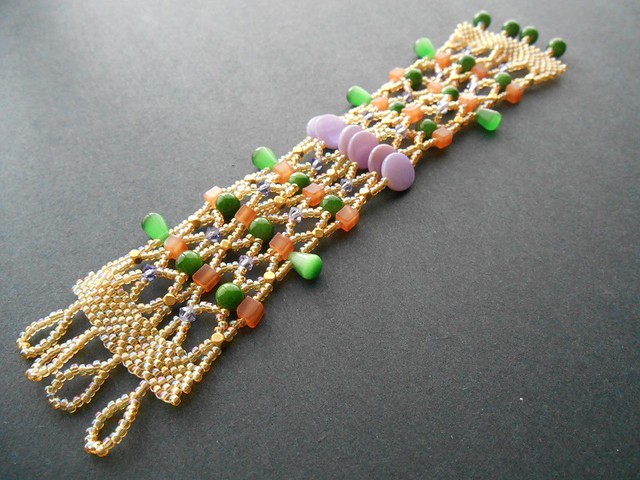
This super easy 'tapestry' cuff project was inspired by the Geometric bead box from Blueberry Cove Beads. This has been my all time favorite bead collection so far this year. When I pulled out all of the lovely beads in the inspiration box, I was struck by how wonderful each of the individual pieces was. The shapes and colors are each unique and beautiful in their own way, but when combined they create a gorgeous tapestry.
The harmony of combining beads together is one of the things that makes it such a rewarding art form, and this project is a great example of the way that you can easily mix together elements that might not seem matched at first sight.
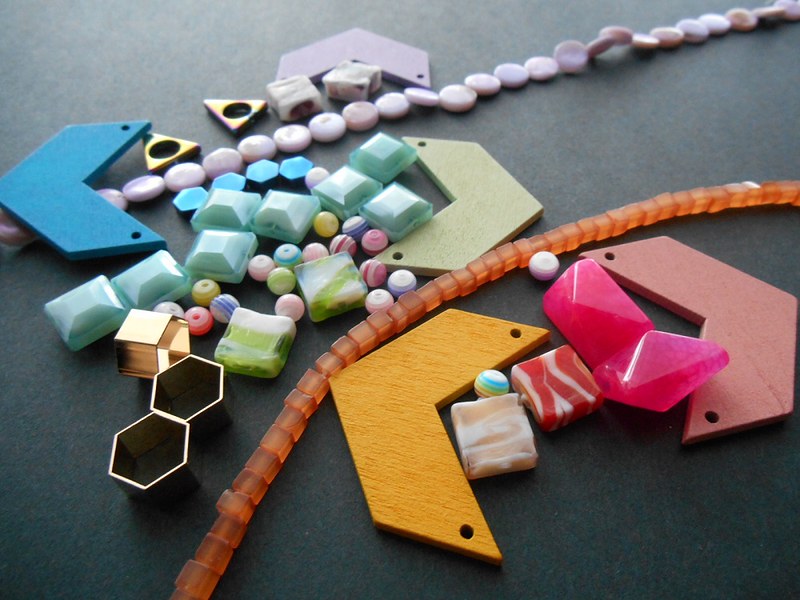
Blueberry Cove Geometric Bead Box
Some of my favorite pieces from this set include the pretty purple mother of pearl coins, and the orange cat's eye cubes. Individually the beads are wonderul, and though they are different in every way, I knew that I could mix them together to make a gorgeous piece of jewelry. I added tiny gold hexagon beads to the palette from the Geometric box, and some green glass rounds and drops from the Rainforest bead box as well. Transparent topaz seed beads and purple crystals from my stash rounded out the palette perfectly.
If you don't have similar materials in your stash, try combining some of your favorite accents together. The pattern will work with just about anything 6mm and smaller - just be sure to leave room for the size and shape of each bead that you add: the coins in the project are used as a focal since they can overlap each other nicely along a single row, but the other beads sit snugly side by side. Once the netting is complete, the beadwork will have a wonderfully chunky texture. If you like your bracelets extra slinky, use waxed beading thread in place of the Fireline.
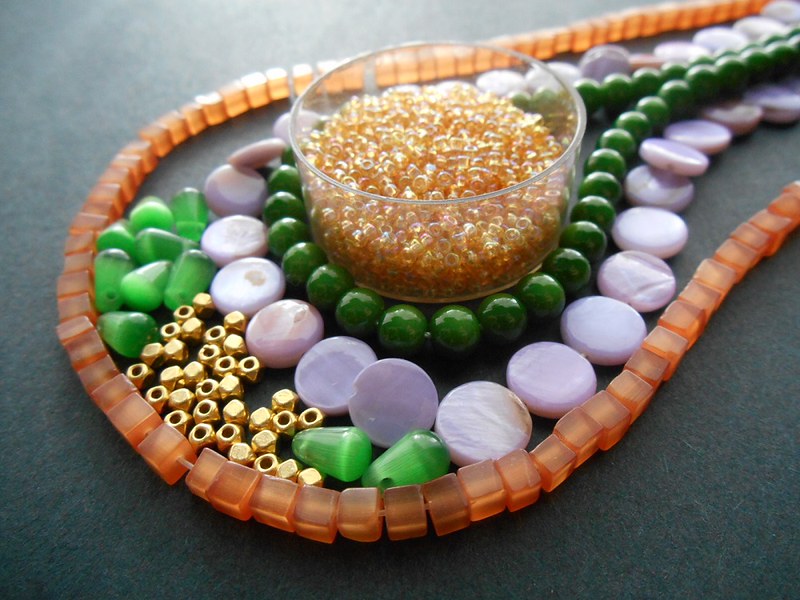
Materials:
10 yards 6lb test Fireline (crystal)
5 grams size 11/o seed beads (transparent topaz)
6 x 10mm mother of pearl coins (purple)
6 x 6mm glass drops (green)
18 x 5mm glass cubes (orange)
16 x 6mm glass rounds (green)
16 x 3mm crystal bicones (purple)
24 x 3mm hexagon beads (gold)
1. Attach a stop bead to a comfortable length of Fireline, leaving a 6 inch (15 cm) tail. Pick up 6 seed beads, and slide them down to the end. Pick up 1 seed bead, and begin stitching an even-count peyote panel. Continue working until your panel is 19 beads wide. Weave in and trim both threads. Create a second 6 x 19 peyote stitch panel and weave in the threads.
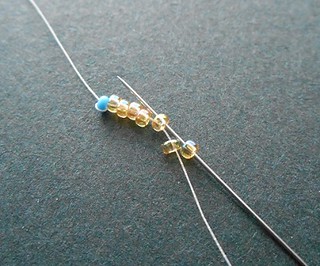
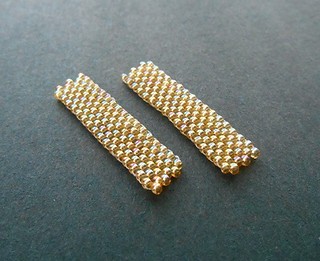
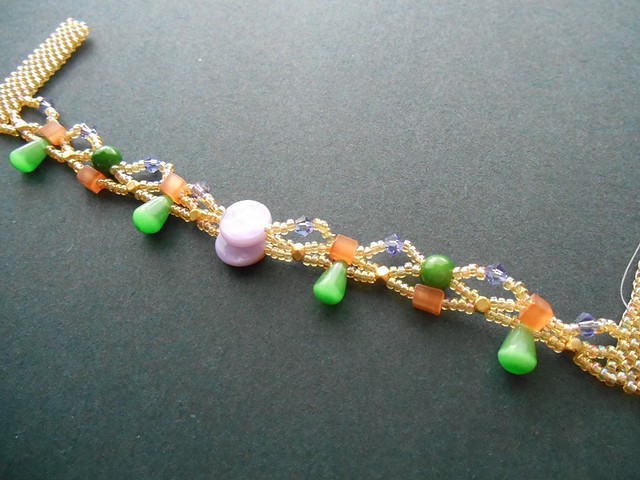
2. Attach a stop bead to a new length of Fireline, and weave into one of the peyote strips, exiting from a corner up-bead. Pick up 4 seed beads, and 1 hexagon bead. Continue stringing accents with 4 seed beads between each: add 1 drop, 1 hex, 1 cube, 1 hex, 1 drop, 1 hex, 1 coin, 1 hex, 1 drop, 1 hex, 1 cube, 1 hex, 1 drop, 1 hex. Finish with 4 seed beads.
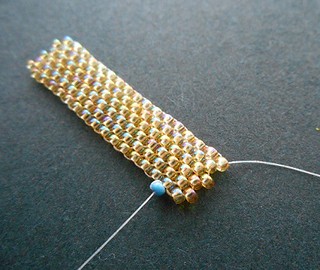
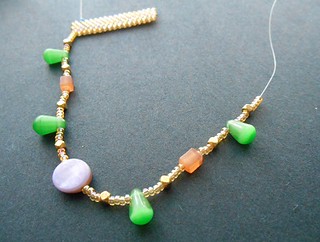
3. Stitch up into a corner up-bead on the second peyote strip, and weave up through the following bead. Pass back down through the adjacent bead and the following bead to exit the panel. Pull snug.
4. Flip the beadwork. Pick up 4 seed beads, and stitch up through the last hex bead added in the previous row.
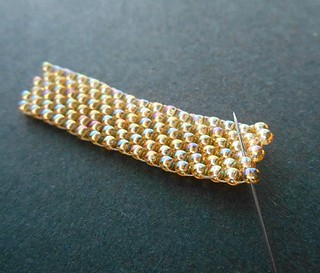
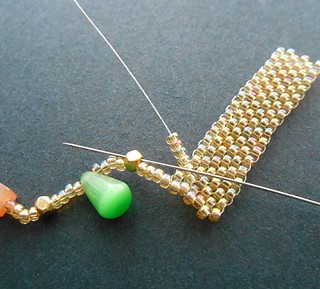
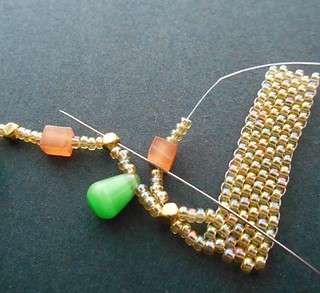
5. Pick up 4 seed beads, 1 cube, and 4 seed beads. Stitch up through the next hex bead of the previous row.
6. Continue adding accents with 4 seed beads to either side, passing through the hex beads to secure them: add 1 round, 1 cube, 1 coin, 1 cube, 1 round, and 1 cube.
7. To complete the row, pick up 4 seed beads.Stitch into the 3rd bead of the peyote strip, leaving one bead between each of the netting rows. Stitch through the following bead in the strip, and then turn as in step 3 to begin the next row.
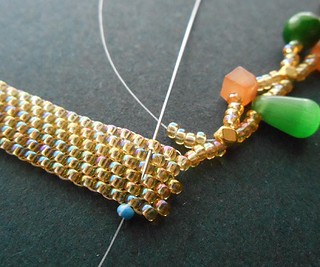

8. Pick up 4 seed beads, 1 crystal, and 4 seed beads. Stitch through the last cube bead added in the previous row. Continue adding crystals for the entire row, passing through each of the accents beads. Finish by stitching into the 3rd bead of the peyote panel and turning the thread as usual.
9. Add 4 seed beads, passing through the last crystal added. Pick up 4 seed beads, 1 round bead, and 4 seed beads. Pass through the next crystal in the previous row.
10. Continue adding accent beads, using the opposite color/shape as the previous row, and a coin in the center. Finish the row and turn. In the following row, add all hexagon beads. Repeat the pattern until you have 5 rows with accents, 3 rows of hexagons, and 2 rows of crystals as shown.
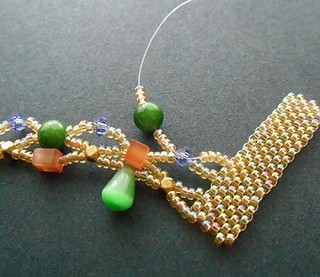
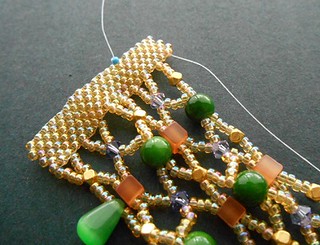
Turn and exit from the last bead of the peyote panel to begin the final row.
11. Add 4 seed beads and pass through the last hexagon bead added in the previous row. Add 4 seed beads, 1 cube, and 4 seed beads. In the next stitch, add seeds beads and a glass drop. Continue adding the remaining accent beads, and finish the row with 4 seed beads. Weave in your threads and trim.
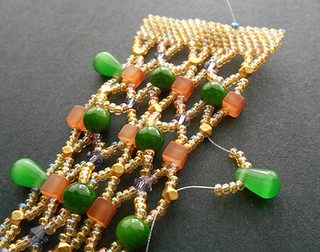
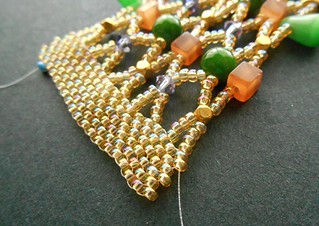
12. Weave across the peyote panel and exit from the fouth bead on the outside edge. Pick up 21 seed beads. Pass back through the first 3 beads again and into the 5th bead of the peyote panel. Pull snug.
Check the fit of the loop on one of your remaining glass rounds. It should be just big enough to slip over the bead smoothly. Adjust the number of beads in the loop if necessary, then continue weaving.
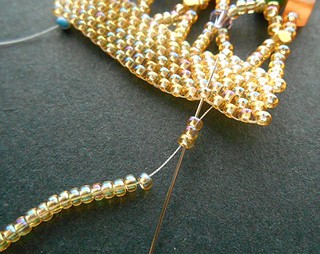
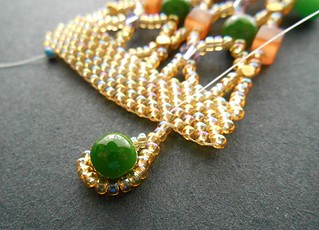
13. Weave through the peyote panel and exit from the edge, leaving a 2-bead space from the previous loop. Add a second loop with the same number of beads. Repeat to add two more loops, then weave in and trim the thread.
14. On the opposite edge of the cuff, position a new thread 4 beads from the end as before. Pick up 3 seed beads, 1 round, and 2 seed beads. Skipping the last seed bead added, pass back through all of the beads again, and into the 5th bead of the peyote panel. Pull snug.
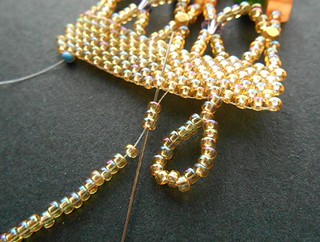
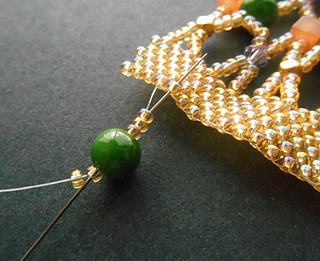
Repeat this step to add 3 more toggles, leaving a 2-bead space between each. Weave in any remaining thread and trim.
This pattern will create a bracelet that is 6.5 inches (16.5 cm) long. To increase the length of your design, you can add additional seed beads to the nets - working with 5 seed beads per stitch instead of 4 will add about 1 inch (15 cm).
Mortira
Subscribe * Facebook * Google+
Send your beading questions to InspirationalBeading@gmail.com
Support Inspirational Beading for bonus tutorials and more! Powered by Patreon
Copyright 2016 Inspirational Beading




fabulous!
ReplyDelete