Pages

Friday, September 30, 2011

Jewelry Pricing Exercises

Calculator and money

For the professional beader, one of the toughest business hurdles to overcome is learning to price designs. There is no perfect way to find a price tag for handmade jewelry, and each beader must find their own groove. I was recently asked for some advice on pricing beadwork, and I thought I’d pass on my tips and some pricing ideas to you.

Calculations

If you go to a beading or marketplace forum and ask for pricing advice, you will almost surely get several suggestions for using a pricing calculator or equation. There are a few different variations out there, and many artists - myself included - create their own. While I am definitely a believer in pricing equations, I also think it is important to use them with flexibility.

One of the most common calculations, particularly for simple jewelry designs, is: (Materials Cost) x 3 = Retail Price. Once you’ve worked out the cost of your materials, it’s easy enough to do. Remember that this includes all materials, including your thread or wire, and findings. And when calculating materials costs, you should use the replacement cost, not what you paid for it - or whichever is higher.

For example, if someone gives you a strand of pearls as a gift, you would still need to include the price of the pearls in your calculations for things you make with them, even though they were free to you. Or, perhaps you bought some buttons for 50 cents in the 1970’s, and are only getting around to using them now - even if they aren’t valuable collector’s items, it would still cost you more to replace the materials for future designs.

While the Materials x 3 formula certainly provides a lot of cushioning, it doesn’t include the amount of time or skill needed to make the finished piece. If you’re making copies of a similar design again and again, then this formula might work for you. However, if you’re making a lot of different jewelry styles, there could be a lack of balance in your prices.

Materials for Making Emerald and Rhodochrosite Earrings
Emerald, rhodochrosite and gold plated findings from Fire Mountain Gems


As an extreme example, let’s say that you make a simple pair of headpin earrings with gold and gemstones, and a long necklace with a detailed pattern of colorful vintage Lucite beads. The earrings take only a few minutes to make, and the final price is $99. The necklace takes a little over an hour to plan and string, but the price you calculate is only $21. Factoring your time into price calculations is not only more fair to you, but to your customers as well.

Materials for Making a Lucite Necklace
Vintage Lucite beads and stringing essentials from The Beadin’ Path


One other pricing formula that gets a lot of circulation includes materials costs, time spent designing and making the piece, overhead to cover business costs, and a hefty markup, which allows you to give discounts and sell bulk orders at wholesale. It goes something like this:

(Materials x 2) + (Hours invested x 20) = n

(n + 10% overhead) x 2 = Retail price


Even if you adjust this calculation to compensate your work time at minimum wage instead of $20 per hour, the results will be quite high. Though this calculation is ideal for finding a fair price for the artist, it doesn’t include factors like quality of work, the target market, or the artist’s ability or desire to reproduce the design many times.

Also, the amount of time it takes to make a piece can vary based on many factors, including your familiarity with the materials and techniques. For example, your first peyote stitch project might take days to complete. If you make the same design a year later, it will probably go much faster, but the work will be of better quality.

Whether you’re just starting to sell your work, or you’re curious about your pricing methods, I highly recommend using the above formula just to get an idea of what your work is worth. Remember that no matter what formula you use, or what the results are, you are in charge of your designs, and pricing is as much a personal choice as it is a business one. Using this calculation can help shock you out of the “who would pay for this?” mindset. Pricing your work too low can be more of a turn off to shoppers than pricing it too high.

Vintage Pin Display

Work Value

Just like finding your own design niche, pricing your work can often be a learn-by-doing experience. I didn’t discover that my jewelry prices were too low until I received several custom orders, and I had the work ahead of me, instead of behind.

To get an idea of what your work is worth, try pricing your designs before you’ve made them. As long as you have an idea of how long it will take, you can predict a price based on the amount of work you need to do. When you’ve already made a design, and are eager to sell it, it’s all too easy to decide on a price that you think someone might pay for it. This is were we undersell ourselves, because the work is already behind us.

After you have already made a design, and decided on a price, walk away for awhile. Later, imagine that a customer has asked you to make 3 new versions of it in different colors. You have x number of hours of work ahead, including buying materials, making the pieces, etc. Now consider your asking price. Is it enough of a reward at the end of the job? This exercise can really help you find prices that work for you, and unlike an equation, the way you feel about the design and your work becomes a factor.

Another worthwhile activity you can use to improve you perceptions of your own work is to donate something you've made to charity. An artist is often her own worst critic, and we can sometimes feel sheepish about asking others to pay for our designs. However, if you’re making something for a fundraiser, especially if it’s a cause that you are passionate about, the importance of quoting an accurate price makes it easier to place value on your work.

Do you use a special formula or method for pricing your beadwork? What do you like or dislike about pricing formulas?

Copyright 2011 Inspirational Beading and Friends
Images Hosted by Flickr
Subscribe to Inspirational Beading
Get inspired on Facebook

Thursday, September 29, 2011

MyMemories Software Giveaway Winner

The results are in, and Random.org has selected Mandy of Beads for Brains to receive a free copy of the MyMemories digital scrapbooking suite! Even though the software is intended for family photos, just like a traditional scrapbook, there are endless possibilities for creating beautiful jewelry and beading presentations. I can’t wait to see what Mandy can do with the fun layouts and decorations!

I’ve been having a great time playing with papers and embellishments, and finding new ways to present photos and make them look even better than before. The blank layouts provide a great jumping off point, and they can be edited and altered until everything looks right. I tried making a little presentation for A Bracelet a Week with a simple 16-image layout. With some tinkering, I got pages like this one:

A Bracelet a Week Photo Collage


Then I decided to really make use of having multiple images on a single page. Not only is this a great way to show off a design at multiple angles, but there’s room for inspiration photos, color swatches, materials, or even a little jewelry haiku. I started with one of my favorite beads to beadwork designs - the original strawberry blossom pendant. Once I had the right background paper, all I needed were a few extra polka dots in coordinating colors.

Strawberry Blossom Pendant Collage
Source: Strawberry Blossom Photo


I love how easy it is to transfer finished albums into JPEG folders. Once I got going, it was hard to quit! I gathered up some of my favorite bead palette pictures, and did a little seasonal remix with simple layouts and embellishments. Next, I uploaded them into my movie maker and created a brand new color ideas video!


Congratulations to Mandy, and thank you so much to everyone who entered the MyMemories giveaway! If you’d still like to give it a try, Inspirational Beading readers can use coupon code STMMMS31747 for $10 off the MyMemories Suite. It’s such a fun and easy creative tool!

Happy beading, and happy scrapping!

I would like to thank Story Rock Inc. for giving me the opportunity to try out My Memories software. Inspirational Beading has not received compensation for featuring products in this review, however, using the coupon code STMMMS31747 to purchase My Memories Suite v2.0 will earn a commission for Inspirational Beading. I have shared my sincere opinions of this product.

Copyright 2011 Inspirational Beading
Subscribe to Inspirational Beading
Get inspired on Facebook
Wednesday, September 28, 2011

World Beaders: Poland

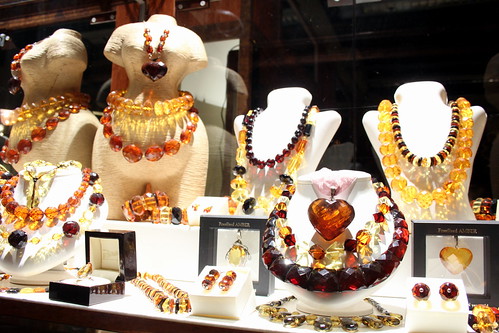
Today I found some amazing bead and jewelry inspirations from Poland - our top visitor country of late. The market stall images are especially delightful, and of course there are lots of beautiful pieces made with Baltic amber. Since it happens to be Wednesday, let's go wordless and let these gorgeous pictures speak for themselves!

Recuerdo de mi paso por Krakow, Polonia.

Amber Jewellery, Krakow

354 Krakow 07 05 28

Poland

Traditional costumes

Poland - Heart of Europe

Karolina

Polish Beads and Jewelry Photo Collage

1. Beads,
2. Beads, 3. Lowicz, Poland, 4. mehe*, 5. Polish Jewelry,
6. Poland Pavilion [Polska], 7. Baltic Amber Blossom,
8. Poland. Krakow, 9. Amber jewellery on sale in Old Town, Gdansk, Poland,
10. Beads, 11. Lubiaz, 12. Beads, 13. krakow poland


Happy beading, Poland!

Copyright 2011 Inspirational Beading
Images hosted by Flickr
Subscribe to Inspirational Beading
Get inspired on Facebook

Monday, September 26, 2011

Tutorials for Christmas Cheer

Beaded Poinsettia Tutorials

Can you believe that September is nearly over already? This month went by so fast, and was filled with lots of new designs, inspirations and videos. Unfortunately, I wasn’t able to create the totally outrageous necklace that I want to donate to the April’s Army fundraising shop. It's still on the drawing board, and I hope it will be ready in time for the next campaign. In the meantime, I thought I’d inspire some beaders to get a head start on their Christmas crafting.

There are six copies of my Beaded Poinsettia tutorial available from April’s Army. The PDF instructions explain how to make cute little Christmas beaded beads, plus variations for four additional flower designs. All proceeds from this month’s shop will help an artist during her battle with cancer. You can learn more about the fundraiser on Regretsy and Facebook.

As always, here are my favorite jewelry and accessory designs, donated by members of the April’s Army Etsy team.


Click on the images to see these great designs, and learn more about the artists behind them.


There are always some fun and fantastic designs to see in the shop, including clothing, home decor items, handmade soap and art prints. I hope you’ll stop by and see them all!

Copyright 2011 Inspirational Beading and Friends
Subscribe to Inspirational Beading
Get inspired on Facebook

Sunday, September 25, 2011

Inspired by Cthulhu

One of the most famous literary characters in fantasy and sci-fi is Cthulhu, a chimeric creature with features of an octopus, dragon and humanoid demon. Created by H. P. Lovecraft, Cthulhu has appeared on some level in many of the author’s works, and inspired many artists in every medium imaginable.

Tentacle Face Cthulhu Treasury

Cthulhu is a classic character of terror - huge, mysterious and omnipotent. Still, fans and followers are often putting a lighthearted spin on this character, with everything from plush toys to quirky kitchen ware. You’ve probably seen at least one Cthulhu inspired design somewhere, because they are just about everywhere.

Untitled


Bride of Cthulhu


An unpronounceable name is almost a prerequisite for any legendary sci-fi and fantasy character. The most common pronunciation for Cthulhu is kuh-THOOL-hoo.

Cthulhu Photo Collage

1. Diablo Tentacle, 2. RUBY CTHULHU, 3. Day 83: Pensive Cthulhu,
4. Cthulhu, 5. Cthulhu, 6. Cthulhu

Are you a fan of Lovecraft’s creature? Who’s your favorite scary but fascinating character?

Copyright 2011 Inspirational Beading and Friends
Subscribe to Inspirational Beading
Get inspired on Facebook
Saturday, September 24, 2011

A Bracelet a Week: Queen Weret

Queen Weret Bracelet

This week I had some fun with something I don’t often use - bold, opaque colors. I usually avoid pairing different colors of opaque beads in a single piece, because I want to avoid that crayon-y, gift shop beadwork look. But with so many new Egyptian and tribal inspirations, I’m challenged to find the right balance of colors, shapes and proportions to make it work.

Opaque royal blue isn’t a new color to me, but I’ve had no desire to use it for years, until I decided to recreate the anklets of Queen Weret. My bracelet is actually a recreation of a recreation. No one will ever know for certain what Queen Weret’s jewelry really looked like. The materials used to string and weave her lovely beads were long gone when her remains were discovered, but Adela Openheim of the Metropolitan Museum of Art was able to reconstruct them with some educated guesswork.

Djed Pillar Bracelets

I particularly like the anklet design from the Queen Weret jewels, with the enameled claw charms in the center, so I used these as inspiration. The palette of the original is blue, red, turquoise and gold. Most of my gold substitute colors are too transparent or flashy to work well with the rest of the palette, so I went with dark beige instead. I like the way it cools off the palette, makes it earthier, and balances the slight luster of the turquoise.

I used the same technique behind my Wavy Wedges bracelet, but without the waves. To mimic the charms, I added some drops and daggers to the center panel. They certainly don’t resemble the glass inlay of the original, but they complete the look all the same.


Copyright 2011 Inspirational Beading
Subscribe to Inspirational Beading
Get inspired on Facebook
Friday, September 23, 2011

Beaded Leaf Tutorials and Projects

No matter what your favorite time of year is, you’ve got to admit that there’s something special about a tree full of orange and yellow leaves. The bold, fiery colors of fall foliage can be relaxing, breathtaking, and even inspire poetry.

Beading and leaves go together very well. Not only are there hundreds of varieties of leaf beads, but we’re always looking for new ways to recreate classic leaf shapes and colors with our favorite techniques. There's simple leaf fringe, and complex sculptural leaves in peyote stitch and St. Petersburg chain.

In honor of the changing colors of autumn, here are some favorite tutorials and projects that feature beautiful leaves.

Beaded Leaf Tutorials

1. Russian-inspired Peyote Stitch Leaves, 2. Russian Leaves and Crossweave Beaded Leaves

3. Crochet Lydia’s Leaves, 4. Polymer Clay New Leaf Beads

Bonus tutorials:

Easy Russian Leaves
Russian Style Peyote Leaves

Leaf Bead Projects

1. As the Leaves Turn Earrings, 2. Vineyard Leaf Filigree Earrings

3. Autumn Leaves Necklace, 4. Leaf Bead Earrings


And, don’t forget the classic Tree of Life, which uses ordinary round or chip beads to imitate leaves. This really fun and easy to follow video tutorial explains exactly how to make a Tree of Life pendant with 4mm round beads.


Do you have a favorite type of leaves or leaf beads?

Copyright 2011 Inspirational Beading and Friends
Subscribe to Inspirational Beading
Get inspired on Facebook

Thursday, September 22, 2011

New Beads: Cowry Shells

Thrifted Cowry Shell Necklace

Ever since I started looking for new Egyptian jewelry inspirations, I’ve been on the hunt for cowry shells. Like many ancient cultures, the Egyptians loved the look and feel of cowries, and considered them to be a feminine symbol and a way to promote fertility. Cowry shapes appear often in Egyptian jewelry designs, so I wanted to get my hands on some and see what they could do.

Unfortunately, I had a hard time finding anything but sawed cowry shells, which are often used in hemp jewelry and other pieces as charms and dangles. I wanted the full effect, especially the smooth shell backs with their pretty, organic designs.

I had almost given up my search for whole, preferably drilled, cowries, when I got lucky. I was out doing some thrifting, and spotted a long, luxurious shell necklace made almost entirely from whole cowries. I didn’t even hesitate to scoop up this treasure, and took it home to disassemble it and see just how lucky I was.

Sure enough, the necklace design relied on the cowries being drilled once, allowing the strings to be fed through the inside of the shell, and out through the spout on the opposite side. Pairs of cowries were then anchored together by a single shell, hiding all of the strings and making a nice, neat necklace.

Blue Cowry Spiral Necklace

All I had to do was come up with a beadweaving design that would make the best use of the cowry shape. Dangles and fringe would likely be askew and not very pretty. I finally decided on spiral rope, which would allow the shells to hug the beadwork, and show off their pretty backs.

Weaving with cowries isn’t the most fun I’ve ever had. Most of the time, I was able to feed Fireline through the tiny, curved spaces by hand. Occasionally, I needed a little help from a twisted wire needle, which is now hopelessly kinked and mangled from the job.

Although I was happy to be able to use up the blue and white bead mixture I accidentally created this summer, and I like the ocean theme, I sort of wish I had gone with an earthier palette. I don’t have quite enough shells left to make another necklace like this, but there are enough for a few bracelets. I’d like to give them another try in a more tribal design.

Copyright 2011 Inspirational Beading
Subscribe to Inspirational Beading
Get inspired on Facebook

Wednesday, September 21, 2011

Digital Scrapbooking for Jewelry Designers

Art Deco Jewelry Collage

Whether your bead and jewelry creations are for business or pleasure, there comes a time when you want to share what you’ve made. Taking great photos is the first step, and once you’ve mastered that, the fun begins. There are so many ways to promote and show off your work both online and in person, from Flickr and Facebook, to graphic business cards.

With digital scrapbooking, you can turn your jewelry and beadwork photographs into beautiful presentations. And the best part is, you don’t need to take a class, or read tons of tutorials to learn how to do it. MyMemories digital scrapbooking software - developed by Polaroid - is incredibly user friendly. If you know how to use the programs that come with most home computers, you’ll be able to navigate MyMemories easily and create professional looking albums for your best work.

The MyMemories Suite comes with everything you might expect to find in a real scrapbooking studio. There are plenty of background “papers”, stickers, and embellishments. You can add ribbons, faux stitching and even graphic staples for an authentic scrapbook look. The studio comes with hundreds of options for decorating your albums, and you can also create your own elements.


Creating Albums with MyMemories Personalizing MyMemories Templates
Here's a basic designer template for traditional scrapbooking.
On the right, you can see some of the export, print and share options.
Just click to add photos, change the text and you're done!
You can also color, move, change or remove any element on your album pages,
to create presentations that are totally unique.


Beginners will love the pre-made designer templates for picture albums. You can choose your theme, and pick from a variety of page styles and layouts. Then all you have to do is click to add the photos that you want from your computer. Every element on an album page is dynamic - you can change sizes and shapes, move objects, switch colors, and add extra elements to every page. Once you get the hang of things, you can create your own album pages completely from scratch.

Nile Theme Custom Photo Collage
I created this custom layout using the built in papers and stickers.
The digital layouts are ideal for professional-looking craft presentations.


I was very excited to have the opportunity to try out MyMemories. As a professional beader, I’m always looking for new and unique ways to show off designs. Once you’ve created an album with MyMemories, you can transfer it to any material that is compatible with your printer. My favorite feature also allows you to create JPEG files of your individual album pages, and with these the possibilities are endless. You can use photos of your designs to make a Facebook landing page, a blog header, a video slideshow, or a professional-looking gallery.

Want to try it out? All Inspirational Beading readers are invited to try the MyMemories Suite at a discount of $10 using coupon code STMMMS31747. You can download the software instantly, and get started on your jewelry albums right away - you might even find some other fun ways to use it! To get an even better idea of how the MyMemories Suite works, and all the things it can do, check out this digital scrapbooking tutorial video by The Pink Toque, or browse through some user creations on the MyMemories Facebook page.

Art Deco Jewelry Cover Page
This layout was made with a designer template.
You can add your own text, or fill the area with
more pictures, embellishments, or color.

For one lucky reader, I also have one free copy of MyMemories to giveaway! I know sometimes beaders and scrapbookers are like oil and water, but I would love to see what a beader could do with all of these fun tools!

How to Enter

Take a look at some of the cool album extras and digital scrapbooking kits at MyMemories, then head back here and leave a comment with the name of your favorite scrapbooking theme, and how you would use it to showcase your designs.

If you do not have a Blogger profile with email contact enabled, please make sure to include a contact link - like your shop or website - with your comment, so I can let you know if you win!

One winner will be drawn at random on Thursday, September 29th. Good luck!

I would like to thank Story Rock Inc. for giving me the opportunity to try out MyMemories software. Inspirational Beading has not received compensation for featuring products in this review, however, using the coupon code STMMMS31747 to purchase MyMemories Suite v2.0 will earn a commission for Inspirational Beading. I have shared my sincere opinions of this product - it’s truly awesome!

Copyright 2011 Inspirational Beading
Story Rock and Polaroid
Subscribe to Inspirational Beading
Get inspired on Facebook

Tuesday, September 20, 2011

Poster Sketch: Pink Padparadscha

Congratulations to Amy of Amybeads, who has won the Faux Crystals bead giveaway! For this draw, I asked what your all time favorite Swarovski color was, and your answers were so varied! Montana sapphire was a popular choice - my personal favorite. I somehow knew that someone would choose padparadscha - it’s a great color with a cool name.

Padparadscha crystals get their name from the orangey-pink variation of sapphires. Both the natural and manmade colors are citrusy and warm - a perfect sunset color.

Pink Grapefruit Treasury


Thanks so much to everyone who entered the draw, and happy beading!

Copyright 2011 Inspirational Beading and Etsy.com
Subscribe to Inspirational Beading
Get inspired on Facebook

Monday, September 19, 2011

Bead Wish List: Freshwater Pearls

Is there anything more lovely than a strand of pearls? Thanks to a little help from science and nature, beaders can enjoy the natural beauty of pearls on almost any budget. Virtually all pearls on the market today are cultured - grown with a little help from humans - but the most varied and abundant are the freshwater pearls. They come in a wide variety of shapes, and are dyed in the most appealing colors.

Did you know that many freshwater pearls come from small, family run rice farms? They provide an extra source of income, as well as lovely beads. Although the mussels used to grow pearls today are selectively bred, and materials must be introduced to start the pearl making process, freshwater pearls are all natural in content.

I recently treated myself to a few strands of freshwater pearls, and they are so pretty, they make me wish I wasn’t such a bead snob. My favorite quality is their weight, as if they are hiding something underneath that shiny surface. If I could buy pearls all the time, I might choose some of these…

Turquoise Green Coin Pearls
From Artbeads.com


Peacock Potato Pearls
From Beads You Need


Peridot Zebra Pearls
Peridot Zebra Top Drilled Pearls
From Auntie’s Beads


Bright Pink Potato Pearls
From House of Beads


Lime Green Leaf Drilled Pearls
Lime Green Leaf Drilled Nuggets
From FusionBeads.com


Metallic Jeweltones Pearls
Metallic Jeweltones Lined Potato Pearls
From Happy Mango Beads


Fuchsia Biwa Pearls
Fuchsia Biwa Shaped Stick Pearls
From Beadaholique


Meadow Nugget Pearls
Meadow Green Nugget Pearls
From SilverSense


Plum Rice Pearls
Plum Purple Rice Pearls
From Lima Beads


Do you have a favorite pearl shape?

Copyright 2011 Inspirational Beading and Friends
Subscribe to Inspirational Beading
Get inspired on Facebook