Pages

Thursday, March 31, 2016

Square Stitch Patchwork Cuff Tutorial

Square Stitch Patchwork Cuff Tutorial

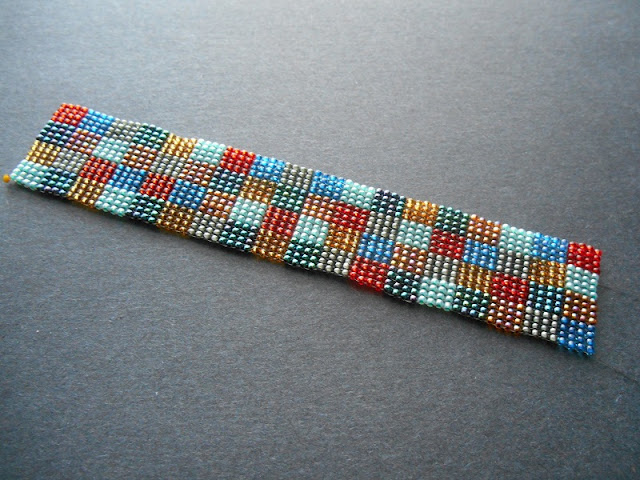
No matter how elaborate beadwork stitches become, or how many holes are added to seed beads, sometimes only simplicity will do. For this month’s project I wanted to do something that was super easy but with a bold look – a project that would be a fun way to play with color but also provide some meditative beadwork.

This square stitch cuff is a great way to practice one of beadweaving’s simplest techniques. Square stitch is very handy if you like the look of loomwork but don’t want to go to all the trouble of setting up a loom and then weaving in your warp threads. Once you've mastered the basics, the pattern possibilities are endless. You can easily create your own unique patterns using graph paper and colored pencils.

To make this cuff you’ll need some size D beading thread of your choice, a clasp or button, and about 30 (total) grams of seed beads in at least 8 colors. I recommend using Japanese round seed beads (preferably of similar make and finish) to get a nice, even bracelet. The boxiness of Japanese rounds is a great match for the patchwork pattern. Have fun choosing your palette. I went with a handful of similar shades in different finishes, but you could also use a chromatic palette with black and white, ROYGBIV +1, or whatever colors you have on hand.

1. Attach a stop bead to a comfortable length of thread, leaving a 12 inch tail. Pick up 4 each of your first 4 seed bead colors (A, B, C, D) and slide them down to the end. Flip the work so that the stop bead is pointing away from you.


2. Pick up 1 color D bead. Stitch down through the last bead added in step one, and carefully pull the thread snug so that the new bead clicks into place beside it. Stitch up through the new bead again and pull snug.


3. Pick up 1 color D bead. Stitch down through the next color D bead in the first row and pull snug to click the new bead into place. Stitch up through the new bead and pull snug.


4. Continue adding one bead at a time with square stitch, matching the color of bead picked up to the bead you will stitch it to in the previous row.


5. To start the next row, flip the beadwork and pick up 1 color A bead. Stitch down through the last bead added in the previous row, and up through the new bead again.


6. Continue adding beads with square stitch until you have 4 rows in the A, B, C, D color pattern, creating a ‘set’ of 4 colored blocks. In the fifth row, add 4 new colors and add 3 more rows to create a second set of blocks in the new colors.


7. Continue weaving with square stitch, adding thread as needed, until the cuff is about 1 cm short of the desired length. To get the random look for my cuff, I staggered the colors after the first 2 sets. In the second set, I used three new colors, and one color from the previous set. I repeated this method for the remaining sets of blocks.

Square Stitch Patchwork Cuff Project


Before starting each set, I selected one bead each from the colors that I wanted to use, and placed them next to the beadwork so that I could map out their placement beforehand. No two blocks of the same color touch at the sides or corners, and I tried to avoid letting similar colors touch at the sides, top, or bottom. For example, topaz never touches red-lined topaz, and metallic blue never touches black-lined blue or metallic green.

8. To finish the cuff with a button or toggle, weave back through the second-to-last row to anchor the thread, then pass through the first 6 beads of the third row.


9. Pick up 5 seed beads to match the block that your thread is exiting. String on your clasp, and add 5 beads to match the next block in the set. Enter the beadwork, passing through the last 6 beads of the row and pull snug. Weave back through the clasp at least once more to add strength, then secure any remaining thread in the beadwork and trim.


10. Remove the stop bead from the original thread and repeat step 9 to position the thread four rows back. Add a loop of seed beads just big enough to wrap around your button or toggle. Use two colors to match the corresponding blocks.


The cuff looks fabulous as is, but there’s plenty of room for embellishing. Try sewing heishi beads to the center of blocks at random or in a pattern. You can also add a trim to the bridge threads at the cuff edges.

How to Weave a Square Stitch Cuff


Happy beading!

Mortira

Subscribe * Facebook * Google+
Send your beading questions to InspirationalBeading@gmail.com
Support Inspirational Beading for bonus tutorials and more!

Copyright 2016 Inspirational Beading

Wednesday, March 30, 2016

Wardrobe Inspiration: Seaside Picnic

Our last Pantone-inspired color trio of the season includes a classic combination of turquoise and coral, plus a little of the blue half of this year’s signature colors. As with the Pantone bead picks, I didn’t find any trios that I liked for Rose Quartz, so the final palette includes Serenity, plus Limpet Shell and Fiesta. Pale blue and intense red are always a great combination for summer, so I was really looking forward to exploring jewelry and garments in these colors.

Seaside Picnic


I started with a very beady cluster necklace in pale, smoky blues that are a pretty close match for Serenity. I wanted to maintain a theme with the other jewelry pieces, with round shapes and lots of chunky elements. I was able to find lovely round earrings in both Fiesta and Limpet Shell, plus a great geometric bangle.

Although I really like this palette, I think I would have preferred it with amber and other warm neutrals in place of either shade of blue. The designs themselves definitely work though, and I was able to find a few tutorials to match. These are my favorites:


My Girlish Whims has a great tutorial for a cluster necklace that would work with almost any of your favorite accent beads. The design has lots of potential for layering and patterns, if you want to go with an ombré look as well.


For a slightly less bead-heavy variation, Panda Hall has a great dangle necklace project using a handful of chunkier accent beads. This would make a great stash buster project.


There are a million and one ways to make medallion earrings. This medallion earring project from Jane Chew and Handmade Jewelry Club uses circular brick stitch to create many lovely layers of color.


There are so many great findings for creating your own cabochon settings. This easy photo bracelet project from by Anna H. on Cut Out and Keep can be adapted with any bezel shape and fillings of your choice.

Happy spring, beaders!

Mortira

Subscribe * Facebook * Google+
Send your beading questions to InspirationalBeading@gmail.com
Support Inspirational Beading for bonus tutorials and more!

Copyright 2016 Inspirational Beading
Tuesday, March 29, 2016

Work in Progress: Quick Stitches

Working multiple projects at once is becoming the norm in my workspace. I seem to be constantly juggling different designs and working on quick projects in between photo days. Right now I’m putting together the project for our next Master Class lesson in circular peyote stitch. From there we’re going to look at a whole bunch of variations on tubular peyote before working our way back to more flat variations like odd count and freeform.

Ankh Pendant and Circular Peyote in Progress


This weekend I didn’t quite have the energy to start a big side project, so I decided to go with something easy that I could make while tuning out to favorite flicks. Since I had just pulled out the packet I’d put together for an ankh pendant, I thought it would be nice to finally use it. The orange glass beads from Blueberry Cove’s Autumn bead box have been great. The finish is really doing all of the work for me.

What are you making right now?

Mortira

Subscribe * Facebook * Google+
Send your beading questions to InspirationalBeading@gmail.com
Support Inspirational Beading for bonus tutorials and more!

Copyright 2016 Inspirational Beading

Saturday, March 26, 2016

The Ultimate Beading Idea Organizer

Staying organized is often a big challenge for any artist, and beaders are no different. Chances are you’ve got at least one – if not twelve – idea notebooks scattered around your home and workspace, perhaps a bulletin board covered with sketches, packets of project materials lined up for future use and collecting dust, or any number of scrambled brainstorming techniques taking up space but not being much use. It’s just what we do.

This weekend I discovered a fabulous new way to organize my life and my ideas in one place, with everything from work, blogging, and beading laid out every week. I got the idea from one of my favorite vloggers, who demonstrates a quick way to make your own custom weekly planner in her Agenda Hacks and Tips video. The stationery geek in me went a little nuts when I watched it, and I started making my own variation right away.

My Ultimate Bead Idea Planner


In my agenda, I’ve created a weekly layout that leaves plenty of room for idea sketches and allows me to make to-do lists that I can carry on from day-to-day. I never know what I’ll have the time or creative energy to accomplish in a day, so a flexible beading schedule is very important. I’ve got a spot for my day-job and appointment schedule, and everything else is dedicated to creativity. I can list my goals for the week, plus must-do lists for 2-3 day stretches. There’s also space for random idea lists, notes, and brainstorming. I’ve only done a few weeks’ worth of layouts at a time, so if I ever want to cut out and paste images from magazines and such, there’ll be space to include them.

Scrap Paper Brainstorming
Goodbye Scrap Paper!


Until now I’ve been using an ordinary pocket agenda to keep track of my timetable, but I was always frustrated that I didn’t really have the space to plan blogs or sketch out jewelry ideas when they suddenly arise. My workspace has also been constantly covered with bits of scrap paper with ideas and half-scratched out to-do lists that eventually get tossed even if I don’t finish them. I’m super excited to start carrying this book around so that I can keep my ideas rolling anytime and anywhere. The best part is that it will take a long, long time to fill up this book; I’ll be able to go back and re-think any unfinished ideas instead of losing them to the scrap paper graveyard.

What's your favorite way to keep track of ideas and projects?

Mortira

Subscribe * Facebook * Google+
Send your beading questions to InspirationalBeading@gmail.com
Support Inspirational Beading for bonus tutorials and more!

Copyright 2016 Inspirational Beading

Thursday, March 24, 2016

Throwback: The Original Bead Trios

So far this month we’ve had three sets of Bead Color Trios, which is definitely a record. Over the years, the concept behind these color experiments has evolved and changed, which means there are so many more options for trying on different beads. When the segment began, I always started with a simple inspiration such as Neapolitan ice cream or the variations on primary colors, then created three different palettes with their own unique themes.

Neapolitan Bead Color Idea: Vanity Saturn Bead Color Idea: Chemistry Set
Neapolitan/Vanity and Saturn/Chemistry Set


As my bead stash was a lot smaller back then, and I was just getting the hang of things, I was only creating one set of trios per month. This gave me a lot more time to play around with the concepts, and I used to arrange the beads into shapes that also represented the themes that went with them. It wasn’t until I was thinking about how far the concept has come that I remembered these little bead scenes.

Blue Tang Bead Color Idea: Splish Splash Beach Palm Bead Color Idea: Sunny Day
Blue Tang/Splish Splash and Beach Palm/Sunny Day


Today Bead Color Trios has so many variations. My favorite is probably the accent bead start, which always gives me new ideas on how to use items in my stash. And I always look forward to mixing and matching Pantone colors in the spring and fall.

Do you have a favorite method for trying out new bead combinations?

Mortira

Subscribe * Facebook * Google+
Send your beading questions to InspirationalBeading@gmail.com
Support Inspirational Beading for bonus tutorials and more!

Copyright 2016 Inspirational Beading
Wednesday, March 23, 2016

Round Bead Inspirations

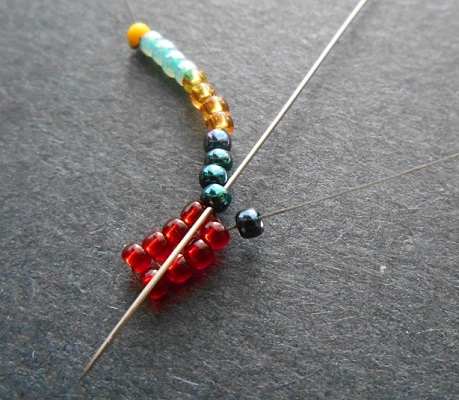
Our latest bead giveaway has come to a close. Congratulations to our winner, Dian, and thank you so much to everyone who entered! For this giveaway we had a great prize pack from Panda Hall featuring lovely acrylic cubes, plus crackle glass and cat eye rounds. These lovely round beads were definitely the favorites – not only are they both gorgeous finishes for glass, but the shape is perfect for a million and one designs and techniques.

Cat Eye Glass Rounds from Panda Hall Crackle Glass Beads from Panda Hall


To celebrate the draw, I gathered up some favorite project ideas using round beads. Whether you string or stitch, there’s nothing better than druks, pearls, and rounds to give a design the perfect amount of pop.


This two-layer bangle bracelet from the learning center at Panda Hall has a unique base of laddered tubes, embellished with round bead nets and picots.


The perfect project for cat eye glass – cat eye earrings! This adorable project from Instructables is perfect for fiber optic glass, but would also be great with druks and glass pearls.


The Lovely Lichen bracelet project from Artbeads.com is a great way to showcase a handful of your favorite rounds. This one would look particularly gorgeous with crackle glass.

See also the Vintage Marble Pendant project and pearl netting tutorials here on Inspirational Beading for more round bead inspirations.

Happy beading!

Mortira

Subscribe * Facebook * Google+
Send your beading questions to InspirationalBeading@gmail.com
Support Inspirational Beading for bonus tutorials and more!

Copyright 2016 Inspirational Beading and Panda Hall

Tuesday, March 22, 2016

Work in Progress: All the Things

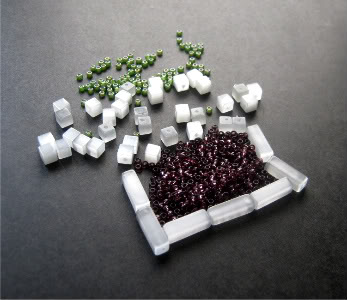
My bead tray looks like an absolute disaster this week as I juggle multiple tutorial projects and a few designs on the side. The new medallion took a back seat over the weekend so that I could get started on some new tutorials while I had time for photography. I decided to go ahead and start a bunch of upcoming projects at once, and now they’re taking over my workspace. I’m so close to finishing one of them that I don’t want to bother putting away all of the beads only to take them all out again. The trouble with tutorials is that I can only work on them so much during nighttime beading. When it’s time to take the next step-by-step photo, everything gets paused.

Square Stitch and Herringbone Tutorials in Progress


Hopefully I’ll be able to finish one of these projects in time to share the instructions with you next week. One is going to be a new PDF tutorial, and there’s a third project that I didn’t include here because it’s a big surprise. After that, it’ll be time to start on the next installment of our peyote stitch Master Class – circular peyote.

What are you making right now?

Mortira

Subscribe * Facebook * Google+
Send your beading questions to InspirationalBeading@gmail.com
Support Inspirational Beading for bonus tutorials and more!

Copyright 2016 Inspirational Beading

Monday, March 21, 2016

Bead Color Ideas: Blue Coconut Redux

For this week’s bead palette ideas, I wanted to try out some seed bead colors to go with accents that have been languishing in my stash. The first thing that came to mind before I even had a good look through my bead trays was about half a strand of blue coconut daggers. I haven’t used these beads since the start of the Egyptian Gods challenge, and I think it’s time to find a new inspiration for them. As I was snapping photographs of the colors that I chose, I started to get the sense of déjà vu. Sure enough, when I looked back at old color ideas, I discovered that I had already tried out some palettes for blue coconut way back in 2012. I think 3 ½ years is plenty of time on the sidelines. I’m determined to use more of these daggers this year.

Banana Boat Bead Color Idea


The first two palettes that I picked out actually got swapped around when I sat down in my photo spot. I had pulled out yellow and green at first, but ended up replacing the green with black to make Banana Boat. The contrast of blue and yellow is always great for a tropical theme, and these dagger beads really want to be tropical. The addition of jet black makes the combo even more dramatic. I could see this trio in a statement necklace, perhaps with Dutch spiral or some really big beaded beads.

Shade Palm Bead Color Idea


I took the rejected lime green and added bone white for the next palette. The pale neutral is a nice counter to the bright blue and green, giving the entire palette a cool feeling. Once again the shape of the coconut gives the trio a tropical vibe that works really well with a fresh green and sandy white. Shade Palm would make a great palette for something netted – perhaps a freeform bracelet or an elaborate lariat.

Golden Urchin Bead Color Idea


For the final palette I wanted to try something really new, and looked for a blue that was a close match for the daggers. Aqua white-hearts were the best for the job, and have the added bonus of looking right at home with the organic coconut shapes. The final color I chose is matte mustard. It’s part neutral and part contrast for the blues, which take on a bit of an underwater look together. Golden Urchin definitely wants to be fringed. I can see this palette as a great pair of earrings or a cascade necklace.

What’s the most hoard-worthy item in your bead stash right now?

Mortira

Subscribe * Facebook * Google+
Send your beading questions to InspirationalBeading@gmail.com
Support Inspirational Beading for bonus tutorials and more!

Copyright 2016 Inspirational Beading
Sunday, March 20, 2016

Four Weird Things People Say to Beaders

If you use Facebook, Pinterest, or Tumblr, there’s a pretty good chance that at some point you’ve seen some variation on the meme “10 Things Not to Say to an Artist”. I’m sure I’ve even seen one specifically for beaders. Anyone who’s been beading or designing jewelry for a while has probably heard at least a few of the unfavorable comments on these lists, though many of them are the types of barbs that only come about when you’re face-to-face with potential clients. The conversation at craft fairs can often turn to debates about price, skill, and even materials.


Source Unknown


While reading one of these memes I started thinking about some of the other not-so-flattering comments that one can sometimes hear not from strangers, but from our family, friends, and acquaintances. Assuming that you’re not hiding your creations away under the floorboards, chances are someone that you know has asked a question or offered an opinion that made you feel less than inspired. Although they don’t always come from a bad place, they can still sting. Just for fun, I’ve listed four of my “favorites”, and some possible interpretations and responses.

1. “I usually hate ___, but I love this.”

There’s something about we humans - at least in Western culture - that makes it nearly impossible to give a true compliment. They’re often a little bit skewed, and it’s almost funny that no one feels weird about paying a compliment that includes the word hate. I think it’s possible that we’re afraid to sound insincere if we’re not a little bit negative, too.

Weird Things People Say to Beaders


This comment can often pop up when a friend is admiring your latest creation. Before telling you they like it, they first have to point out what they don’t like about it. On the other hand, a more favorable interpretation could be “I don’t usually like ___, but you’re so talented that you’ve changed my mind.” That certainly feels better! In fact, you should translate that back to them by saying “That’s because I’m so awesome I can make anything look good.”

2. “I could never make anything like that. I’m just not creative.”

This is probably the most common thing that people say when viewing someone’s handiwork. And it’s definitely the weirdest. Creativity is one of the things that make us human; it just doesn’t always manifest itself in color and crafts. Creativity can be found in almost any activity or skill – from cooking to organizing one’s closet.


Sometimes this comment comes across as “I’m too busy/sophisticated/cool to make art.” But it’s probably more like “I’m being self-deprecating because I’m really intimidated by your amazing talents.” To be honest, I haven’t come up with a great response to this comment yet, even though I’ve had so many chances to practice. If you know the person well, you can always point out something they do that is creative. Otherwise, you’ve just got to own your skills by saying something like “It takes a lot of practice, but I find it very rewarding.”

3. “I should totally buy something from you sometime.”

This one isn’t exactly rude, just kind of annoying - especially after you’ve heard it for the tenth time. The fact is that if someone really does want to pay you for your work, they’ll ask for a price and get their wallet ready. Or they’ll tell you what they want and work out how they’ll pay you for it. Giving you their custom is one of the best compliments that someone can give you, particularly if they don’t try to haggle!

Things Not to Say to Beaders


The most likely translation for this statement is “I don’t like your work that much, but I want to make you feel good about it anyway.” This isn’t really a bad thing – our friends aren’t required to like what we do. A more forgiving interpretation might be “I really want you to know how much I like your designs, but also I know I can’t afford them.” For a really good friend, you can always make a note of the elements they like and make them a variation for their next birthday. Otherwise just smile and say “I do custom work, too. Let me know if you’d like a quote sometime.”

4. “Why don’t you ever make ___?”

A question like this often pops up in the jewelry section of a clothing shop, when a friend or family member catches a glimpse of a colleague’s design in your Facebook feed, or perhaps if you've left a beading magazine lying around with one of those ads featuring award winning pieces on the back. The design is usually way outside of your skillset, or so completely different from what you like to make that it might as well be architecture or championship pumpkin growing.

Weird Things People Say to Jewelry Designers


This comment probably stings the most, because we’re most likely to interpret it as “I like that person’s work way more than yours.” Or perhaps “You’re not very good yet, are you?” Of course this isn’t usually the case. A fellow artist of any medium wouldn’t say this, so the commenter is just not familiar with the techniques and materials involved in either design. Deep down, what they’re really saying is “You’re going to win awards someday, too. Get on it, you awesome beader!”

What’s the best or worst thing anyone’s ever said about your beadwork? How did you respond?

Mortira

Subscribe * Facebook * Google+
Send your beading questions to InspirationalBeading@gmail.com
Support Inspirational Beading for bonus tutorials and more!

Copyright 2016 Inspirational Beading

Saturday, March 19, 2016

Wardrobe Inspiration: Strawberry Soda

Mixing up the Pantone Spring 2016 picks again, I came across another gorgeous trio using Snorkel Blue, Peach Echo, and Iced Coffee. I love the contrast of the blue and pink, and either color would pair off so well with the earthy neutral. Once I had decided on this trio, I couldn’t wait to start looking for jewelry and garments to work with. The colors are fresh and exciting without looking too organic or floral. This is the kind of combination that would be right at home in an ice cream parlor – the perfect place to hang out when spring arrives.

Strawberry Soda


I couldn’t resist going with another multistrand necklace for this collage. The cascade of intense blue beads is totally captivating. Rather than contrast it with chunky accessories like in Spring Crunch, I went with very beady earrings and a wrap bracelet. The cut-out sandals and fringed bag join in with the tiny-scale theme as well.

I love how grown-up and vivacious the pink looks in this trio, while the dark blue just sings. So far this is definitely my favorite color combination of the season. The jewelry designs are also very do-able, and I was able to find lots of great projects to recreate this look.

Ahava Bracelet by Beadaholique


Two multistrand bracelet projects from Beadaholique could easily be adapted to make a gorgeous cascade necklace. The Ahava Bracelet tutorial includes a lovely palette in Snorkel Blue, while the Square Root Bracelet has the cascade look that works so well in our inspiration necklace.


Scale Maille Earrings by Karen  Karon


Mini scale maille earrings are the perfect way to recreate our Iced Coffee dangles, and this tutorial by Karen Karon on Jewelry Making Daily is great for beginners. These would look gorgeous in just about any color.


Teardrop Window Earrings by Rena Klingenberg


The Peach Echo teardrop and bugle earrings would be super easy to recreate. For variation, I found a gorgeous tutorial for extra large teardrop earrings with a wirework frame by Rena Klingenberg at Jewelry Making Journal.


Sonoran Sunset Bracelet by Artbeads.com


There are oodles of tutorials out there for making leather wrap bracelets with crystal cup chain instead of individual beads. I like the Leather Wrapped Cup Chain video by The Potomac Bead Company. To get the same look with another take on the traditional method, try the Sonoran Sunset Bracelet project from Artbeads.com.

What’s your favorite combination for salmon pink?

Mortira

Subscribe * Facebook * Google+
Send your beading questions to InspirationalBeading@gmail.com
Support Inspirational Beading for bonus tutorials and more!

Copyright 2016 Inspirational Beading and Friends