Showing posts with label herringbone. Show all posts

Friday, December 2, 2016

The Lady of the House

Ask anyone who their favorite Egyptian goddess is, and most people would probably say Isis or Hathor. These dieties known for motherhood, healing, love, and protection long outlasted their original culture and continue to be an important part of spirituality and feminity to this day. This is an impressive achievement when you consider that they were competing with hundreds of other gods and goddesses. Throughout 4000 years of Ancient Egyptian culture, many religions, cults, and legends were incorporated into the pantheon and worshipped in the home, alongside the same dieties that we can still see depicted on the walls of ancient tombs. The names and identities of many Egyptian goddesses have been lost to time, but the daughters of Ra, and the children of Nut and Geb continue to thrive in their own way.


My favorite goddess is Nephthys - sister of Isis and wife of Set. Her name means "Lady of the Mansion" and she was the Ancient Egyptian goddess of death. Not to be confused with Anubis, the god of embalming, or other death gods with morbid and shadowy backstories, Nephthys was as much a goddess of healing and protection as her sister. In Ancient Egypt, life, death, and rebirth were all linked; Nephthys represented the realm were all things living and dead are one. This concept can be very comforting, especially when one feels disconnected from their peers or the world around them. We are all made from the same atoms, and Nephthys embodies that notion perfectly.

The Inspiration:

The realm of Nephthys was the place where the fertile waters and silt of the Nile met the harsh and inhospitable desert - a margin between abundant life and bleak death. She was the place were bodies become soil, and soil nourishes bodies in a neverending circle. When I picture Nephthys I always think of a goddess that is poised and regal, while also having a smoldering vitality. She is the combination of solemn death and the never ending resilience of life. She is birth, death, regeneration, and evolution all rolled into one.

In making a new tribute piece to Nephthys, I wanted to incorprate the earthy colors of biomass such as greens, browns, and black. This time I also wanted some rich blue to represent the water that connects all living things. For this project I started by combing through my stash to find pieces that had the right look to represent the lady of death, and tried to picture them together until a design took shape. I also wanted to be sure that the piece would turn out right on the first try, so I decided to go with my favorite fringe. This would allow me to pull lots of different accents together, and add some stripe patterns to keep things looking Egyptian.
Nephthys Beads


The Beads:

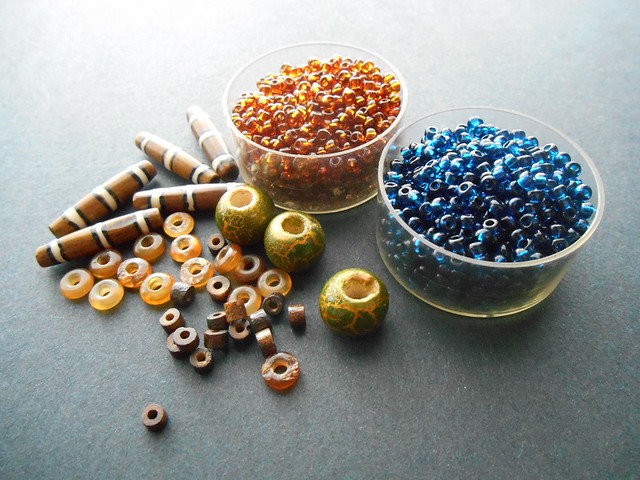
For the base beadwork I chose transparent dark topaz and Montana blue sapphire seed beads in size 8/o. These were my earth and water elements, and they contrast each other with perfect sophistication. I also included some black and white seed beads for borders and stripes, though I hadn't yet decided what type of pattern I wanted to use.

For accents I had so many wonderful choices, but in the end I went with bone tubes, crackle finish wood, amber horn heishi beads, and sono wood tubes. These beads all had the color, texture, and light that I wanted in this piece. I was particlarly exited to use the green wood beads from Blueberry Cove, which so perfectly represented Nephthys' home on the Nile. I was in the mood for even more texture, so I later added batik bone beads in black, jet black druks, and some tiny natural coconut rounds to the mix.
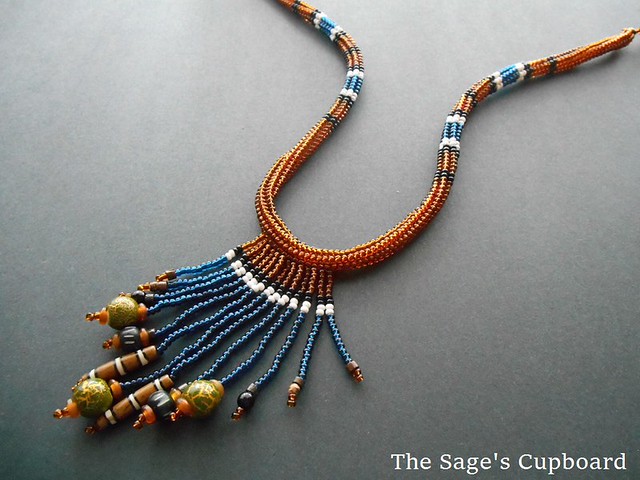
Nephthys Necklace 1


The Beadwork:

Few things are easier than creating something from your favorite inspiration, and this project certainly fits that description. The pattern and the fringe just came together, and the work seemed to go by in a flash.

For the rope, I used black to border the brown sections, and white to border the slightly darker blue portions. To break up the rope a little, I added smaller blocks of brown between each of the striped sections. This is a little bit different from any of the patterns that I've used before, and not exactly traditional, but I love how it turned out. I repeated the pattern somewhat for the fringe, connecting it at the edge with brown, then finishing with a cascade of more Montanta blue sapphire. I really love working with this color in any type of bead, and it never disappoints.
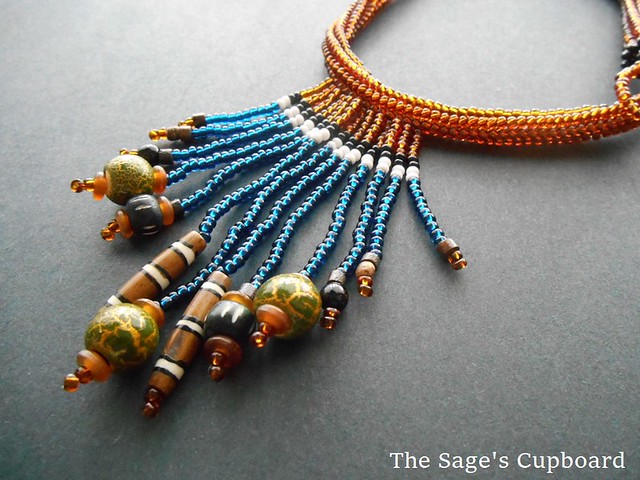
Nephthys Necklace 2


Do you have a favorite figure from mythology? How do they inspire your work?

Mortira

Subscribe * Facebook * Google+
Send your beading questions to InspirationalBeading@gmail.com
Support Inspirational Beading for bonus tutorials and more! Powered by Patreon

Copyright 2016 Inspirational Beading


Wednesday, November 16, 2016

Work in Progress: Progress in Work

I am happy to say that I have found some new inspiration that will keep me going for a good long while. At the very least, I am excited to start making things again, and to share the ideas behind each project as I go. My very first project will return to a favorite place: I'm making a new necklace inspired by my favorite Egyptian goddess, Nephthys. As someone who has long been fascinated by the science of death, I found an instant connection with Nephthys when I first read about her. She embodies the realm where life, death, and rebirth meet in the Ancient Egyptian understanding of the universe. At times she was also considered to be the mother of Anubis, and helped in the creation of the first mummy.

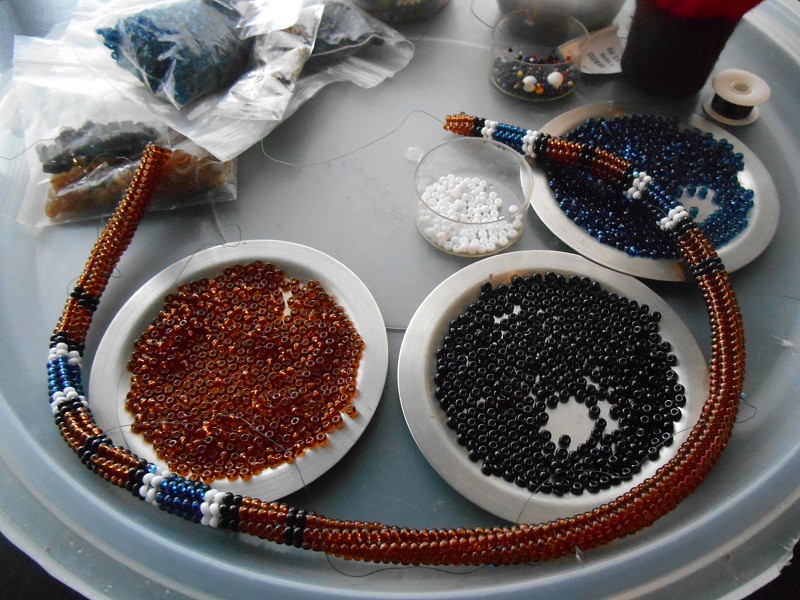
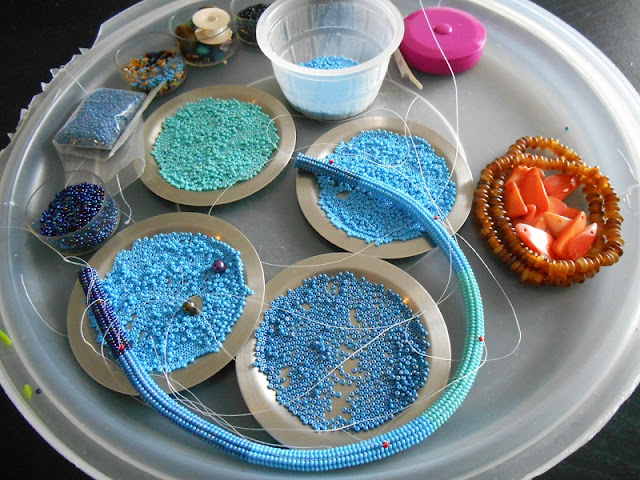
Nephthys Rope Necklace in Progress


I didn't want to risk making a copy of my last Nephthys design, so I decided to shy away from greens for this necklace. Instead I added Montana blue sapphire to my palette for a chunky herringbone rope. When it comes time to add some fringe, I may regret going with a twisted rope, but we'll see how things turn out. I'm finding a lot of comfort in making a tribute to "The Lady of the House", and even if it doesn't quite work out perfectly, it'll be worth it.

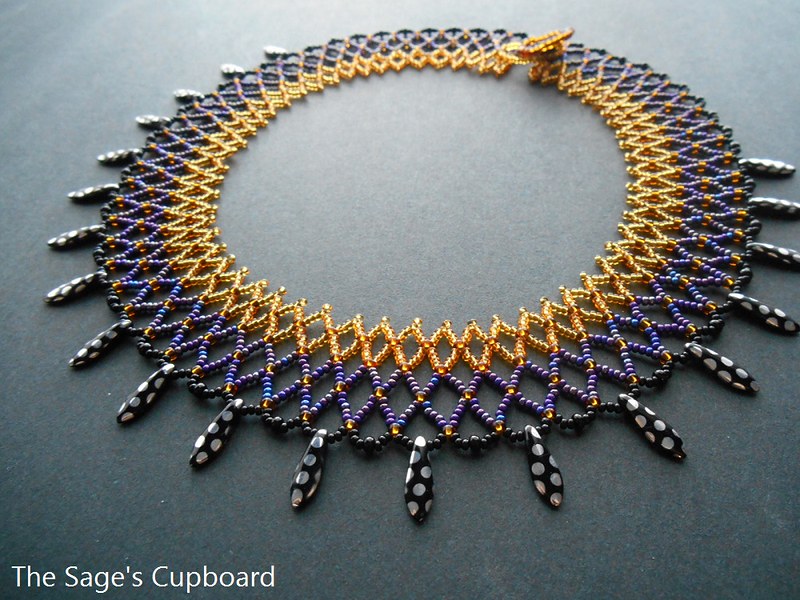
The peacock dagger collar turned out quite nicely. I was so excited to get started on Nephthys that I had to force myself to complete and add the button for this piece. Luckily, it only took one beading session, and I thought it was important to finish at least one project before starting this new adventure.

>Peacock Collar


What inspirations are empowering you at the moment?

Mortira

Subscribe * Facebook * Google+
Send your beading questions to InspirationalBeading@gmail.com
Support Inspirational Beading for bonus tutorials and more! Powered by Patreon
Dear Artists

Copyright 2016 Inspirational Beading


Friday, August 26, 2016

Work in Progress: Nefertiti Stripes

My adventures with stripes and fringe are still going strong, and projects are chugging along at a much better pace. I had thought that I would want to try a new project once the latest necklace was complete, but I was still really in the mood for fringe, and herringbone necklaces are just the most satisfying way to use it right now. For the new necklace, I had a craving to do something a little more Egyptian, so I put together a jeweled palette. I was a little worried at first that the pattern would end up being too busy. I think once the entire piece is complete and the fringe is added it will come together just fine.


The last necklace turned out great. I hadn’t given any thought to accent beads when I chose my palette, and it turns out that the only thing I had in my stash that would match with the opaque colors was African Christmas beads. This is perfectly fine by me! I had fun picking out just the right beads to use and putting on the final touches.


What are you making right now?

Mortira

Subscribe * Facebook * Google+
Send your beading questions to InspirationalBeading@gmail.com
Support Inspirational Beading for bonus tutorials and more! Powered by Patreon

Copyright 2016 Inspirational Beading


Wednesday, July 13, 2016

Work in Progress: Beadwork Potpourri

My tentative steps back into my normal beading routine have begun, and I have actually had some time to sit down with beads over the past couple of days. I decided it was time to just pick a project and go with it, then took some time to decide what I really, really wanted to do. For a while, I plan to just make things that I want to, and avoid anything that feels obligatory (though that doesn’t rule out a tutorial or two!).

Two Necklaces and a Bracelet in Progress


I finally decided to do something with stripes, and to just go ahead and use some of my favorite colors without worrying about quantities. This new project is all about fun. So far I’ve got the beginnings of a nice herringbone rope. I haven’t yet decided if I’m going to add additional colors or just stick with the olive green.

To help keep things interesting, I’m also chipping away at unfinished projects, rather than dedicating all of my time to a single piece. Changing things up a bit may take away from the progression of each project, but I still feel a sense of accomplishment with each new stitch. Although I can’t say that I’m dead excited to sit down, it does feel familiar to be beading again, and there is comfort to be had in that.

Bob Ross Inspired Paintings


Part of my newfound motivation is thanks to finally getting another creative project out of my system. My bead helper and I did some paintings this week that turned out pretty great. We’re planning to do more as soon as we get the chance, and to experiment with techniques and themes. The joy of making something is definitely helping to bring back my need to bead.

What are you working on right now?

Mortira

Subscribe * Facebook * Google+
Send your beading questions to InspirationalBeading@gmail.com
Support Inspirational Beading for bonus tutorials and more! Powered by Patreon

Copyright 2016 Inspirational Beading

Friday, April 22, 2016

Giveaway: Chunky Herringbone Necklace Tutorial

For the past several weeks I’ve been puttering away at a brand new PDF tutorial for one of my favorite herringbone necklace designs. This project is great for showcasing larger accent beads and heavy fringe. I’ve used it to display everything from lampwork beads to beaded flowers, and it is the basis for some of my all time favorite designs. Even after many fun projects using this design, I've only just begun to explore the fun possibilities in dressing up the fringe. It's a great stash-busting project and a fun way to display a variety of beads.

Chunky Herringbone Fringe Rope Necklace Tutorial


The PDF tutorial for the Chunky Herringbone Fringe Necklace is finally complete, and is now available in my shop for instant download. The tutorial project features a striking colorblocked rope and bold wood bead accents. To celebrate the first of many new tutorials this year, I’m giving away one copy to a lucky reader!

How to Enter

To win a free copy of the Chunky Herringbone Fringe Necklace tutorial, simply leave a comment on this post letting us know what kinds of beads you would use in the fringe. I’d love to hear your ideas!

Important: Please make sure to include an email address in your comment so that I can contact you if you win!


One winner will be drawn on Friday, April 29th. This giveaway is open to all international readers.

Good luck, and happy beading!

Update: This draw has closed.

Mortira

Subscribe * Facebook * Google+
Send your beading questions to InspirationalBeading@gmail.com
Support Inspirational Beading for bonus tutorials and more!

Copyright 2016 Inspirational Beading

Wednesday, December 30, 2015

Work in Progress: Chunky Rope

After all of the miscellaneous projects that I had on the go during the last few weeks of Christmas, my bead tray feels sort of empty this week. I’m just finishing up the rope base for a new PDF project, which I started at the beginning of December, and had to shelve for assorted other designs. I'm loving the palette of black, cobalt, and lime - although I've nearly used up all of my opaque cobalt Dyna-mites.

Chunky Herringbone Rope in Progress


I haven’t made much progress on my swatch of ugly right angle weave, but I have a lot of quick projects in mind for the coming weeks, so I’ll probably get a chance to add some rows to it between designs. I’ve found a great new series on Netflix and got a copy of Mad Max: Fury Road for Christmas, so I foresee a lot of nights where I’ll run out of things to do before I’m ready to stop beading for the day.

Bead Embroidered Ocean Pencil Case


The bead embroidery project that I was making for Christmas turned out really great. If I’d had a bit more time, I would have liked to add a sunshine stitch to the flap on the pencil case. Otherwise, I’m really happy with how it turned out. The O-beads turned out to be great embellishments for embroidery – they stitch on easy and don’t take up a lot of space.

What are you making right now?

Mortira

Subscribe * Facebook * Google+
Send your beading questions to InspirationalBeading@gmail.com
Support Inspirational Beading for bonus tutorials and more!

Copyright 2015 Inspirational Beading


Sunday, December 6, 2015

Work in Progress: Earring Experiment

My bead tray is a bit of a mess right now as I jump from one project to the next. I disassembled the components from the diagonal SuperDuo tutorial, but I haven’t yet sorted or put them away. This week I’m working on a few new tutorial prototypes, including a fringed earring design with a little herringbone twist. I’m far too excited about this project to stop and clean up! So far the design is going exactly as planned, so I should be able to get the step by steps soon.

Earring Experiment in Progress


Meanwhile, I’m cooking up some ideas for a new necklace line that I think is going to be really great. It’s been awhile since I’ve added a totally new design to my shop, so I’m looking forward to testing out my idea. I saw a very interesting charm necklace on a fellow shopper the other day, and I think that it can be greatly improved with the right combination of beads. The best part is that if it works, I’ll be able to combine lots of my favorite accents with ease. Can’t wait to try it out!

What are you working on this week?

Mortira

Subscribe * Facebook * Google+
Send your beading questions to InspirationalBeading@gmail.com
Support Inspirational Beading for bonus tutorials and more!

Copyright 2015 Inspirational Beading


Friday, December 4, 2015

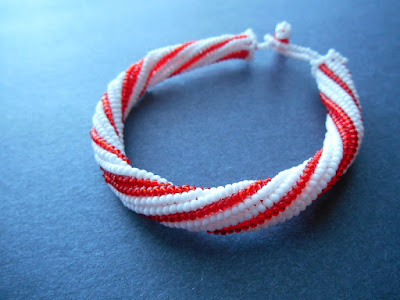
Tutorial: Holiday Candy Cane Bangle Project

Holiday Candy Cane Bangle Tutorial

One of the best things about dressing for the holidays is getting the chance to wear kitschy things like ugly Christmas sweaters and incredibly literal jewelry. Though there’s something sort of wonderful about Christmas light earrings and charm bracelets – especially ones that light up – edible inspirations have to be the best. Luckily for beadweavers, there are a lot of stitches and bead shapes the lend themselves well to food themes, especially for the holidays.

This easy to make bangle puts seed beads and herringbone stitch to good use recreating the look of a tasty candy cane. All you need are size 11 seed beads in opaque white and transparent red or green, plus some thread and a clasp of your choice. Although you can use basic twisted tubular herringbone to make this bangle, we’re going to use a variation that creates an even tighter spiral for the classic candy cane stripe look.

Another advantage of this super twisted stitch is that it makes the rope much sturdier, allowing us to add multiple rows of color without losing the tubular shape when the bracelet is brought into a curve. If you want to add even more stability, you could string your herringbone tube over a core of beads or rubber tubing, and add a clasp with crimps. For added strength, I highly recommend weaving this bracelet with Fireline or another braided beading line.


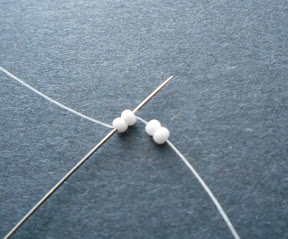
1. On a comfortable length of beading thread, pick up 4 white seed beads. Slide them down to the end, leaving a 10 inch tail. Stitch up through the first 2 seed beads again, and pull snug to form a ladder. Pass down through the second pair of beads.


2. Pick up 2 red seed beads and stitch down through the same 2 white beads again – moving in the same direction as the thread. Pull snug, and stitch up through the 2 red beads. Continue weaving with ladder stitch, adding 2 beads at a time until you have a strip that is 10 beads wide, with the pattern shown.


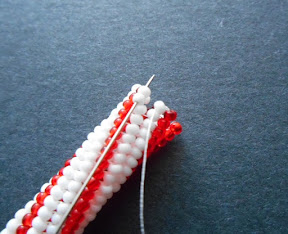
3. Bring the ends of the ladder together and stitch the first and last rows together twice. Exit from the nearest red row at top of the ring, opposite from the tail thread.


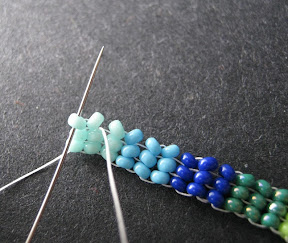
4. Pick up 1 red and 1 white seed bead. Stitch down through the topmost white bead in the ladder below, and pull snug to bring the new beads in place along the ring. Stitch up through the topmost white bead in the next row.


5. Continue adding 2 beads at a time around the ring, matching them to the rows below until you have added 5 pairs total. To step up for the next round, stitch up through the top 2 red beads in the next row and exit from the top of the ring.


6. Repeat step 4 and 5 to add another round of tubular herringbone, but this time, stitch up through 3 beads to step up.


7. Add the first 2 beads of the new round as usual, but stitch up through the top 2 beads of the next row to exit the ring, instead of just one. Continue around the ring, stitch up through 2 beads in each stitch, and stepping up through 3 at the end.

8. Continue weaving with twisted herringbone until your rope is about 1 inch short of the desired length. Be sure to test the fit, as thicker ropes will fit a little bit differently than more flexible bracelets.


9. To close the final stitches and match both end of the beadwork, you’ll need to do a dummy stitch. Work one row of twisted herringbone without picking up any beads, stitching up through 2 beads at a time. Work a second row without any new beads, stitching up through 1 bead in each row. (Look carefully at the beadwork, and follow the natural thread path until all of the beads have the same connections.) Finally, work a round of ladder stitch in the opposite direction, moving 2 beads at a time, to flatten the edge of the rope.


10. Once you’ve woven in all of your tail threads, you can finish your bracelet as desired. My favorite technique is the crown picot finish for herringbone tubes. You could also string the bangle on stretch cord with a focal between the ends for a true bangle look.

Herringbone Candy Cane Bangle Project


Happy holidays!

Mortira

Subscribe * Facebook * Google+
Send your beading questions to InspirationalBeading@gmail.com
Support Inspirational Beading for bonus tutorials and more!

Copyright 2015 Inspirational Beading


Sunday, November 1, 2015

Work in Progress: Some More Blue Rope

I haven’t quite finished the new fringe rope, as I’ve been busy constructing this year’s Hallowe’en costume and taking a bit of time to just recharge. I’ve got lots of full weekends coming up in November, so I’ll be able to get things back on track and get started on all of the ideas swirling around in my brain. I've got something really spectacular planned. Stay tuned!

Blue and Orange Necklace in Progress


The all-blue rope for this new necklace is coming along nicely, although I’ve depleted a lot of the colors already so it’s taking a little extra time to cull them as I go. Even though the strange uniformity of Czech seed beads seems to always lead to these little setbacks, I’m still rather fond of them. I’m thinking I’ll have to start organizing and planning with different types of projects in mind for the beads that are left over after a piece is complete, and I’ve used all the ‘good’ beads in a hank.

I didn’t have a set plan for the fringe on this one when I started, but I’m thinking that I’ll mimic all or part of the ombré pattern in the strands when the time comes. I’m looking forward to seeing it all come together!

What are you making right now?

Copyright 2015 Inspirational Beading
Subscribe to Inspirational Beading
Get inspired on Facebook and Google+


Saturday, October 17, 2015

Work in Progress: Colorblock Contrast

This week I’m working on a new fringe necklace, and I cannot wait to see how it will come out. I wanted to try the new shell pendants in my surprise pack from Blueberry Cove Beads; the shape and color is gorgeous, and the pendants are just the right size for really bold fringe. I pondered a few different palettes, but decided to go with a strong contrast in blue for the rope base.

Orange and Blue Fringe Necklace in Progress


As I was looking over my blue seed bead stash, I realized that I had several different shades of blue in opaque rainbow finish, so I thought it would be fun to combine them in an ombré type pattern. All I have to do now is decide on a color for the fringe strands!

The pendant that I was working on last week turned out kind of amazing. I love how the three chain colors work together, and how they highlight the finish of the ceramic focal. Unfortunately, I was so engrossed in what I was watching as I finished the necklace that I forgot to cap the strands with the second druk. (Thanks a lot, Cracked.com!) I think perhaps I’d better stick to watching movies I’ve already seen while working, just to be safe.

Earthy Ceramic Chain Pendant


On the plus side, I was planning on keeping this piece for myself, so I’m not too worried about it. Nobody’s going to see the missing druk while I wear it!

What are you making right now?

Copyright 2015 Inspirational Beading
Subscribe to Inspirational Beading
Get inspired on Facebook and Google+


Saturday, June 6, 2015

Operation Inspiration: Phase Two

For the past week or so I’ve been picking away at getting back into beading with one of my favorite recharge methods, and I didn’t even have to clean up first!

Once it occurred to me that putting a stopper on the herringbone collar project I was (not) working on would help get me inspired again, I realized that it would be the perfect place to start a new ugly necklace. I took out my box of UfO’s and selected a few choice scraps of beadwork, then opened a few packets of beads that I had been planning to put away last week. I’m going to stitch all of these elements together any which way and use the free-for-all as a way to find my creative groove again.

I had been planning to make another Unfinished Object purge necklace at some point this year, and now is as good a time as any. Beading without any rules - not just freeform but totally without attention to style or form - is so liberating and has never failed to give me a cleansed feeling in the creative sense. It’s also giving me an opportunity to try out some unusual beads that have had me stumped for months.

Herringbone and Coconut Ugly Necklace in Progress


The center drilled coconut daggers have been on my mind a lot lately, but I just couldn’t come up with a good design to use them in. By adding them to this completely crazy necklace, I can use them in ways that I wouldn’t dare to otherwise, and get a feel for what they can and can’t do. I’m also incorporating some assorted leftovers and some really fun beadwork scraps from the past couple of years. I can’t wait to see how this piece turns out!

I’m hoping to have this ugly necklace complete in the next few days, so that I can be ready to work on normal projects again by the time Orange is the New Black hits Netflix. A great series always helps to keep me in my seat and beading away, since I can’t stand to watch movies or shows alone and not have something for my hands to do.

The final phase of Operation Inspiration all depends on my bead budget, but will probably be the most effective overall. Then things will really get rolling again!

How do you like to deal with stale or unfinished projects?

Copyright 2015 Inspirational Beading
Subscribe to Inspirational Beading
Get inspired on Facebook and Google+


Thursday, May 21, 2015

Work in Progress: Sluggish Green Collar

I have been a big neglectful of all my duties these past few weeks, both in beading and in blogging. Before we get around to an update on this week’s progress, let me say thanks for sticking with me so far! Although I had a little surge of ideas and projects, it turns out that I’m still a bit burnt out from making designs for Ancient Worlds, Modern Beads. It would also seem that taking on two projects at once wasn’t the great idea that I thought it would be. After stitching a few inches of the new herringbone collar that I started, I realized the repacking and unpacking of so many different bead types - all of which I need to have out at once - was just too time consuming, and I’ve been plodding along on the collar without picking up any other projects.

Green Herringbone Collar in Progress


The collar is coming along nicely, though I haven’t spent quite as much time on it as I should. I’ve been feeling a bit unmotivated of late, partly because I have no idea what to do with my pieces when they’re finished. Over the past several years, I’ve juggled both an Etsy and an ArtFire store, testing them both out to see which one suits me best. Because Etsy runs on temporary listing fees as well as a 3.5% commission, I decided that it was just too expensive and time consuming to list most of my work there.

Just as I was getting into the process of moving and cultivating an ideal selection for both shops, ArtFire rolled out Google and Amazon ads on all listing pages. Although I’m not necessarily opposed to having third-party ads on pages I’m already paying for, the page design is really terrible, and sellers have no control of the quantity or types of ads that are displayed. The only way to opt out of the ads is to sign up for 3% commission fees - something that I’m not prepared to do for one-of-a-kind pieces that can sometimes be over $100.

ArtFire Page Ads
New ArtFire Page Layout


I'm working more than usual at the day job right now, which is fabulous; but I simply don’t have the time or energy to research and cultivate a shop on a new platform right now, so I’m feeling a little glum when it comes to making new pieces. I’m hoping that giving my workspace a really good tidy and refresh will help me at least get some of the beading bug back so that I can get back to making jewelry just for the joy of it.

What are you making this week? Are there any challenges in your path right now?

Copyright 2015 Inspirational Beading
Subscribe to Inspirational Beading
Get inspired on Facebook and Google+


Saturday, May 2, 2015

Work in Progress: A Rope and a Collar

I’m a little behind on projects this week, as I’ve been catching up on sleep instead of staying up late to bead. It’s a bit of a double setback, as I’ve taken on the rare challenge of working two projects at once. The red bugle cuff that I had started last week was a bust. One of the seed bead colors that I had chosen didn’t work out – I was spending more time culling them than actually getting any beading done. Feeling discouraged, I decided to set aside the project for later and get started on another design that I had been pondering.

Herringbone Rope and Collar Projects in Progress


I got to work on a new fringe necklace that would combine a black and gold striped rope with some striped Java glass and perhaps a few mother of pearl chips. Then I got a sudden craving to make a new all-seed bead herringbone collar. I started with some cactus green 8/o’s and built a nice palette from there. The beadwork hasn’t turned out quite right, so I’m going to need to restart, but I’m hoping to continue with it until the end.

What are you making right now?

Copyright 2015 Inspirational Beading
Subscribe to Inspirational Beading
Get inspired on Facebook and Google+


Wednesday, July 23, 2014

Work in Progress: Egyptian Stripe Cuff

There are lots of new things happening on the bead tray this week, including another totally open and not at all secret project. I’m finishing up my little creative break with a simple herringbone cuff using a classic Egyptian pattern. Then I’ll be moving on to some classified experiments with Ancient Roman glass!

It took a while to find the right color palette for the new cuff. Originally I had wanted to do blue and red with gold, but I didn’t have any transparent red Czech seed beads. Then I thought two different blues would look nice, but the other shades of transparent blue I had are all really small and I didn’t want to go crazy culling them. Finally I decided on blue and green, which actually looks great with the medium topaz.

Egyptian Stripe Cuff Bracelet in Progress


I’ve also got a new pincushion, which I am totally loving. As much as I adored my grim-faced “Don’t Poke Me” pincushion, I really needed to find something that took up less room in my workspace. I don’t have time right now to craft a little bottle cap pincushion, so I borrowed a handmade felt mushroom house from my craft collection. It’s not heavy enough on the bottom and occasionally topples over, but otherwise it works great and makes the bead tray look a lot happier. It’s a nice change of pace.

Egyptian Embroidery Medallions


Last week’s neon medallion is trimmed and ready to string. I was surprised by the last minute addition of aqua to the palette, but it turned out fabulous. I really like to do several sliding knot projects all at once, so I’ll probably wait until we have at least one more finished medallion before finishing these and adding them to the collection.

What are you working on this week?

Copyright 2014 Inspirational Beading
Subscribe to Inspirational Beading
Get inspired on Facebook and Google+


Wednesday, January 29, 2014

Work in Progress: Hippo Rope

I’ve got two projects rolling on the bead tray this week. I’m just putting the finishing touches on a wonderful custom necklace, and in the margins I’ve started work on one of the final Egyptian Gods pieces.

Tawaret the hippopotamus goddess is my latest inspiration, and for her I’m going to try and recreate the Egyptian Sa amulet in necklace size, using 8/o seed beads. I’ve included some lovely dark amethyst in the palette, as it seemed like just the right color for a mama hippo. There’s also cobalt blue, black, and emerald green. I’m a little worried that the green might run out on me before I can get the length that I want, but I can always make this a clasped necklace, rather than the pull-over I was hoping for. I’m keeping careful track of length and beads as I go.

Rope Necklaces in Progress


The new collar design that I was working on last week (and the week before that) turned out great. The scalloped edges came out much better than I expected, and even though it wasn’t what I imagined, I’m really happy with the look. I might even do it again some time. My only regret is not including more lime green - it contrasts so perfectly with the blue daggers.

Thoth the Scribe Collar


What are you working on this week?

Copyright 2014 Inspirational Beading
Subscribe to Inspirational Beading
Get inspired on Facebook and Google+


Tuesday, January 7, 2014

Work in Progress: Moon Cobra Necklace

Things are finally staring to move along in my studio this week. I took a short break from the Egyptian gods to get started on my Ugly Necklace design, then packed it all away to start on a necklace for Tefnut. The goddess of moisture and wife of Shu proved to be a very easy inspiration. She is associated with the moon and cobras, so what better way to represent her than with a blue and white beaded rope?

I haven’t decided on any accents yet. I wanted to jump right in with this piece and just see where it lead me. Rather than work out a snake pattern like for Apep’s necklace, I went with a simple Egyptian stripe design. Once the herringbone rope is complete, I’ll have to comb through my stash to find just the right accents for some fringe.

Egyptian Stripe Rope Necklace in Progress


Shu’s lariat turned out really great. I couldn’t decide which colors to use in the fringe, so I went with a combination of al the neutrals in turn. Although the color block effect isn’t as obvious here, I still love the way things turned out, especially with all that lovely Java glass. Hopefully there will be some good light for photography this week so that I can get caught up on finished designs.

God of Air Fringe Lariat


What are you working on this week?

Copyright 2014 Inspirational Beading
Subscribe to Inspirational Beading
Get inspired on Facebook and Google+


Tuesday, September 17, 2013

Work in Progress: Zebra Cuff

Do you ever feel like no matter how much you get done, there’s never enough time for all that’s left? My schedule this past week has left very little time for beading, so I’m still working on last week’s cuff bracelet. The longer it goes on, the more rushed I feel when I think about the rings I want to make before moving on with the next piece for my Egyptian Gods challenge.

The good news is, I’ve nearly finished the herringbone work, so hopefully I’ll be able to finish most or all of the embellishments by tomorrow. If I can just squeeze in an extra hour or two of dedicated beading time, I can probably get back on schedule without cutting anything out of my to-do list.

Tropical Stripe Cuff in Progress


With several different deadlines looming, and a few too many side projects and everyday duties pulling me in every direction, I’m seriously considering doing an overhaul of my timetable and activities. We recently implemented Kaizen at my day job, and it’s starting to look like a good idea around here as well.

What are your favorite timesaving techniques?

Copyright 2013 Inspirational Beading
Subscribe to Inspirational Beading
Get inspired on Facebook and Google+


Monday, September 2, 2013

Embellished Ombre Herringbone Cuff Tutorial

Embellished Ombre Herringbone Cuff

There’s nothing quite like a beaded cuff to show off the marvel of tiny seed beads. With the right combination of colors and stitches, you can have a bold and beautiful bracelet that fits like fabric. The only thing that can make a beadwork cuff even better is the addition of some choice accent beads.

This project combines the visual appeal of an ombre palette with the added texture and delight of disc bead accents. We’ll also explore an easy way to attach clasps to beadwork that can be applied to a variety of stitches.

Materials:

11/o seed beads in 6 colors
4 or more 6-8 mm disc beads
4 or more flat heishi beads or 8/o seed beads
Beading thread
A button or toggle (beaded or purchased)

To make an ombre herringbone cuff:

Start by arranging your seed bead colors from dark to light, or warm to cool. You can use 6 different shades of one color, or blend from one color to another. Try placing your bead packages in different positions until you get a pattern that is has a pleasing ombre look.

Two Bead Ladder Herringbone Weave Start


I like to start herringbone weave with a two-bead ladder, but you can also start with a single-bead ladder, or use the Ndebele technique. Check out the Twisted Tubular Herringbone Tutorial for full instructions on making a two-bead ladder.

Begin with 3 columns of each color in your chosen pattern, so that you have 18 columns in all. Step up to begin the first row of herringbone weave: stitch up through the bead next to where your thread is exiting, and up through the last bead in the top of the ladder.


Pick up two seed beads - making sure that they match the first and second columns below - and stitch down into the first bead next to where you thread is exiting. Pull snug so that the beads lock into place side-by-side. Stitch up through the next bead in the row below and pull tight.

Continue adding two beads at a time, matching them to the pattern, until you reach the end of the row. Remember to step up through the following base bead at the end of each stitch. You can work in whichever direction is most comfortable for you.

Ombre Herringbone Cuff Tutorial


After adding the final bead pair, pull the thread snug, and then step up to start the next row: Stitch up through the bead next to the one that your thread is exiting, then up through the last bead added in the previous row. Pull tight, and flip the beadwork over.

Flat Herringbone Step Up Technique


Continue adding rows of herringbone weave until the beadwork reaches the desired length, adding new thread as needed. You’ll need to allow a bit of length for the clasp - about half an inch or 1.5 cm. The clasp will overlap, so the final length is adjustable.

Once the final row is added, you can cinch up the beadwork so that both ends match: stitch a dummy row by following the herringbone thread path, but without picking up any beads. Step up through the second column from the end, and stitch up and down the top two rows to connect the remaining columns together. There should now be threads between each of the beads along the edge. Weave in your threads and trim.

Herringbone Dummy Stitch Technique


Add the bracelet clasp:

Secure a new length of thread in the beadwork, near one end. (If desired, add straight fringes to the edge of the beadwork using two or more beads of matching colors.) Exit from the 8th column, and pick up enough seed beads to form a loop that will fit your clasp. Stitch down into the beadwork through the 11th column and pull snug.

Retrace the thread path through the seed bead loop at least once more to strengthen. Continue adding fringes to the edge is desired, then weave in your thread and trim.

Finishing Flat Herringbone Weave How to Add a Seed Bead Clasp


Secure a new length of thread at the opposite end. Test the length of the bracelet, and determine where you would like the second half of your clasp to rest. Count back 3 beads, and exit from one of the center 2 columns at this point.

Pick up 3 matching seed beads, your clasp, and 3 beads to match the corresponding column in the cuff. Stitch into the beadwork, then retrace the thread path at least once more to secure the clasp. Add fringes to this side of the cuff, then weave in your thread and trim.

Adding a Clasp to Herringbone Weave Attaching a Clasp to a Beadwork Cuff


Embellish the cuff:

Arrange your disc beads on the cuff in a pattern you like. Take a picture or make a quick sketch if necessary. You can also add embellishments freeform for an organic look.

Secure a new length of thread near the point where you would like to add the first disc. Make sure that you are working from the same side as your button or toggle, so that the accents will face out! Weave through the beadwork and exit from your start point. Pick up one disc bead, one heishi or 8/o bead, and one seed bead to match the closest row in the cuff.

Embellished Herringbone Cuff Tutorial


Skipping the seed bead, pass through the larger two beads, and through the cuff below. Pull snug, making sure that there is no slack thread in the stack of accent beads. Pass through 2 seed beads from the underside of the beadwork, then two beads in an adjoining row - follow the herringbone thread path.

How to Embellish a Herringbone Cuff


Pass the needle between the beads, being careful not to snag any threads, and pass up through your accents. Stitch through the top seed bead, then back through the accents and into the beadwork again. Continue reinforcing the stitch until the accent beads are secure, then weave through the cuff until you’ve reached the next area where you would like to place a disc

Continue adding your accents, adding thread as needed. Weave in your threads, and you’re done!

There are so many fun color and pattern possibilities for this project. If you make a variation, share it on Facebook - I’d love to see what you come up with!


Copyright 2013 Inspirational Beading
Subscribe to Inspirational Beading
Get inspired on Facebook and Google+


Blog Widget by LinkWithin
Fire Mountain Gems and Beads

Inspiration Topics

accessories amulet Ancient Worlds Modern Beads animals April's Army art ArtFire astrology astronomy autumn awards awareness bangle beach Bead Inspired Bead Shops bead soup bead spotlight bead stash Bead Trays beaded beads beading theory beads belt bezel birthstones black blog spotlight blue boho bone book spotlight bracelet Bracelet A Week branch fringe brick stitch brown bugles buttons cabochon ceramic chain maille challenge charity chevron chain christmas collar Collections color Color Ideas color triads conservation craft shows crafts crochet crystals cuff Culled Beads current events Current Faves daggers Daily Sets daisy chain Delicas Destash drops Dutch spiral earrings Egypt Egyptian Gods embellishing embroidery environment etsy exotic fair trade fantasy fashion Favorite Beads Favorite Techniques feminine fibers film findings fire polish fixtures Flashback Test flickr inspiration flowers food found object free form fringe Geek Jewels geekery gemstones geography giveaway glass gold gray Greece green herringbone hex cuts history holiday home decor insects inspiration tip inspired beader Inspired by... Inspiring Links ivory Jewelry Stash knitting ladder stitch lampwork lariat leaf fringe leather lights literature loomwork macrame magatamas Master Class Medallions metal free metalwork Mini Collar a Week mixed media mixture Mood Board MOP multi-color multi-strand music natural beads nature necklace Necklace a Day Nepal chain netting New Beads ocean ombre orange paint paper patterns pearls pendant peyote photography Picasso finish pink Pinspiration PMC polymer clay poster sketch purple quick inspiration rainbow RAW red resin ring Ring a Day rivoli Rome Russian spiral scarf science seed beads shell silver soutache spiral rope spring square stitch St. Petersburg steampunk stringing stripes summer tagua TBT The Elements thread Tilas Time Capsule tools trade beads triangle weave tribal tropical turquoise tutorial two-hole beads Ugly vintage Wear it Twice weather white winter WIP wire wishlist wood World Beaders yellow
Blog Home * About * Beading Tutorials * Advertise

Learn About Sponsoring Inspirational Beading with Project Wonderful
Affiliated With ShareASale.com and Amazon.com