Wednesday, December 30, 2015
Work in Progress: Chunky Rope
I haven’t made much progress on my swatch of ugly right angle weave, but I have a lot of quick projects in mind for the coming weeks, so I’ll probably get a chance to add some rows to it between designs. I’ve found a great new series on Netflix and got a copy of Mad Max: Fury Road for Christmas, so I foresee a lot of nights where I’ll run out of things to do before I’m ready to stop beading for the day.
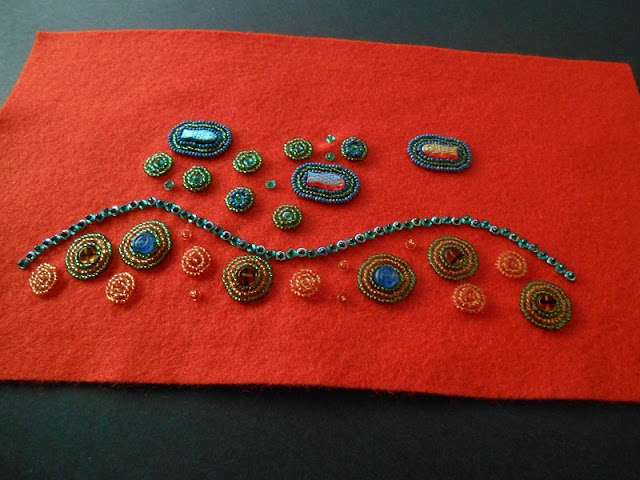
The bead embroidery project that I was making for Christmas turned out really great. If I’d had a bit more time, I would have liked to add a sunshine stitch to the flap on the pencil case. Otherwise, I’m really happy with how it turned out. The O-beads turned out to be great embellishments for embroidery – they stitch on easy and don’t take up a lot of space.
What are you making right now?
Mortira
Subscribe * Facebook * Google+
Send your beading questions to InspirationalBeading@gmail.com
Support Inspirational Beading for bonus tutorials and more!
Copyright 2015 Inspirational Beading
Tweet
Tuesday, December 29, 2015
New Beading in 2016
Two weeks ago we had our final giveaway of the year, with a full suite of beading tutorials going to two lucky readers. Congratulations to our winners Hesther and CA, and thank you so much to everyone who entered. Your comments in this draw have been some of the most inspirating yet! This time I asked for your ideas and requests for new tutorials to feature here on the blog. It was such a pleasure to read all of your comments and learn about the stitches that you’re most interested in. I don’t usually respond to giveaway comments – to keep the draw accurate and fair – but I will definitely try to get back to each of you on this one. Your kind words and encouragement have made my year.
Many of the tutorials requested have already been covered (check out the full list of free beading tutorials for a look at what’s currently available) but I have been thinking about re-doing many of these techniques and updating them for new styles and beads. Peyote stitch, brick stitch, and bead embroidery were among the most popular stitches, and we’ll definitely cover those in both stitch tutorials and full projects in the coming months. I’d like to introduce a new Master Class series that will cover a single stitch from A-Z, with full projects to try whenever possible. Stay tuned for the first series!
I’m also working on some exciting new PDF tutorial projects for 2016, and I’ve made some changes to my current selection. Select projects are now available for commercial use – if you’ve purchased these PDFs as personal use projects in the past you’re automatically upgraded, so you can sell your creations as well! Open license projects include:
The Wavy Wedges Bracelet
The Right Angle Weave Bangle
The Herringbone Fringe Lariat
The RAW Lattice Cuff
The Strawberry Pendant
and Beaded Buttons and Toggles
The upcoming PDF projects will include some of my all-time favorite designs – I’ll keep you posted on new developments! If you have a particular design, stitch, or project that you’d like to see covered in 2016, please don’t hesitate to send me an email. I love to hear your ideas and questions.
Happy New Year!
Mortira
Subscribe * Facebook * Google+
Send your beading questions to InspirationalBeading@gmail.com
Support Inspirational Beading for bonus tutorials and more!
Copyright 2015 Inspirational Beading
Tweet
Wednesday, December 16, 2015
Bead Embroidered Ocean Scene
When I sat down to work on this piece, I had absolutely no idea what it was going to look like, or what kind of design I was going to stitch. Then I spotted some Czech glass fish that I happened to have in my workspace, and an idea started to take shape. I stitched on the fish and added a border of blue and green seed beads. From there, I picked out a few additional accents and then just let my beads decide where to go.
So far I’ve added a wave of O-beads and an assortment of accents like glass nautilus shells. I’ve been working in little patches, going back and forth to different areas and adding whatever looks best. The finished design should be covered with evenly spaced yet totally random embellishments and look like a sparkling underwater scene. I can’t wait to see how it turns out!
Do you use your beading skills for gift giving? What’s your favorite thing to make for others?
Mortira
Subscribe * Facebook * Google+
Send your beading questions to InspirationalBeading@gmail.com
Support Inspirational Beading for bonus tutorials and more!
Copyright 2015 Inspirational Beading
Tweet
Tuesday, December 15, 2015
Very Merry Beading Tutorial Suite Giveaway
Two lucky readers will receive my complete collection of current PDF beading tutorials. Most projects will be open license or ‘commercial use’ meaning that you can use them however you like! I will also be including personal use versions of some tutorials that have been discontinued due to being included in Ancient Worlds Modern Beads. Here’s what each prize pack will include:
Full color and text copies of commercial use tutorials for:
The RAW Bangle
The Herringbone Fringe Lariat
The Beaded Strawberry Pendant/Ornament
The Stacked Peyote Ring
The RAW Lattice Cuff
The Druk Chain Y Necklace
The Wavy Wedges Cuff
The Faux Freeform Peyote Cuff
and last but not least, the Beaded Buttons and Toggles Collection
Each tutorial includes two files - one with full color, step-by-step photos, and one with text-only so you can save on printing if you want to take your instructions with you on the go. Tutorials will be sent to each winner by email, so you can download and save however you like.
Each tutorial suite to be won also includes personal use versions of these tutorials:
The RAW Chain Link Bracelet
The Herringbone Jewel Ring
The Peyote Ring Pendant
The Leafy Poinsettia Beaded Bead
and The Starfish Beaded Bead
How to Enter:
For a chance to win downloadable PDFs for all of the tutorials shown, simply leave a comment on this post letting me know what kinds of techniques and projects you’d like to see featured in free beading tutorials on Inspirational Beading next year!
Please be sure to leave a contact method or email address in your comment so that I can contact you if you win! Comments should be made here on InspirationalBeading.Blogspot.com to qualify. Two winners will be drawn on Sunday December 20th, 2015. Unclaimed prizes will be re-drawn on December 27th. This giveaway is open to all international readers.
Good luck, and happy beading!
Update: This draw has closed. Congratulations to our winners!
Mortira
Subscribe * Facebook * Google+
Send your beading questions to InspirationalBeading@gmail.com
Support Inspirational Beading for bonus tutorials and more!
Copyright 2015 Inspirational Beading
Tweet
Monday, December 14, 2015
Work in Progress: Charm Experiment
For my next attempt, I’m thinking of adding accents directly onto the chain, so that I can use separate bails for the charms but block them from sliding off of the chain. Unless another idea comes along in the meantime. I might not get this idea working until the new year, as I’m now using most of my beading time to work on handmade presents. I’m very excited about the project that I’m making this year, which is going to include some bead embroidery - maybe a little, or maybe a lot! I’ll post some pictures as soon as I can.
What are you making right now?
Mortira
Subscribe * Facebook * Google+
Send your beading questions to InspirationalBeading@gmail.com
Support Inspirational Beading for bonus tutorials and more!
Copyright 2015 Inspirational Beading
Tweet
Saturday, December 12, 2015
Tutorial: Vintage Marble Pendant Project
The mixture of opaque and transparent glass reminded me so much of vintage toys, especially those pictured in search-and-find books like I Spy. I wanted to capture those elements in a necklace, using little more than a handful of colorful druks. For this project you can use any found object or toy-themed focal that you like, such as a drilled die or domino tile. Since I didn’t have a suitable toy pendant, I made my own bead-covered bead with a classic rubber ball pattern.
For the druks I combined the most marble-like colors that I had including: opaque red, white, black, and yellow; transparent brown, purple, green, and blue. You’ll need about 48 druks. For the beadwork I used amber horn rondelles, lustered rootbeer 8/o’s, and transparent medium topaz 11/o’s - all for a golden look to represent old clockwork toys, but any metallic-looking hue will do. Last but not least you’ll need some beading thread and a button of your choice.
1. Attach a stop bead to a comfortable length of thread, leaving a 10 inch tail. Pick up one 11/o, one 8/o, one rondelle, your focal, one rondelle, one 8/o, and, two 11/o. Add one 8/o, one 11/o, one druk, and seven 11/o.
2. Stitch up through the druk bead again, and gently pull snug to wrap the last seven beads around the outside of the druk. Pick up seven 11/o, and stitch up through the druk again to add a second loop of beads around the outside.
3. Pick up one 11/o, one 8/o, one 11/o, and one druk. Repeat step 2, and continue the pattern to add a total of six druks with double loops of seed beads.
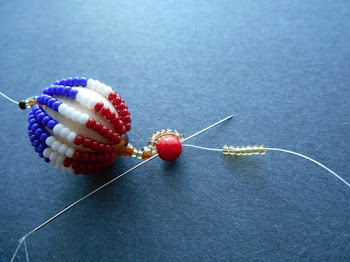
4. Pick up one 11/o, one 8/o, four rondelles, one 8/o, one 11/o, and one druk. Repeat the druk pattern again, adding seed bead loops and rondelles until the strand reaches half of your desired necklace length, less one inch. Be sure to add at least one druk with loops at the end of your strand to make a secure finish, ending with an 8/o seed bead.
5. Pick up enough 11/o seed beads to make a loop for you button. Stitch back down through the last 8/o added, and through the following beads to exit from the bottom of the last druk added. Weave up through one of the seed bead loops and back into the clasp area. Pass through the clasp loop at least once to add strength, then weave any remaining thread into the chain and trim.
6. Remove the stop bead from step one, and pass up through the 8/o, rondelle, and focal bead. Weave the thread into the chain and trim.
7. Attach a stop bead to a new length of thread, leaving a 10 inch tail. Skipping the 11/o, stitch up through the bottom beads and the focal, and exit from the topmost 8/o. Repeat the steps above to add a second chain of druks and rondelles. You can make a mirrored pattern, or go freeform –either way looks great! Attach your button with a few seed beads at the end, then weave in all remain thread and trim.
Though the palette would be a little less gold, you could also make this necklace with stringing wire and crimps for a super fast gift project. A single strand design would also allow for a side-drilled pendant. If you're working with a found object that can't be drilled, you could give it a wire-wrapped a bail.
Do you have a favorite found object theme for jewelry?
Mortira
Subscribe * Facebook * Google+
Send your beading questions to InspirationalBeading@gmail.com
Support Inspirational Beading for bonus tutorials and more!
Copyright 2015 Inspirational Beading
Tweet
Friday, December 11, 2015
Double Winter Bead Palette Ideas
The very first idea that came to mind, even before I decided to go with a mix of palettes, was snowflakes. There are so many gorgeous decorating ideas that begin with a little glitter in white, silver, and maybe a hint of blue. I started this palette with some shimmery white potato pearls, then added a little backup of opaque white and transparent sea blue. Snowflake Glitter would be lovely in a netted design, or perhaps in a multistrand necklace.
Next I had a vision of a cardinal on an evergreen branch, like something from a classic Christmas card. I started with some dyed horn rondelles for the intense, natural red. Some lustered emerald and a touch of transparent dark topaz complete the woodland look. I think Woodsy Wonderland would work really well in something fringy, or as a chunky double spiral necklace.
For a more lighthearted palette, I couldn’t resist using a strand of multicolored Chrsitmas lights for inspiration. This trio started with a mother of pearl chip mix in tropical colors, with a backdrop of jet black and some transparent mint green. I’d use Deck the Halls for a spiral lariat, or perhaps an embellished cuff.
Of course I had to go with something really classic, so for the next palette I turned to holly sprigs. Big, round, gorgeous red white-hearts provided the perfect pop of red and white. I kept the palette simple with a backdrop of transparent emerald and forest green. Jolly Berries would be great as a light collar, or perhaps a lariat with bead cluster fobs.
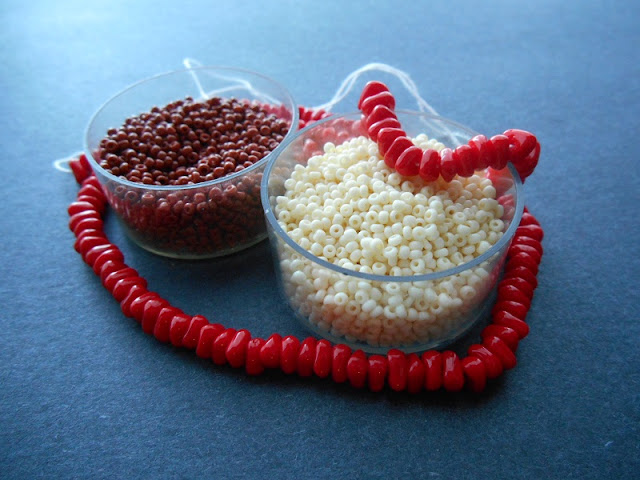
I hadn’t yet used a food-themed palette, so I tried to recreate one of my new favorite holiday treats – peppermint bark. First I grabbed a strand of cherry red triangle beads, and some chocolately terra cotta seed beads. Although opaque white would have looked great in this trio, I decided to go with bone white instead, for a hint of eggnog or perhaps toasted marshmallow. Peppermint Latte could definitely make a wonderful spiral rope bracelet, or a pair of tasseled earrings.
Finally, I simply had to do a palette with a hint of gold. I started with some metallic gold freshwater pearls, which have a nice warm look to them. I added some metallic olivine and dragonfly seed beads, creating the perfect trio for a vintage-style glass globe. Heirloom Ornament would be perfect for any earring style, or maybe a pearl-netted statement necklace.
What winter color combinations do you love? Have you ever used them in a design?
Mortira
Subscribe * Facebook * Google+
Send your beading questions to InspirationalBeading@gmail.com
Support Inspirational Beading for bonus tutorials and more!
Copyright 2015 Inspirational Beading
Tweet
Thursday, December 10, 2015
Holiday Beading and Craft Tutorials
Almost any sewing project can be tweaked with the addition of a few beads!
This easy and adorable ornament project from Bugs and Fishes offers a lot of great design opportunities.
I love the subtle color palette of this Christmas Chainon bracelet from Fusionbeads.com.
The technique uses two-hole SuperDuo beads to create a gorgeous, sparkly bangle. It would look just as good in a darker palette, or in crystal and blue!
Rivolis have been making a comeback this year, with new bezeling techniques and even some ready-made bezel components
creating new design ideas. This Merry and Bright earring project from Artbeads.com could easily be converted to beadwork is you want to use up some of your size 15/o seed beads!
This Holiday Wire Wrap cuff tutorial from Beadaholique looks just like vintage wrapping paper!
The unique structure of the design allows the magatamas to show off their unique shape and still add a little texture.
This easy netted necklace project from FireMountainGems.com and Preciosa is perfect for a snowflake palette!
The pip beads add a playful touch,you’re your favorite drops would work, too.
Need a festive way to use up some leftover accent beads?
This ribbon Christmas tree decoration from BeAFunMum.com is super easy, and it could easily be scaled down
with smaller beads and ribbon. Perhaps even to earring size!
The right palette can turn just about any project into a festive masterpiece,
like this vintage button bracelet from MySoCalledCraftyLife.com.
It would look great with a few crystals and maybe and extra charm or two!
If you love Delica patterns, this project will give you a chance to experiment with lots of colors! No matter what palette you use, this Festive Lights bracelet pattern from Beadaholique is sure to please.
Do you like to make holiday themed jewelry or beading projects? What’s your favorite palette to use?
Mortira
Subscribe * Facebook * Google+
Send your beading questions to InspirationalBeading@gmail.com
Support Inspirational Beading for bonus tutorials and more!
Copyright 2015 Inspirational Beading
Tweet
Tuesday, December 8, 2015
Geek Jewels: Aurra Sing
For my second Geekspiration project, I wanted to see if I could design a piece of jewelry that would go with the bounty hunter’s signature outfit. As I started to work on an overall design and palette, I realized that it would be the perfect way to use my stash of center-drilled coconut chips. A cuff bracelet seemed like the way to go. A chunky design would have that tough, gauntlet-like look ideal for a space-travelling fighter.
I started with a base of transparent rootbeer with a bold blue stripe. I revived the Earth Mother Cuff design from Ancient Worlds Modern Beads, which has a built-in fringe and works up really fast. Over the blue stripe, I layered some of the coconut chips with purple O-beads and a hint of orange.
Although the cuff itself turned out pretty good, I’m not quite sure that I captured the look that I wanted. I wouldn’t call this one a total success, but I had a great time putting it all together.
Do you have a favorite Star Wars character? What kind of accessory would you design for them?
Mortira
Subscribe * Facebook * Google+
Send your beading questions to InspirationalBeading@gmail.com
Support Inspirational Beading for bonus tutorials and more!
Copyright 2015 Inspirational Beading
Tweet
Inspiration Topics
Learn About Sponsoring Inspirational Beading with Project Wonderful
Affiliated With ShareASale.com and Amazon.com