Wednesday, August 31, 2011

DIY Kumihimo Braiding Tutorials

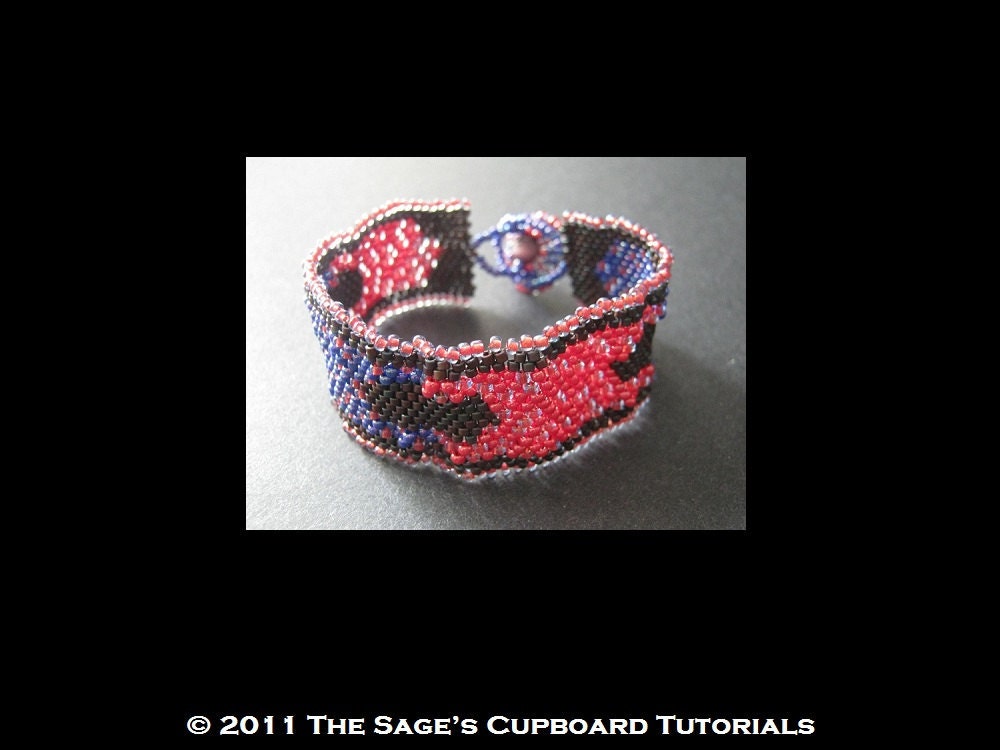
Kumihimo braiding has become an incredibly popular technique for jewelry making, and it has been showing up in some of our favorite magazines, issue after issue. As with other fiber and weaving methods, like crochet, you can use a lot of beads, a few beads, or no beads at all, to make a variety of stunning designs.

The word Kumihimo means “the coming together of threads” in Japanese. The technique of braiding the fibers is done with special round looms, which are a little reminiscent of knitting spools. Different types of threads and cords can be woven together, with our without beads, in a beautiful variety of patterns.

Kumihimo Braiding Jewelry Projects


If you’re interested in trying out this exciting technique, here are a few tips and tutorials to help you get started:

Kumihimo Bracelet Basics

Kumihimo Disk and Bracelet Tutorial

Kumihimo Round Braid Tutorial and Pattern

Flat Braid with Hearts Kumihimo Pattern

Kumihimo Friendship Bracelet

Kumihimo Crystal Bracelet Project

Have you tried Kumihimo braiding before? What do you like about it?

Copyright 2011 Inspirational Beading and Friends
Subscribe to Inspirational Beading
Get inspired on Facebook


Tuesday, August 30, 2011

Beaded Eye Rings

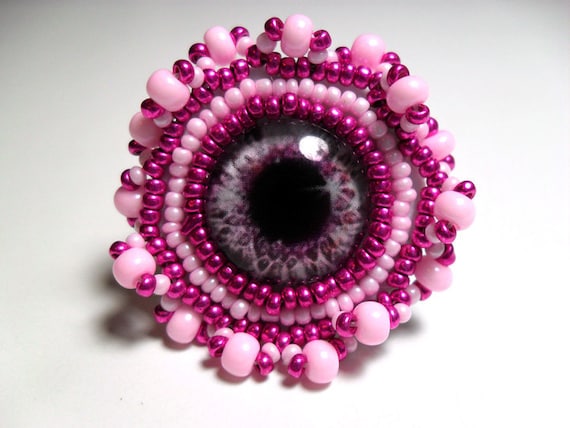
Eye of the Beholder Beaded Ring Set

I’ve grown incredibly fond of making herringbone rings, and I find that other styles just don’t appeal to me as much. Not only are they really simple and fast to make, but they are just so cute and wearable. I’m always looking for new ways to incorporate different patterns and shapes into the design to make each one unique.

Way back during my Ring a Day challenge, I made a herringbone ring with a shell coin as the focal. It turned out so nice, that I’ve made quite a few since, but none of them were quite like the original. The combination of shape and color made it look just like a misty, mysterious eye. Over the past year, I’ve pondered other ways to incorporate an eye design into a herringbone ring.

While experimenting with different Egyptian inspired designs, I came up with the idea of using a tortoiseshell bead and a white herringbone increase to make a more realistic, if not a bit feline, eye ring. And since the theme of this month’s April’s Army fundraiser is ‘beauty’, it seemed like the perfect fit.

I used some eye-shadowy colors for the base of each ring, and created an eye shape with a black lining. I carefully selected tortoiseshell beads that had a central black accent for the iris and pupil, and made some pretty interesting, wearable eyes.

These two rings are available as a set from the April’s Army shop, which opens today. All proceeds from the shop will benefit an artist who needs a hand up.

Here are some of my favorite jewelry designs from the shop:


Click on the images to learn more about the designs and the artists behind them.


And I have to give a shout-out to one of my all-time favorite Etsy sellers, UglyBaby, who is donating for the first time this month.


There are lots of beautiful, weird, and wonderful products on sale until the end of this week. This month, the team is raising money to help an artist go to school and get her dream job! You can learn more about the shop and this month’s recipient on the April's Army Facebook page.

Copyright 2011 Inspirational Beading and Friends
Subscribe to Inspirational Beading
Get inspired on Facebook


Monday, August 29, 2011

Giveaway: Imitation Freeform Peyote Tutorial

Ruffled Peyote Cuff Tutorial

I’ve been hard at work this weekend, putting together the instructions for my ‘safe freeform’ peyote stitch cuff. With a second variation of the bracelet done, I can see so many fun possibilities for the pattern! So far I’ve used a rocky palette, and a bumpy mixed berry palette. I think it would be great for nudibranch inspired cuffs, eye motifs, and even animal prints!

I’m giving away one free copy of my new Faux Freeform Peyote Cuff tutorial to one lucky reader. To enter, simply leave a comment on this post, and answer the following question:

What is your favorite beading stitch to work in freeform?


If you do not have a Blogger profile with your email listed, be sure to include a link or email address so I can get in touch with you if your comment is drawn. This giveaway is open to beaders worldwide!

One winner will be drawn on Sunday, September 4th.

Good luck, and happy beading!

Copyright 2011 Inspirational Beading
Subscribe to Inspirational Beading
Get inspired on Facebook


Sunday, August 28, 2011

Wear It Twice: Fall Feathers

For this month’s fashion collage, I took a little inspiration from Pantone’s Fall 2011 colors. The entire lineup is gorgeous, and would translate beautifully into crystals and freshwater pearls for trendy, colorful jewelry. My palette features teal and purple, with hints of magenta and brown.

Fall 2011 Fashion Color Trends

Early fall is a great time to wear statement jewelry. The days are cool enough for heavier pieces, and warm enough to go without a heavy jacket to cover things up. I started with a breezy teal and gold feather bib necklace, and a set of blue and purple stackable bangles that would easily go from casual to chic.

Fall Feathers


This month’s handmade and vintage picks are also full of feathers and hot colors.

Handmade in Teal, Purple and Gold


Teal September

Here are a few of my favorite Polyvore sets featuring today’s picks:

be classy...


Summer in camp


70's Inspired


Crazy look for print animal


Do you like to make or wear feather jewelry? What’s your favorite style?

Copyright 2011 Inspirational Beading
Collages by Polyvore.com, Etsy.com, ArtFire.com
Subscribe to Inspirational Beading
Get inspired on Facebook


Saturday, August 27, 2011

A Bracelet a Week: Triple Berry

Tripleberry Faux Freeform Bracelet

This week’s bracelet was a fun diversion, and an experiment in color. One of my favorite beaders requested a tutorial for my Rocky Path bracelet, and I was more than happy to oblige. This meant making a new version of the design, and choosing a new color palette.

Because I only have a handful of Delicas to choose from, creating a new set of colors for this bracelet meant working around what I had - burgundy, black, gray or silver-lined red. The burgundy are my favorite, and since I had yet to try them out, I chose them for the base of this new bracelet.

I wanted to make a palette that would work with both the Delicas, and the shape of the beadwork, so I combined red, blue and transparent blue lined with red for a berry colorway. This time around, I stuck with just two bead sizes.

I was really excited to try out this design with a new set of colors, and see how it would come out. I saved a little time by incorporating the edging right into the peyote stitch, and ended up with a pretty interesting bracelet! I really like the way the colors and texture work together.

I only finished the bracelet with enough time to share it with you today, and now it’s on to writing up the steps to create it., along with the brick and square stitch button closure. If all goes well, I’m also hoping to create a beaded clasps compilation PDF, with all of my favorite metal-free closure designs.

Copyright 2011 Inspirational Beading
Subscribe to Inspirational Beading
Get inspired on Facebook


Friday, August 26, 2011

Coordinating Complementary Colors

Walt Disney's Fantasia, The Pastoral Symphony

Do you know where your preferences for color come from? Do you embrace the colors of your past, or avoid them and explore new possibilities?

I started to think differently about color choices recently, when I was confronted with some old memories of the role complementary colors used to play in my artwork and crafts. I had borrowed a copy of Disney’s Fantasia from the library, and hoped that my bead helper would enjoy the movie as much as I did when I was young.

Watching it again, I was momentarily stunned by the memories it gave me of using color. I can clearly remember a running theme with almost anything I made, where I would create copies of the same design, and use different sets of color until all possibilities where exhausted. I kept up this habit until a few years ago, when I was making daisy chain friendship necklaces in all kinds of flower palettes - the classic white and yellow daisy, purple and yellow violets, and yellow and brown for Brown-eyed Susans, among others.

If I didn’t know any better, I would say that Fantasia had a lot to do with this trend, particularly The Pastoral Symphony chapter, or Beethoven’s Symphony No. 6. The mythical story that the creators paired with the symphony has romantic overtones, and throughout the scene, creatures in a variety of colors pair off together.

Walt Disney's Fantasia, The Pegasus Couple


The first example of this complementary color theme is the Pegasus family. The female is a traditional winged horse in white, and her eyes are blue. Her mate is midnight black. The animators could have given him eyes of any color, but they chose red, making him the exact opposite of the female. This use of opposites inspired the concept of pairing: make one bracelet in red and blue, and the next one in green and yellow.

The Centaurs inspired a slightly different way of using color. The combinations of skin, hair and coat colors created a desire to make copies of designs in as many palettes as possible, with only minor variations. A slight change in bead shape or size, while sticking to the same pattern, allows for endless design possibilities with very little risk. I was especially fond of the zebra Centaurs, which provide a great example of how not just color, but style or pattern, can be folded into a basic design for a totally new look.

Walt's Disney's Fantasia - Bacchus and the Centaurs


I’m not sure why these color concepts departed from my design methods. Perhaps it is because I rarely have time to make the same thing twice, and new ideas are always forming. Recalling these old ideas has rekindled that creative spark, and a new lust for color combinations. I may just have to start repeating myself more often, if only to place two identical but complementary pieces side-by-side.

Do you like to make multiple variations on the same basic design?


Copyright 2011 Inspirational Beading and Walt Disney Productions
Subscribe to Inspirational Beading
Get inspired on Facebook


Thursday, August 25, 2011

Bead Wishlist: Swarovski Rhinestones

The word rhinestone technically refers to rock crystals from the river Rhine, though over the years it has become the term for imitation gemstones made from glass, paste or crystal, particularly those with metallic foil backings or metal settings.

Most beaders are familiar with the family of crystal rhinestones by CRYSTALLIZED™ - Swarovski Elements, which come in an amazing variety of shapes and colors. Made from lead crystal and usually backed with foil, Swarovski flatbacks and pointed back rhinestones or rivolis make beautiful additions to beadwork, embroidery and mixed media projects.


Crystal Sahara Cosmic Flatback
from Artbeads.com


Vintage Emerald Swarovski Rhinestones in Brass
from MKSupplies


Light Colorado Topaz Round Flatback
from Auntie's Beads


Aquamarine Classic Baguette
from FusionBeads


Vintage Rose Pointedback Baguettes
from Driving Miss Moppet


Orchid 18mm Rivoli
from Whimbeads


Sterling Silver Plate Flowers
from Too Cute Beads


Vintage Blue Zircon Fancy Stones
from Beading in the Rain


Crystal AB Flatback Rivoli Triangle
from Beadaholique


Vintage Rose Round Rhinstones in Brass
from Katofmanycolors


Which rhinestone shape is your favorite?

Copyright 2011 Inspirational Beading and Friends
Subscribe to Inspirational Beading
Get inspired on Facebook


Wednesday, August 24, 2011

New Beads: Tomb Treasures

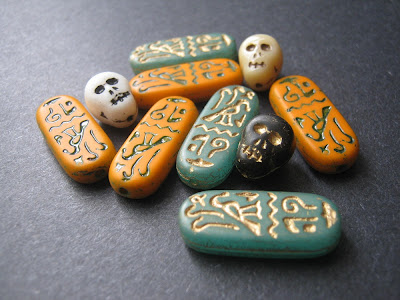
Skull and Egyptian Hieroglyph Czech Glass Beads

I have some very exciting bead finds to share with you today! Over the past few months, my favorites and bookmarks have been filling up with wonderful beads and cabochons with an Egyptian flair. As soon as mail service opened up again, I just had to scoop up two sets of gorgeous hieroglyph tablets from Ms. Bijoux Beads.

These Czech glass beads are made in the classic Egyptian revival style that was popular in the 1920’s, and the colors are fantastic! While I was shopping, I also came across some lovely Czech glass skull beads, and didn’t hesitate to grab them. I searched high and low for some affordable skull beads last fall, and came up short. Everything seemed to be either turquoise, which I don’t use, or ceramic, which is a bit expensive, and also on the fringes of my taboo list.

The very first thing I made when my beads arrived was a Halloween inspired collage pendant. I’ve been experimenting with this necklace style a bit lately - taking a swatch of beadwork and weaving it through with fringe and dangles. This one combines skulls and rustic Christmas beads with black and brown.

Black Magic Collage Pendant


The orange hieroglyph beads created a bit of a challenge. What sort of palette would work well with such a vibrant orange, and have a distinct Egyptian flair? I started with cobalt AB druks, and matching blue seed beads. A dash of light cream and parched desert wood beads rounded things out nicely.

Orange Hieroglyph Pendant


I was really happy with how the orange pendant turned out, and then I got to work on the jade green, and actually surprised myself a little. I love this palette of turquoise, black, topaz and olive so much, I’m very tempted to use it all again in a different design.

Jade Hieroglyph Pendant


I have a bunch more of these little hieroglyph beads, and I can’t wait to explore more possibilities. I’m hoping that they will take a peyote stitch bezel - they’d make great focals for cuff bracelets.

What’s your favorite bead style of late?

Copyright 2011 Inspirational Beading
Subscribe to Inspirational Beading
Get inspired on Facebook


Tuesday, August 23, 2011

A Flicker of Inspiration: Bead Embroidery

I have been craving bead embroidery quite a bit lately. Perhaps it was remembering my earlier Egyptian beadwork, or just longing for something a bit different. Either way, I am looking forward to getting back into it sometime in the near future, though I may have to make it a 2012 resolution. I’m working on finding just the right foundation material. Genuine leather and suede are expensive and difficult to work, ultra suede and acrylic felt are out, because of what they are made of. I’ll just have to keep looking.

In the meantime, I wanted to indulge just a little bit, and I found some gorgeous bead embroidery designs on Flickr. The variety of design styles showcases the versatility of this technique. It’s one of the only beading styles that has no rules, just guidelines. There’s the classic rosette style, freeform, cabochons, and one of my favorites, embellishing patterned fabric.

Bead Embroidery Photo Collage

1. Hannah and the Sunflower,
2. Phoenix Reborn, 3. Closeup of shell, 4. fabric beads, 5. Bead Embroidered Collar,
6. Facing a Wall of Denial, 7. Beaded Cuff Moon Over Stormy Waters3,
8. Beaded Blue Doll, 9. beaded embroidery pendant - aqua & bronze,
10. bead embroidery pendant - girls just wanna have fun, 11. Bead Journal Project July07, 12. Polymer Clay and Seed Bead Embroidery, 13. bead embroidery


Which embroidery style do you like most?

Copyright 2011 Inspirational Beading
Images Hosted by Flickr
Collage by BigHugeLabs.com
Subscribe to Inspirational Beading
Get inspired on Facebook


Monday, August 22, 2011

Bead Color Trios: August Sunsets

Orange Sunset

The last half of August is sort of an ironic time of year. If you adore summer, it might seem unfortunate that it’s so close to ending. On the other hand, some of the most wonderful things about summer are only beginning. The end of August is usually when the fair comes to town, and it’s one of the best times to see gorgeous, vibrant sunsets.

Although fabulously colorful sunsets can happen at any time of the year - the one shown here is actually from January - they are somehow more spectacular in August. Perhaps it’s because we are enjoying good times, or even lamenting the passing of yet another summer, that they seem so poignant. Or maybe it’s just because we happen to be outdoors, with the horizon in view, more often at this time of year.

Either way, the colors of a perfect summer sunset are irresistible - but can we capture them with beads? This month’s bead triads are a combination of purple, pink and orange. These are some of the most ostentatious colors in the spectrum - they are often used as bold hues in exciting ways. The trick with this combination was to find beads that looked nice together, and to create blends with the same moods as sunsets in August.

August Sunsets Palette


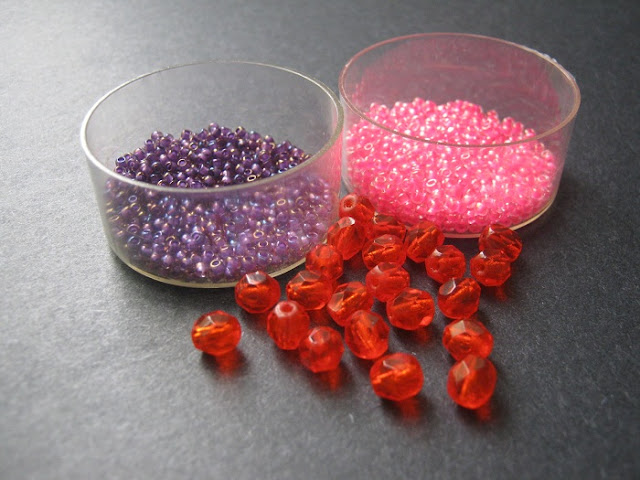
One of the first colors I went for was hyacinth orange. The color is unusual and intense, like the world’s most exotic fruit punch. It’s a strong color, so I paired it with equally bold pink and purple. I call this palette Reflected Fire, because it has the qualities of a sunset seen from the beach. The hyacinth fire polish rounds look dramatic with 11/o seed beads in shocking pink and purple lined Rosaline.

Reflected Fire Bead Palette


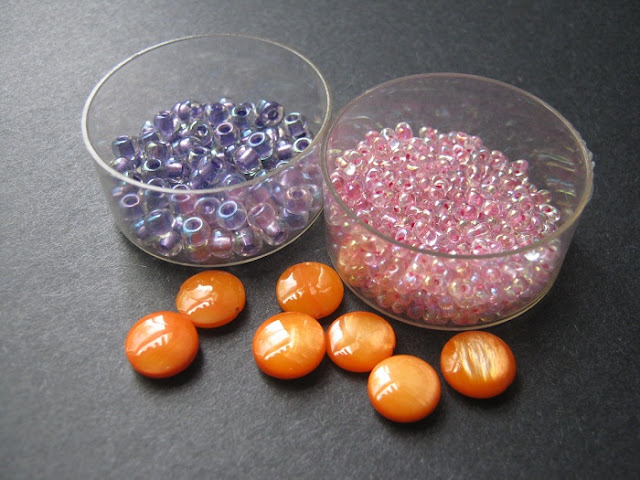
Next I went for some very citrusy orange shell coins, and combined them with pink lined crystal peanuts, and purple lined crystal 6/o seed beads. I love the soft, sweet qualities of the seed beads, and they make a great complement for the zesty orange. This trio reminds me of the Old Fashioned Sweets that one can find in shops at heritage themed amusement parks.

Old Fashioned Sweets Bead Palette


I was so happy with the first combination using hyacinth orange, that I wanted to try using it again, this time with Swarovksi crystal bicones. I added vintage amethyst glass leaves and fuchsia lined 11/o seed beads, and got this:

Holy Hyacinth! Bead Palette


Once I had the beads all set out together, I realized it wasn’t quite right. It’s certainly doable, but there was an opportunity for something even better. I removed the hyacinth crystals and immediately added light tangerine seed beads instead to create Orchard Hammock - a palette that is both fruity and sleepy.

Orchard Hammock Bead Palette


Sunsets come in a great variety of intriguing colors. What combination is your favorite?

Copyright 2011 Inspirational Beading
Subscribe to Inspirational Beading
Get inspired on Facebook


Sunday, August 21, 2011

Book Review: New Dimensions in Bead and Wire

New Dimensions in Bead and Wire Jewelry: Unexpected Combinations, Unique Designs by Margot Potter

Sometimes, when we become very adept at using certain techniques or materials, we get a little carried away with our designs. Huge and elaborate jewelry that takes hours and weeks to complete provides a stunning showpiece, but jewelry should be fun and exciting, too. Every once in awhile, even the most experienced beader should just take it easy and create.

Fortunately, we can get a little instant-gratification inspiration from the queen of quick beading - Margot Potter, the Impatient Crafter. In her latest book, New Dimensions in Bead and Wire Jewelry, Margot shows us how to really appreciate the versatility and design possibilities of the most basic jewelry materials. She says, “I think sometimes it’s easy to relegate wire to a supporting role, but there is so much you can do with it if you cast it as the star.”

New Dimensions in Bead and Wire JewelryNew Dimensions in Bead and Wire Jewelry: Unexpected Combinations, Unique Designsis a workbook for beaders and jewelry designers that carefully guides you through the techniques and elements you need to create stunning, unique jewelry that relies on different types of wire. The book is divided into five chapters: Foundations, Thinking in 3-D, Sculptural Concepts, Architectural Exploration, and The Fifth Dimension. The projects start off easy, giving readers a taste of the techniques used to create with both beading wire and shaping wire. In the final chapter, Margot combines and mixes wires and techniques in stunning jewelry.

Each of the 30 projects includes a full materials list, step-by-step instructions with large, easy to follow photographs, plus design tips and variation ideas. Margot’s charming humor comes through on every page, with cheerful introductions that only enhance the vibrant and whimsical necklaces, rings, bracelets, earrings and even a tiara.

Margot Potter is no bead snob, so if you love beads in all forms, you will enjoy the combinations of metals, glass, crystals, gemstones, plastics, buttons and found objects. If you’re a beader that lives to crimp, the variety of exposed wire projects will be a delight. There are also plenty of designs that use wire jigs, hammering, freeform shaping, and wire weaving - including a delightful netting style bracelet.

I would like to thank North Light Books and F+W Media for giving me the opportunity to preview New Dimensions in Bead and Wire. Inspirational Beading has not received compensation or merchandise in exchange for this review. I have shared my sincere opinions of this book.

Copyright 2011 Inspirational Beading
Margot Potter and F+W Media
Subscribe to Inspirational Beading
Get inspired on Facebook


Saturday, August 20, 2011

A Bracelet a Week: Fake Wrap

Imitation Beaded Wrap Bracelet

A while back, I mentioned in a discussion that I was thinking of making an all-beaded variation of the leather wrap bracelet. After sharing some tutorials and inspirations for wrap bracelets with you last week, I finally got the motivation I needed to try it out.

To mimic the look of beads suspended between leather cords, I turned to what is almost certainly my favorite technique - herringbone weave. By using a very small herringbone base, and adding an increase for 6/o seed beads, the same overall shape of leather wraps appears. My version is a bit chunkier, and the dimensions are a little different, but I think the effect is very similar.

Since this was just a little experimental prototype, I only made a seven inch bracelet. I’m keeping this bracelet for myself, and it is really fun to wear! In the future, I’d like to make some adjustments to the stitch sequence and try to make a new bracelet with a more polished shape. Hopefully, I can do this without adding any additional bead sizes to the center row, but it’s tough to get all those 6/o beads to sit neatly when they are stitched perpendicular to 11/o’s. If I can make it work, I’ll try a double or triple wrap variation.

In the meantime, I’m working on a brand new PDF tutorial along with next week’s design. And the color palette is delicious. See you next Saturday!

Copyright 2011 Inspirational Beading
Subscribe to Inspirational Beading
Get inspired on Facebook


Friday, August 19, 2011

Mastering Peyote Stitch

Peyote Stitch Practice Strips

I was recently rummaging through my sewing box, searching for some rarely used beading component when I stumbled across a hidden treasure - a little baggie filled with all of my first attempts at peyote stitch. I can’t remember why I decided to keep all of these swatches and store them in their own little spot, but I’m certainly glad I did. It was wonderful to look back at that clumsy beadwork, and see how far I’ve come.

When we first learn bead weaving techniques, and they don’t turn out as nice as the designs in the instructions, it can be discouraging. Most stitches are very simple, and it seems as though it should be easy enough to make the beads do what we want. It’s only with practice that we can develop the skill needed to really master a technique. Little things like holding the needle correctly, thread placement and tension can make a huge difference, and the more we work at it, the more natural the process becomes.

Technically speaking, peyote stitch is one of the simplest bead weaving stitches out there. Pick up one, skip one, stitch through one, repeat. It sounds easy, but anyone who has ever attempted it knows that it doesn’t usually come out right the first time. And even when we get the steps down, it still takes practice to get perfectly even peyote stitch.

I’ve covered the basics of flat, even-count peyote before, but today I want to go over some of the tips and tricks that I’ve picked up over the years, which can help beginners learning peyote to go from frustration to triumph.

Choosing Beads

Assorted Seed Bead Sizes and Shapes

Everyone who teaches beading will have a different opinion about which beads are best for learning peyote stitch. Perfectly uniform Delica seed beads are a favorite, and because they are about as long as they are wide, they lock together neatly, and make it easier to weave evenly. Unfortunately, standard sized Delicas are also tiny, and this can make them hard to work with.

Larger beads, like 8/o’s or 4 mm cubes might seem more ideal, because they are easy to see and there’s lots of room to needle through. However, because the bead holes are so large, they leave a lot of room for the thread to move around. If the beads are not ‘gripping’ the thread, this creates tension problems. If you’ve ever had the third row of peyote stitch go twisted and floppy while you’re weaving, you know what I mean.

I actually recommend regular old 11/o Japanese round seed beads for starting out with peyote. The length of seed beads can vary depending on the finish or batch, so those that are a bit longer are ideal. Flatter, bagel shaped seed beads - similar to Czech seed beads - are a little harder to work with, and don’t lock together as nicely for this stitch.


If you have access to them, Miyuki round seed beads are excellent for peyote. Alternatively, 1.5 mm cube beads are just the right size, and their boxy shape makes peyote stitch a little easier. They aren’t always as uniform as round seed beads, so you might need to cull them as you work.

Choosing Threads

There are lots of different beading threads out there, and everyone has their favorites. The one you choose to work with will depend on your own preferences as a beader, and the type of designs you like to make. Threads like Nymo are versatile and inexpensive, and make for very supple beadwork, so it’s no wonder they are a favorite.

If, however, you are trying to learn peyote stitch, and find that keeping the first few rows even is like torture, a switch to braided fishing line might turn things around. Threads like Fireline and Powerpro are stiff and more plastic in nature - they don‘t spring back to their original shape quite as easily. When you weave with them, they take on the shape of the stitch and hold together really well. For peyote stitch, this can make all the difference, especially when working those tricky first rows.

Rainbow Peyote with Assorted 11/o Seed Beads

Mixing Beads

Peyote is one of the best techniques to work freeform, using a variety of bead colors, shapes and sizes. However, if you’re trying to learn the basics of peyote stitch, it’s best to stick with one type of bead, preferably from the same batch. Slight variations in the size and shape of beads can significantly alter the look of peyote stitch. For practice, it’s much more encouraging if you work with the best materials that you can, which will give you better results.

In this rainbow peyote sample, you can see how the slight differences in bead shape and size effect the look of the beadwork. These are all 11/o seed beads, most of them Japanese, many from the same manufacturer.

Practice Makes Perfect

Working the first three rows of peyote stitch is the most difficult. Tension and control over the beads are important to make a strong base for the following rows. If you are already proficient with the concept of peyote - pick up one, skip one, weave through one - the starting rows might be a little easier.

Peyote Stitch with Czech Seed Beads and Round Acrylic Beads

To practice peyote without those first rows, you can work a strip off of another type of beadwork. Any flat stitch with a row of picots on the edge will work as a starter for peyote, as will basic right angle weave. I got most of my peyote stitch practice by adding peyote bails to embroidered medallions with picot edging.

Two-drop peyote can also provide a less stressful way to learn peyote. The doubled beads are easier to work with, especially in the first three rows. You get a strong base that isn’t as prone to twisting and curling, so you can move on to practicing tension and find your own peyote stitch groove.

Are you a master at peyote stitch? What helped you to learn this classic beading technique?

Copyright 2011 Inspirational Beading
Subscribe to Inspirational Beading
Get inspired on Facebook


Blog Widget by LinkWithin
Fire Mountain Gems and Beads

Inspiration Topics

accessories amulet Ancient Worlds Modern Beads animals April's Army art ArtFire astrology astronomy autumn awards awareness bangle beach Bead Inspired Bead Shops bead soup bead spotlight bead stash Bead Trays beaded beads beading theory beads belt bezel birthstones black blog spotlight blue boho bone book spotlight bracelet Bracelet A Week branch fringe brick stitch brown bugles buttons cabochon ceramic chain maille challenge charity chevron chain christmas collar Collections color Color Ideas color triads conservation craft shows crafts crochet crystals cuff Culled Beads current events Current Faves daggers Daily Sets daisy chain Delicas Destash drops Dutch spiral earrings Egypt Egyptian Gods embellishing embroidery environment etsy exotic fair trade fantasy fashion Favorite Beads Favorite Techniques feminine fibers film findings fire polish fixtures Flashback Test flickr inspiration flowers food found object free form fringe Geek Jewels geekery gemstones geography giveaway glass gold gray Greece green herringbone hex cuts history holiday home decor insects inspiration tip inspired beader Inspired by... Inspiring Links ivory Jewelry Stash knitting ladder stitch lampwork lariat leaf fringe leather lights literature loomwork macrame magatamas Master Class Medallions metal free metalwork Mini Collar a Week mixed media mixture Mood Board MOP multi-color multi-strand music natural beads nature necklace Necklace a Day Nepal chain netting New Beads ocean ombre orange paint paper patterns pearls pendant peyote photography Picasso finish pink Pinspiration PMC polymer clay poster sketch purple quick inspiration rainbow RAW red resin ring Ring a Day rivoli Rome Russian spiral scarf science seed beads shell silver soutache spiral rope spring square stitch St. Petersburg steampunk stringing stripes summer tagua TBT The Elements thread Tilas Time Capsule tools trade beads triangle weave tribal tropical turquoise tutorial two-hole beads Ugly vintage Wear it Twice weather white winter WIP wire wishlist wood World Beaders yellow
Blog Home * About * Beading Tutorials * Advertise

Learn About Sponsoring Inspirational Beading with Project Wonderful
Affiliated With ShareASale.com and Amazon.com